ARMS | PROCEDURE 4 | |
|
|
|
3.Perform one (1) of the following:
Small Side Guards - Movethebottomclampupone
(1)of two (2) mounting posi- tions in the side guard.
Large Side Guards - Movethebottomclampupone
(1) of three (3) mounting posi- tions in the side guard.
4.
5.Install the ![]()
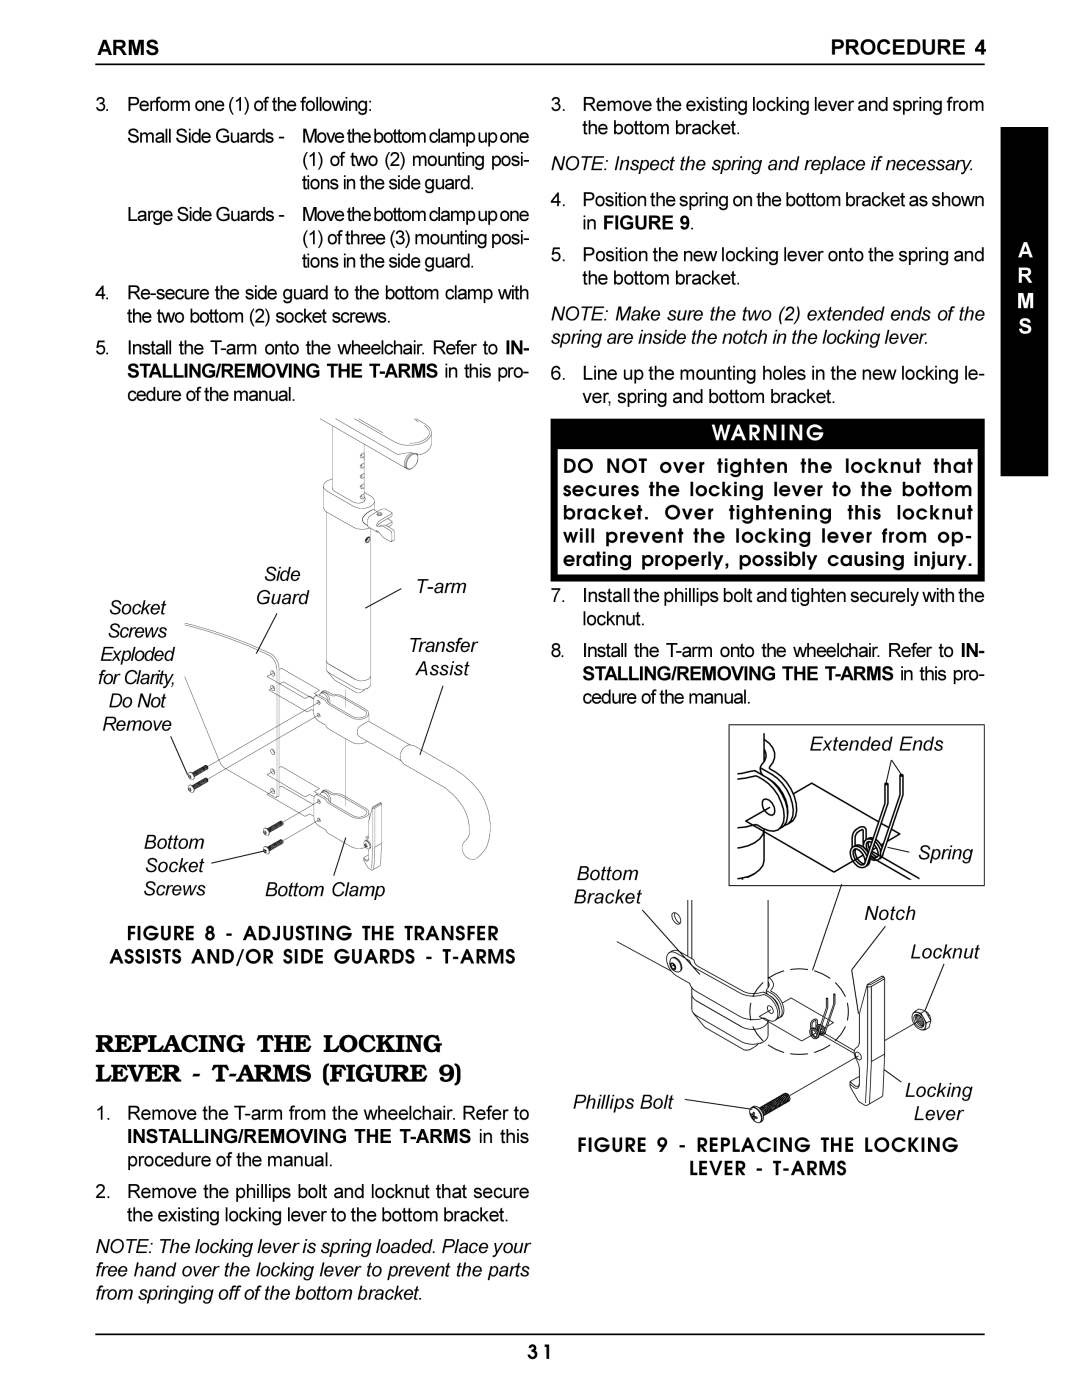
| Side | ||
Socket | Guard | ||
| |||
|
| ||
Screws |
| Transfer | |
Exploded |
| ||
| Assist | ||
for Clarity, |
| ||
|
| ||
Do Not |
|
| |
Remove |
|
|
3.Remove the existing locking lever and spring from the bottom bracket.
NOTE: Inspect the spring and replace if necessary.
4.Position the spring on the bottom bracket as shown in FIGURE 9.
5.Position the new locking lever onto the spring and the bottom bracket.
NOTE: Make sure the two (2) extended ends of the spring are inside the notch in the locking lever.
6.Line up the mounting holes in the new locking le- ver, spring and bottom bracket.
WARNING
DO NOT over tighten the locknut that secures the locking lever to the bottom bracket. Over tightening this locknut will prevent the locking lever from op- erating properly, possibly causing injury.
7.Install the phillips bolt and tighten securely with the locknut.
8.Install the
A R M S
Bottom |
|
Socket |
|
Screws | Bottom Clamp |
FIGURE 8 - ADJUSTING THE TRANSFER ASSISTS AND/OR SIDE GUARDS - T-ARMS
REPLACING THE LOCKING LEVER - T-ARMS (FIGURE 9)
1. Remove the |
INSTALLING/REMOVING THE |
Bottom
Bracket
Phillips Bolt
Extended Ends
![]()
![]() Spring
Spring
Notch
Locknut
Locking
Lever
procedure of the manual. |
2. Remove the phillips bolt and locknut that secure |
the existing locking lever to the bottom bracket. |
NOTE: The locking lever is spring loaded. Place your free hand over the locking lever to prevent the parts from springing off of the bottom bracket.
FIGURE 9 - REPLACING THE LOCKING
LEVER - T-ARMS
3 1