PROCEDURE 4 | ARMS | |
|
|
|
A R M S
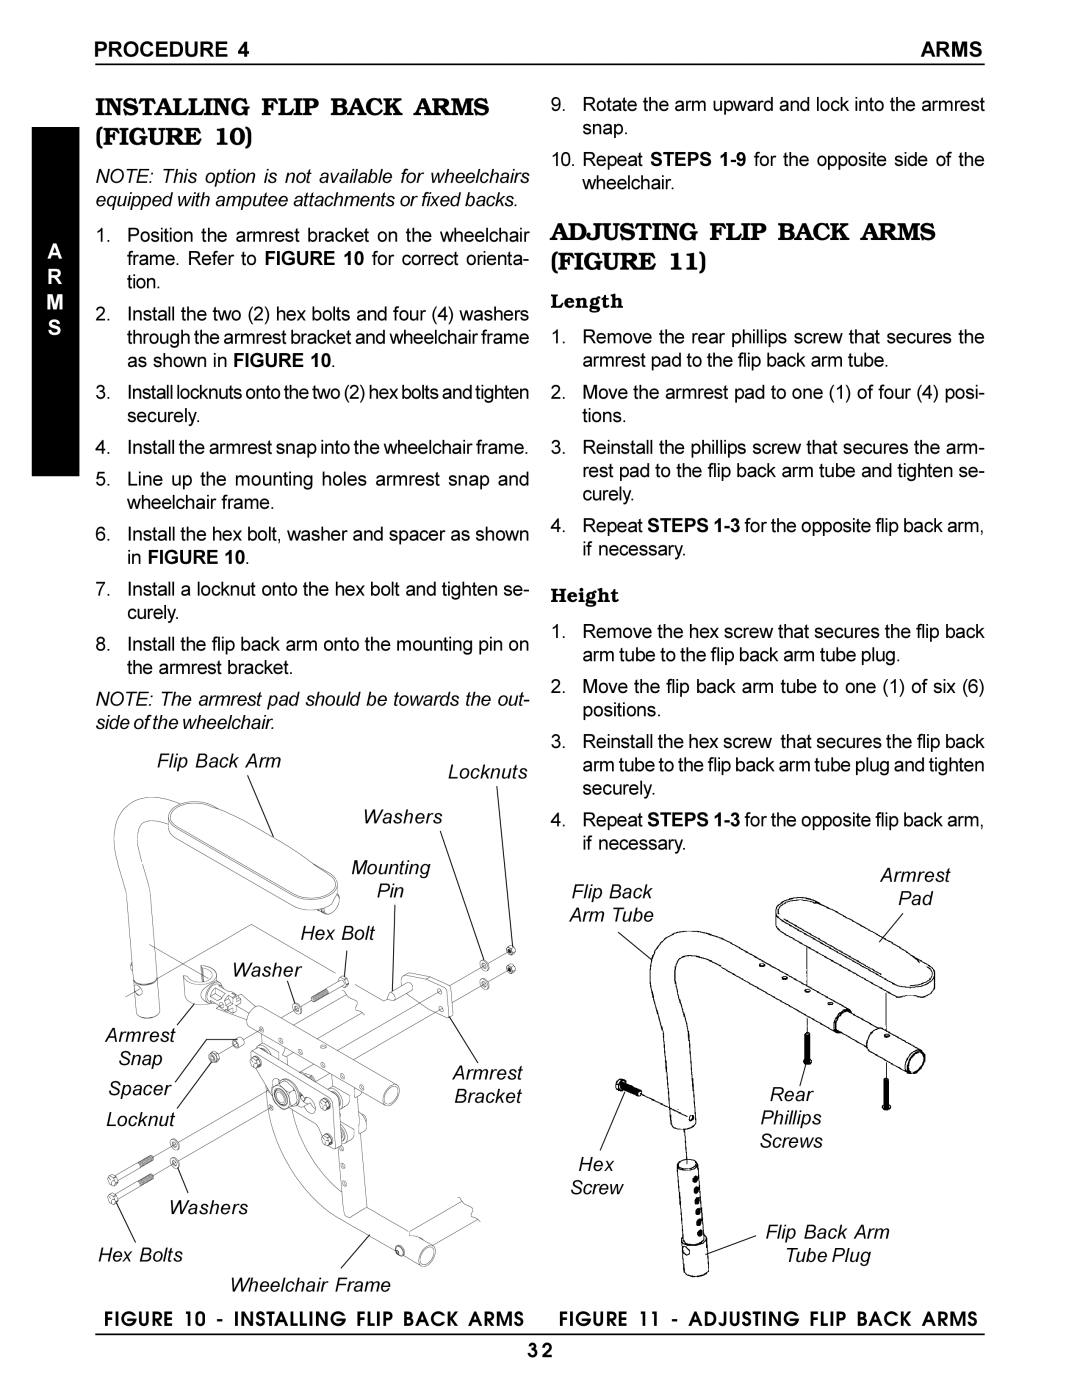
INSTALLING FLIP BACK ARMS (FIGURE 10)
NOTE: This option is not available for wheelchairs equipped with amputee attachments or fixed backs.
1.Position the armrest bracket on the wheelchair frame. Refer to FIGURE 10 for correct orienta- tion.
2.Install the two (2) hex bolts and four (4) washers through the armrest bracket and wheelchair frame as shown in FIGURE 10.
3.Install locknuts onto the two (2) hex bolts and tighten securely.
4.Install the armrest snap into the wheelchair frame.
5.Line up the mounting holes armrest snap and wheelchair frame.
6.Install the hex bolt, washer and spacer as shown in FIGURE 10.
7.Install a locknut onto the hex bolt and tighten se- curely.
8.Install the flip back arm onto the mounting pin on the armrest bracket.
NOTE: The armrest pad should be towards the out- side of the wheelchair.
Flip Back Arm | Locknuts | |
| ||
| Washers | |
| Mounting | |
| Pin | |
| Hex Bolt | |
Washer |
| |
Armrest |
| |
Snap | Armrest | |
Spacer | ||
Bracket | ||
| ||
Locknut |
|
Washers
Hex Bolts
Wheelchair Frame
FIGURE 10 - INSTALLING FLIP BACK ARMS
9.Rotate the arm upward and lock into the armrest snap.
10.Repeat STEPS
ADJUSTING FLIP BACK ARMS (FIGURE 11)
Length
1.Remove the rear phillips screw that secures the armrest pad to the flip back arm tube.
2.Move the armrest pad to one (1) of four (4) posi- tions.
3.Reinstall the phillips screw that secures the arm- rest pad to the flip back arm tube and tighten se- curely.
4.Repeat STEPS
Height
1.Remove the hex screw that secures the flip back arm tube to the flip back arm tube plug.
2.Move the flip back arm tube to one (1) of six (6) positions.
3.Reinstall the hex screw that secures the flip back arm tube to the flip back arm tube plug and tighten securely.
4.Repeat STEPS
Armrest
Flip BackPad
Arm Tube
Rear
Phillips
Screws
Hex
Screw
Flip Back Arm
Tube Plug
FIGURE 11 - ADJUSTING FLIP BACK ARMS
3 2