REAR WHEELS | SECTION 6 | |
|
|
|
Section 6 - Rear Wheels includes the following:
Removing/Installing the Rear Wheels
Adjusting the
Replacing Rear Wheel Handrim
Replacing/Repairing Rear Wheel Tire/Tube
WARNING
After ANY adjustments, repair or service and BEFORE use, make sure all attaching hardware is tightened securely - otherwise injury or damage may occur.
REMOVING/INSTALLING THE REAR WHEELS
NOTE: This procedure applies to
WARNING
If changing the size of the rear wheel or a change in the
Make sure both rear wheels are the same size and are installed into the same respective mounting hole BEFORE using the wheelchair, otherwise injury may occur.
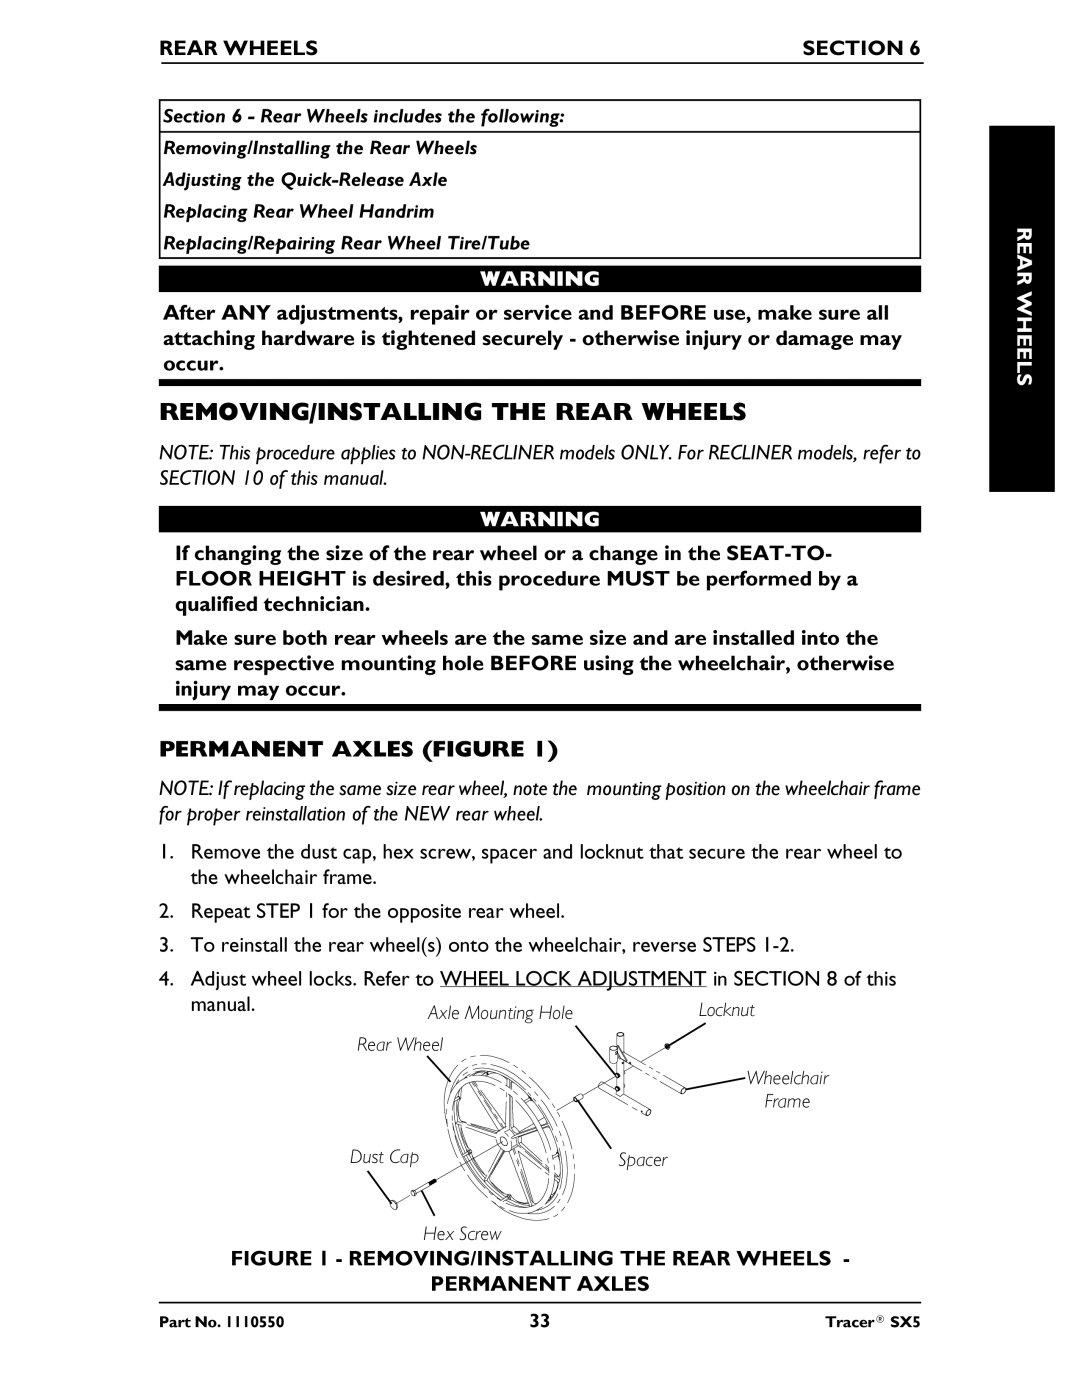
PERMANENT AXLES (FIGURE 1)
NOTE: If replacing the same size rear wheel, note the mounting position on the wheelchair frame for proper reinstallation of the NEW rear wheel.
1.Remove the dust cap, hex screw, spacer and locknut that secure the rear wheel to the wheelchair frame.
2.Repeat STEP 1 for the opposite rear wheel.
3.To reinstall the rear wheel(s) onto the wheelchair, reverse STEPS
4.Adjust wheel locks. Refer to WHEEL LOCK ADJUSTMENT in SECTION 8 of this
manual. | Axle Mounting Hole | Locknut |
| ||
| Rear Wheel |
|
|
| Wheelchair |
|
| Frame |
| Dust Cap | Spacer |
Hex Screw
FIGURE 1 - REMOVING/INSTALLING THE REAR WHEELS -
PERMANENT AXLES
REAR WHEELS
Part No. 1110550 | 33 | Tracer® SX5 |