SECTION 5: SERVICE PROCEDURES
RINSE SOLENOID VALVE REPAIR PARTS KIT (CONTINUED)
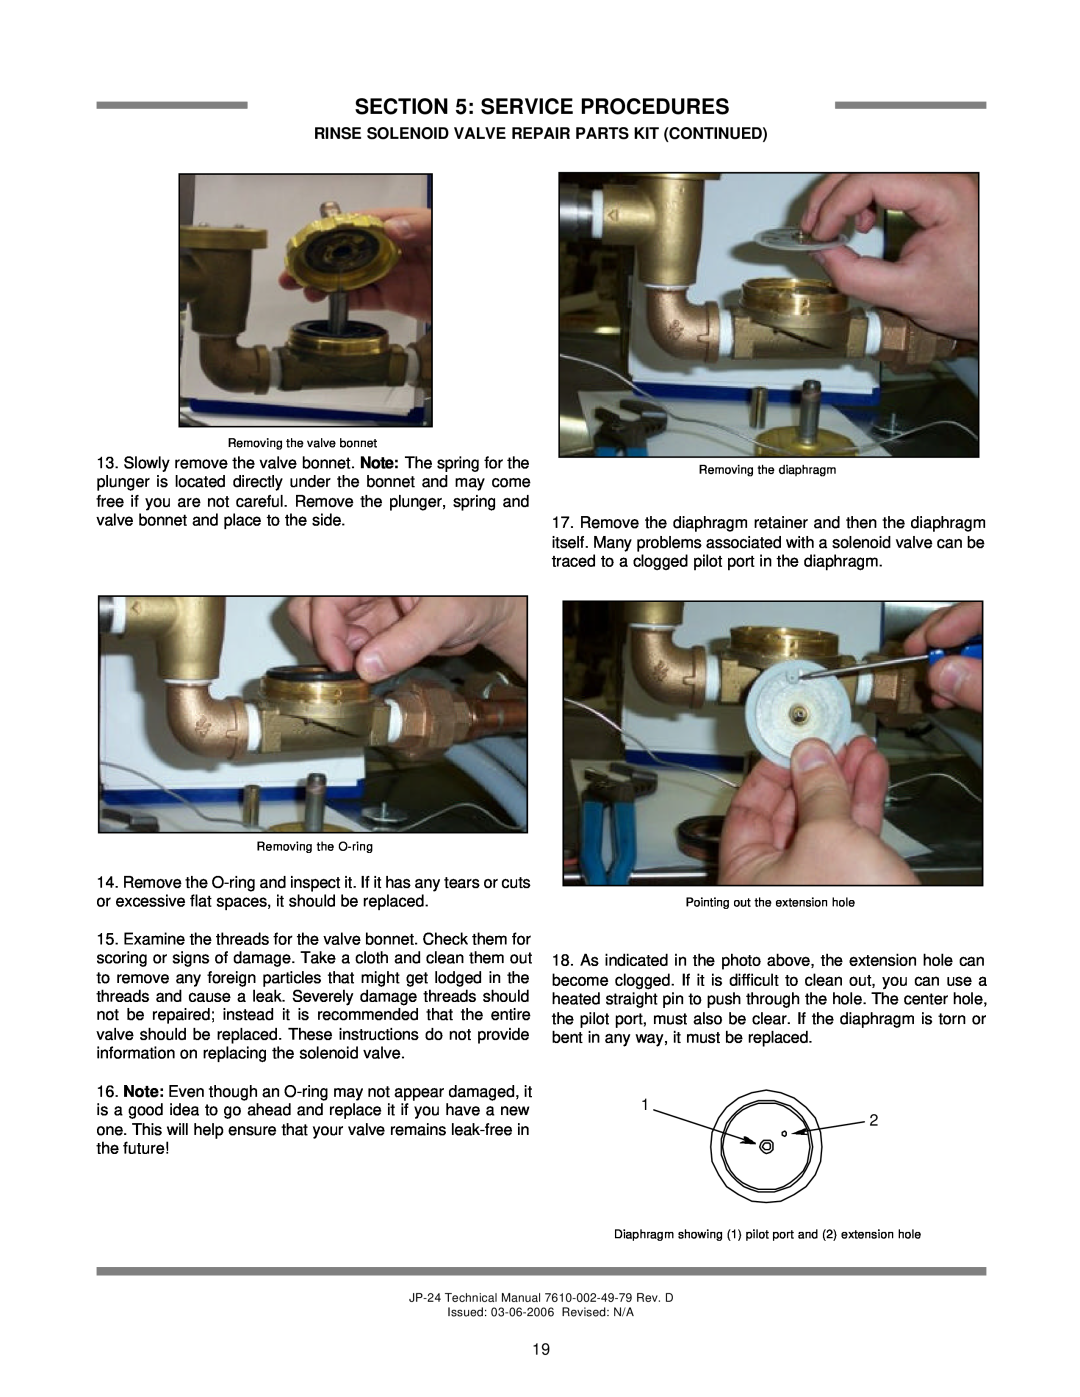
Removing the valve bonnet
13.Slowly remove the valve bonnet. Note: The spring for the plunger is located directly under the bonnet and may come free if you are not careful. Remove the plunger, spring and valve bonnet and place to the side.
Removing the
14.Remove the
15.Examine the threads for the valve bonnet. Check them for scoring or signs of damage. Take a cloth and clean them out to remove any foreign particles that might get lodged in the threads and cause a leak. Severely damage threads should not be repaired; instead it is recommended that the entire valve should be replaced. These instructions do not provide information on replacing the solenoid valve.
16.Note: Even though an
Removing the diaphragm
17.Remove the diaphragm retainer and then the diaphragm itself. Many problems associated with a solenoid valve can be traced to a clogged pilot port in the diaphragm.
Pointing out the extension hole
18.As indicated in the photo above, the extension hole can become clogged. If it is difficult to clean out, you can use a heated straight pin to push through the hole. The center hole, the pilot port, must also be clear. If the diaphragm is torn or bent in any way, it must be replaced.
1
![]() 2
2
Diaphragm showing (1) pilot port and (2) extension hole
Issued:
19
