2 WALL BASE INSTALLATION
STEP 6
Place cement board or equivalent on top of shower base flange and secure to studwall.
CEMENT BOARD
STUD
STEP 7
Apply tile (or other finishing material) leaving a 1/8" gap between the finishing material and the shower base flange lip. Seal this gap with silicone sealant. Leave a minimum 1/4" gap at the back and front corners of the shower base to allow drainage from leakage through unsealed tiled grout.
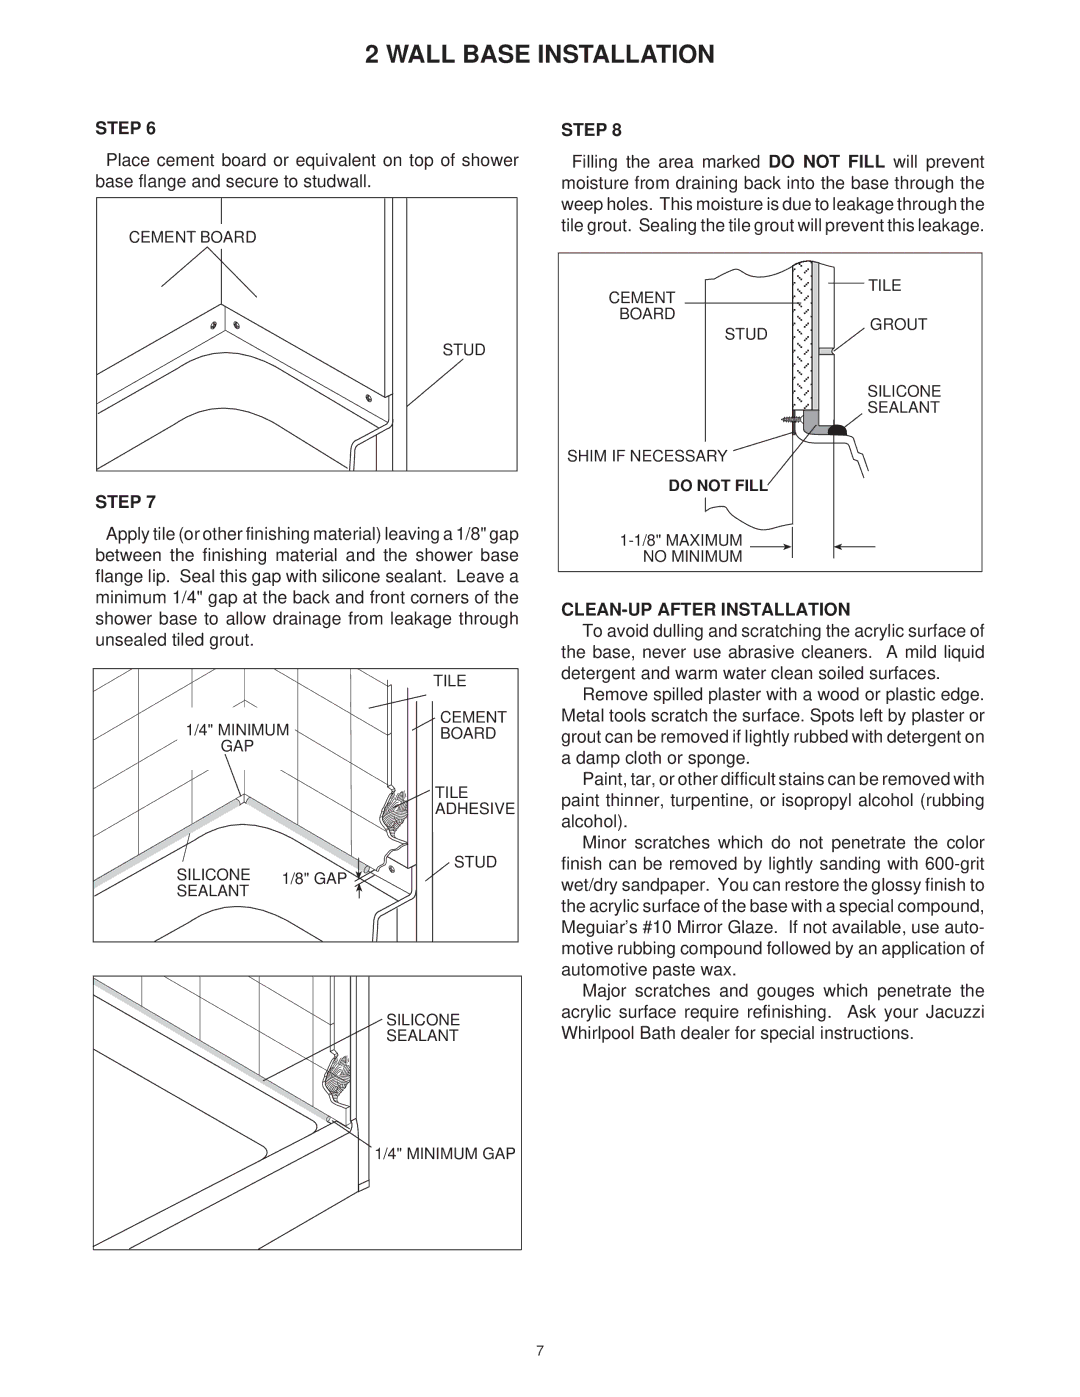
STEP 8
Filling the area marked DO NOT FILL will prevent moisture from draining back into the base through the weep holes. This moisture is due to leakage through the tile grout. Sealing the tile grout will prevent this leakage.
TILE
CEMENT
BOARD
GROUT
STUD
SILICONE
SEALANT
SHIM IF NECESSARY
DO NOT FILL
CLEAN-UP AFTER INSTALLATION
To avoid dulling and scratching the acrylic surface of the base, never use abrasive cleaners. A mild liquid detergent and warm water clean soiled surfaces.
1/4" MINIMUM
GAP
SILICONE 1/8" GAP ![]()
![]()
SEALANT
TILE
CEMENT BOARD
TILE ADHESIVE
STUD
Remove spilled plaster with a wood or plastic edge. Metal tools scratch the surface. Spots left by plaster or grout can be removed if lightly rubbed with detergent on a damp cloth or sponge.
Paint, tar, or other difficult stains can be removed with paint thinner, turpentine, or isopropyl alcohol (rubbing alcohol).
Minor scratches which do not penetrate the color finish can be removed by lightly sanding with
SILICONE SEALANT
Major scratches and gouges which penetrate the acrylic surface require refinishing. Ask your Jacuzzi Whirlpool Bath dealer for special instructions.
1/4" MINIMUM GAP
7