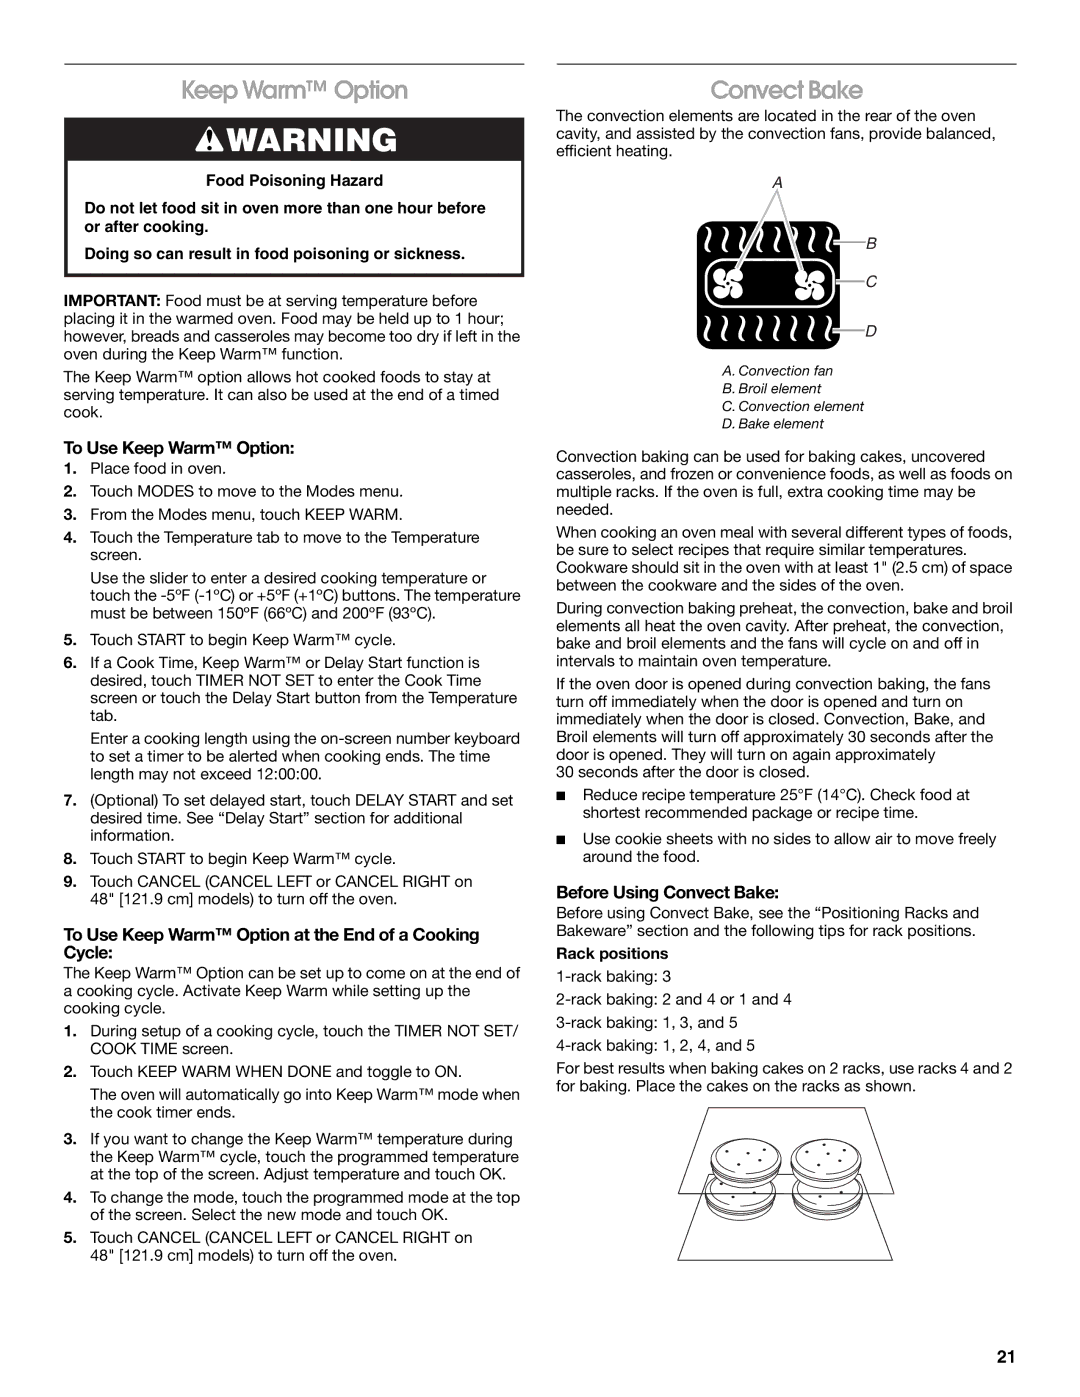
JDRP548, JDRP430, JDRP536, JDRP436 specifications
Jenn-Air has long been synonymous with luxury and innovation in the kitchen appliance industry, and their latest range of professional-grade refrigerators, including models JDRP436, JDRP548, JDRP536, and JDRP430, exemplifies this commitment to excellence. Each model is designed to meet the demands of culinary enthusiasts while seamlessly integrating into any modern kitchen layout.Starting with the JDRP436, this model features a 36-inch width and offers a generous capacity, making it perfect for storing large quantities of ingredients while maintaining a sleek appearance. It incorporates advanced cooling technologies, ensuring a consistent temperature that keeps food fresh for longer. The refrigerator utilizes a dual evaporator system, which separates refrigerator and freezer airflow, avoiding the mixing of odors and ensuring optimal preservation conditions for both fresh and frozen items.
Next up is the JDRP548, boasting a spacious 48-inch width and an impressive storage solution for serious chefs. One of its standout characteristics is the integrated design that allows for flush mounting with cabinetry, providing a clean and seamless look. This model also features the innovative Adaptable Shelving System that allows users to customize the layout according to their needs, offering flexibility for larger items or party-sized platters. Additionally, it comes equipped with advanced water filtration systems for ice and water, ensuring purity and taste.
The JDRP536, another compelling option, focuses on energy efficiency without compromising performance. This model includes an advanced LED lighting system that illuminates every corner of the refrigerator, making it easy to locate stored items. Furthermore, its smart technology, including Wi-Fi connectivity, allows users to monitor the appliance remotely, receive alerts, and adjust settings via their smartphones.
Lastly, the JDRP430 caters to those with a penchant for minimalist design and modern functionality. At 30 inches wide, it fits comfortably in smaller spaces while still offering ample storage and easy-to-navigate organization. The model features a unique food preservation zone designed specifically for meats, cheeses, and produce. Additionally, the temperature-controlled drawers maintain optimal settings, giving users confidence that their ingredients are stored precisely as needed.
In conclusion, Jenn-Air’s JDRP series showcases an impressive array of features and cutting-edge technologies, making these refrigerator models a standout choice for home chefs seeking luxury, efficiency, and functionality in their culinary spaces. Each model reflects Jenn-Air’s dedication to quality and style, promising to elevate the cooking experience for users everywhere.