Aligning the Blade Guard Splitter
![]() To avoid injury from an accidental start, make sure the switch is in the OFF position and the plug is disconnected.
To avoid injury from an accidental start, make sure the switch is in the OFF position and the plug is disconnected.
●When installing the blade guard, cover the blade teeth with a piece of folded cardboard to protect yourself from possible injury.
●Never operate this tool without the safety guard in place for all through sawing operations.
Important: The splitter must always be correctly aligned with the blade so the cut workpiece will pass on either side without binding or twisting.
The splitter/riving knife is adjusted at the factory and should not require adjustment. In the event that adjustment becomes necessary, follow the procedure below.
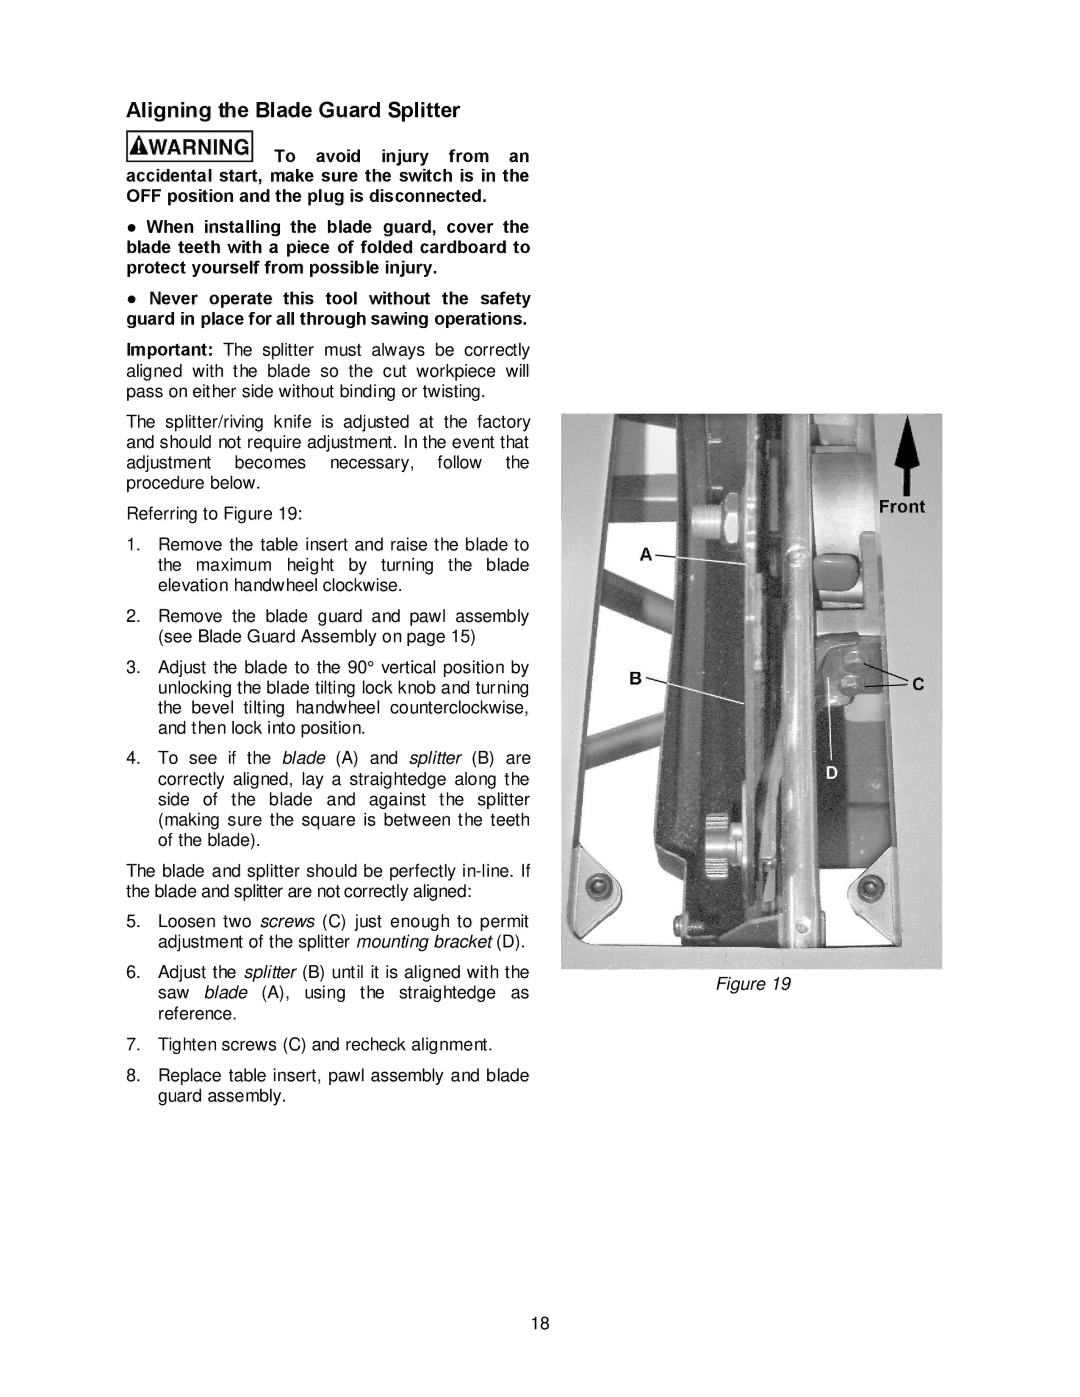
Referring to Figure 19:
1.Remove the table insert and raise the blade to the maximum height by turning the blade elevation handwheel clockwise.
2.Remove the blade guard and pawl assembly (see Blade Guard Assembly on page 15)
3.Adjust the blade to the 90° vertical position by unlocking the blade tilting lock knob and turning the bevel tilting handwheel counterclockwise, and then lock into position.
4.To see if the blade (A) and splitter (B) are correctly aligned, lay a straightedge along the side of the blade and against the splitter (making sure the square is between the teeth of the blade).
The blade and splitter should be perfectly
5. | Loosen two screws (C) just enough to permit |
|
| adjustment of the splitter mounting bracket (D). |
|
6. | Adjust the splitter (B) until it is aligned with the | Figure 19 |
| saw blade (A), using the straightedge as | |
|
|
reference.
7.Tighten screws (C) and recheck alignment.
8.Replace table insert, pawl assembly and blade guard assembly.
18