Mounting the Saw to Work Surface
![]() A hole to allow sawdust to fall through must be provided when the saw is mounted to a work surface (stand not used). Failure to do so will cause sawdust to build up in the motor area, which can result in fire or damage to the motor.
A hole to allow sawdust to fall through must be provided when the saw is mounted to a work surface (stand not used). Failure to do so will cause sawdust to build up in the motor area, which can result in fire or damage to the motor.
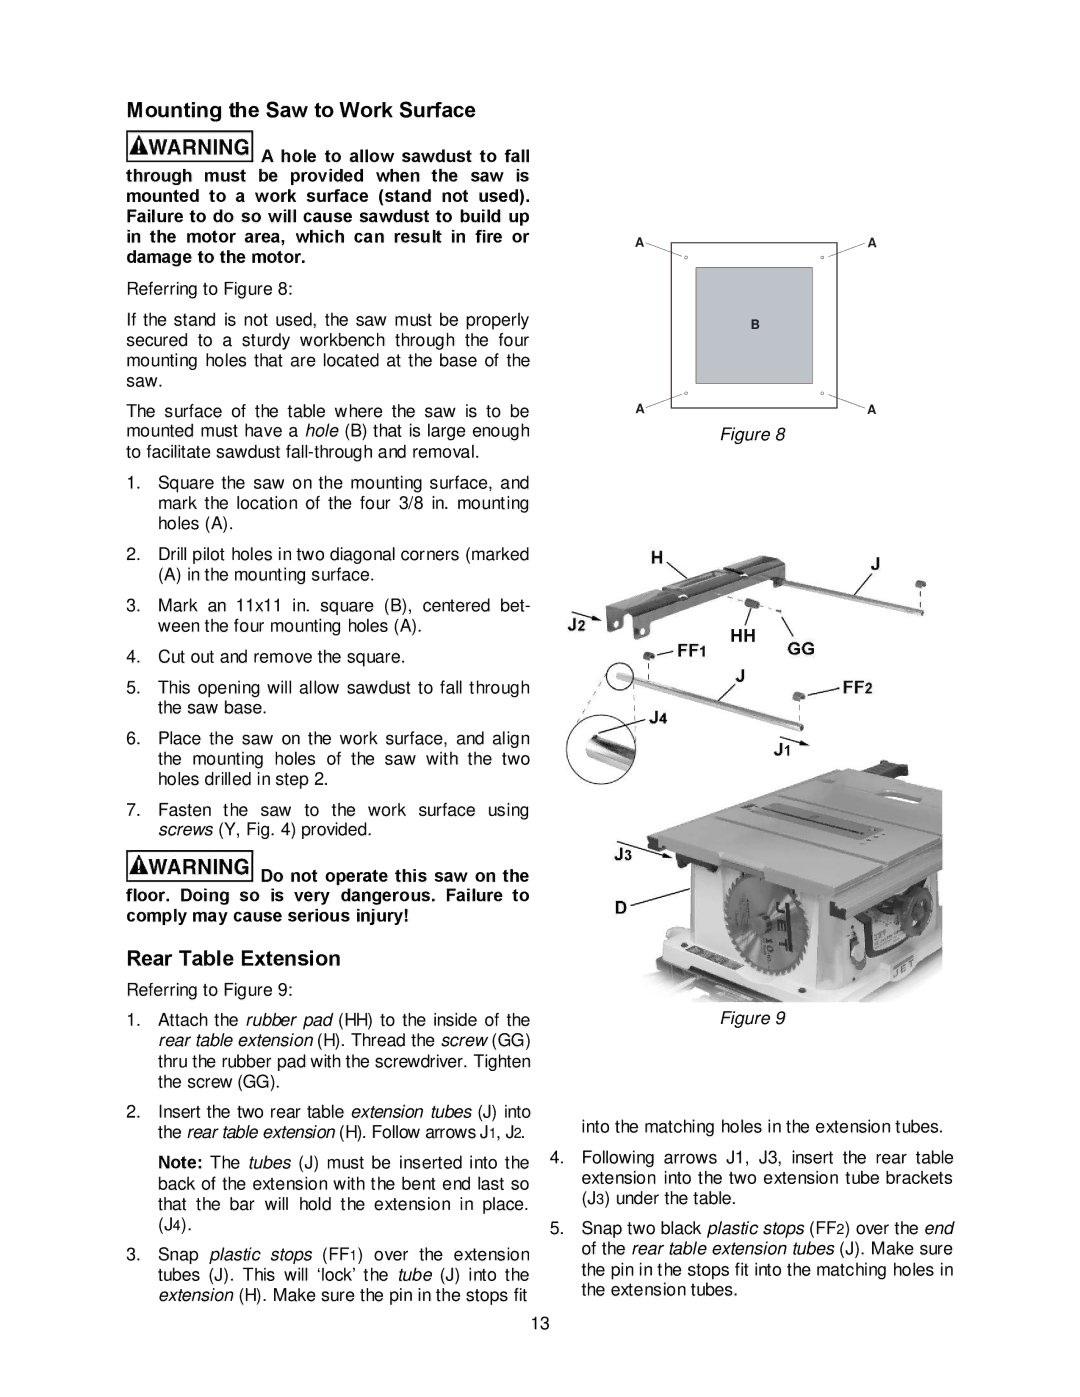
Referring to Figure 8:
If the stand is not used, the saw must be properly secured to a sturdy workbench through the four mounting holes that are located at the base of the saw.
The surface of the table where the saw is to be mounted must have a hole (B) that is large enough to facilitate sawdust
1.Square the saw on the mounting surface, and mark the location of the four 3/8 in. mounting holes (A).
2.Drill pilot holes in two diagonal corners (marked
(A)in the mounting surface.
3.Mark an 11x11 in. square (B), centered bet- ween the four mounting holes (A).
4.Cut out and remove the square.
5.This opening will allow sawdust to fall through the saw base.
6.Place the saw on the work surface, and align the mounting holes of the saw with the two holes drilled in step 2.
7.Fasten the saw to the work surface using screws (Y, Fig. 4) provided.
A | A |
B
A![]()
![]() A
A
Figure 8
![]() Do not operate this saw on the floor. Doing so is very dangerous. Failure to comply may cause serious injury!
Do not operate this saw on the floor. Doing so is very dangerous. Failure to comply may cause serious injury!
Rear Table Extension
Referring to Figure 9:
1.Attach the rubber pad (HH) to the inside of the rear table extension (H). Thread the screw (GG) thru the rubber pad with the screwdriver. Tighten the screw (GG).
2.Insert the two rear table extension tubes (J) into the rear table extension (H). Follow arrows J1, J2.
Note: The tubes (J) must be inserted into the back of the extension with the bent end last so that the bar will hold the extension in place. (J4).
3.Snap plastic stops (FF1) over the extension tubes (J). This will ‘lock’ the tube (J) into the extension (H). Make sure the pin in the stops fit
Figure 9
into the matching holes in the extension tubes.
4.Following arrows J1, J3, insert the rear table extension into the two extension tube brackets (J3) under the table.
5.Snap two black plastic stops (FF2) over the end of the rear table extension tubes (J). Make sure the pin in the stops fit into the matching holes in the extension tubes.
13
