Assembly
![]() Read and understand all assembly instructions before attempting assembly! Failure to comply may cause serious injury!
Read and understand all assembly instructions before attempting assembly! Failure to comply may cause serious injury!
Unpacking and Cleanup
1.Remove all contents from the shipping carton. Keep the saw table upside down (see Figure 5) and place on a
2.Inspect the contents for shipping damage. Report damage, if any, to your distributor.
3.Compare the contents of the shipping carton with the contents list in this manual. Report shortages, if any, to your distributor.
Installing Legs
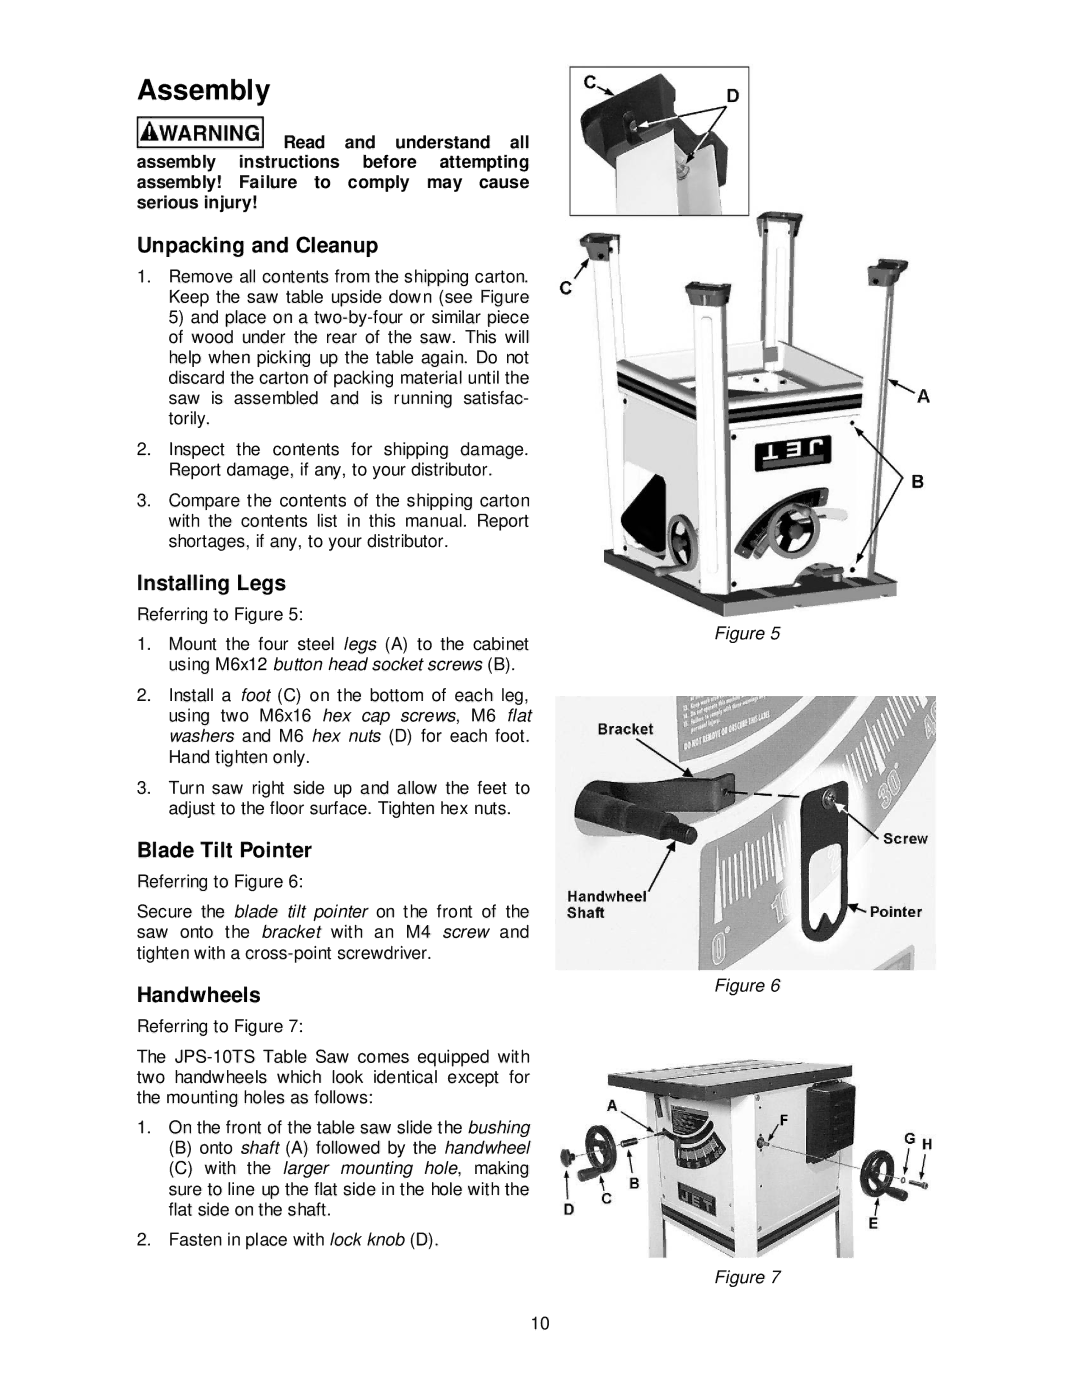
Referring to Figure 5:
1.Mount the four steel legs (A) to the cabinet using M6x12 button head socket screws (B).
2.Install a foot (C) on the bottom of each leg, using two M6x16 hex cap screws, M6 flat washers and M6 hex nuts (D) for each foot. Hand tighten only.
3.Turn saw right side up and allow the feet to adjust to the floor surface. Tighten hex nuts.
Blade Tilt Pointer
Referring to Figure 6:
Secure the blade tilt pointer on the front of the saw onto the bracket with an M4 screw and tighten with a
Handwheels
Referring to Figure 7:
The
1.On the front of the table saw slide the bushing
(B)onto shaft (A) followed by the handwheel
(C)with the larger mounting hole, making sure to line up the flat side in the hole with the flat side on the shaft.
2.Fasten in place with lock knob (D).
Figure 5
Figure 6
Figure 7
10