Sliding Table Miter Gauge
Hardware: Miter Gauge, Fence, (2) Handles, Stop, Fence Bar, Indicator Bar, Bushing, Bracket Clamp Assembly & (2) Handles
Tools: 2.5mm Hex Wrench
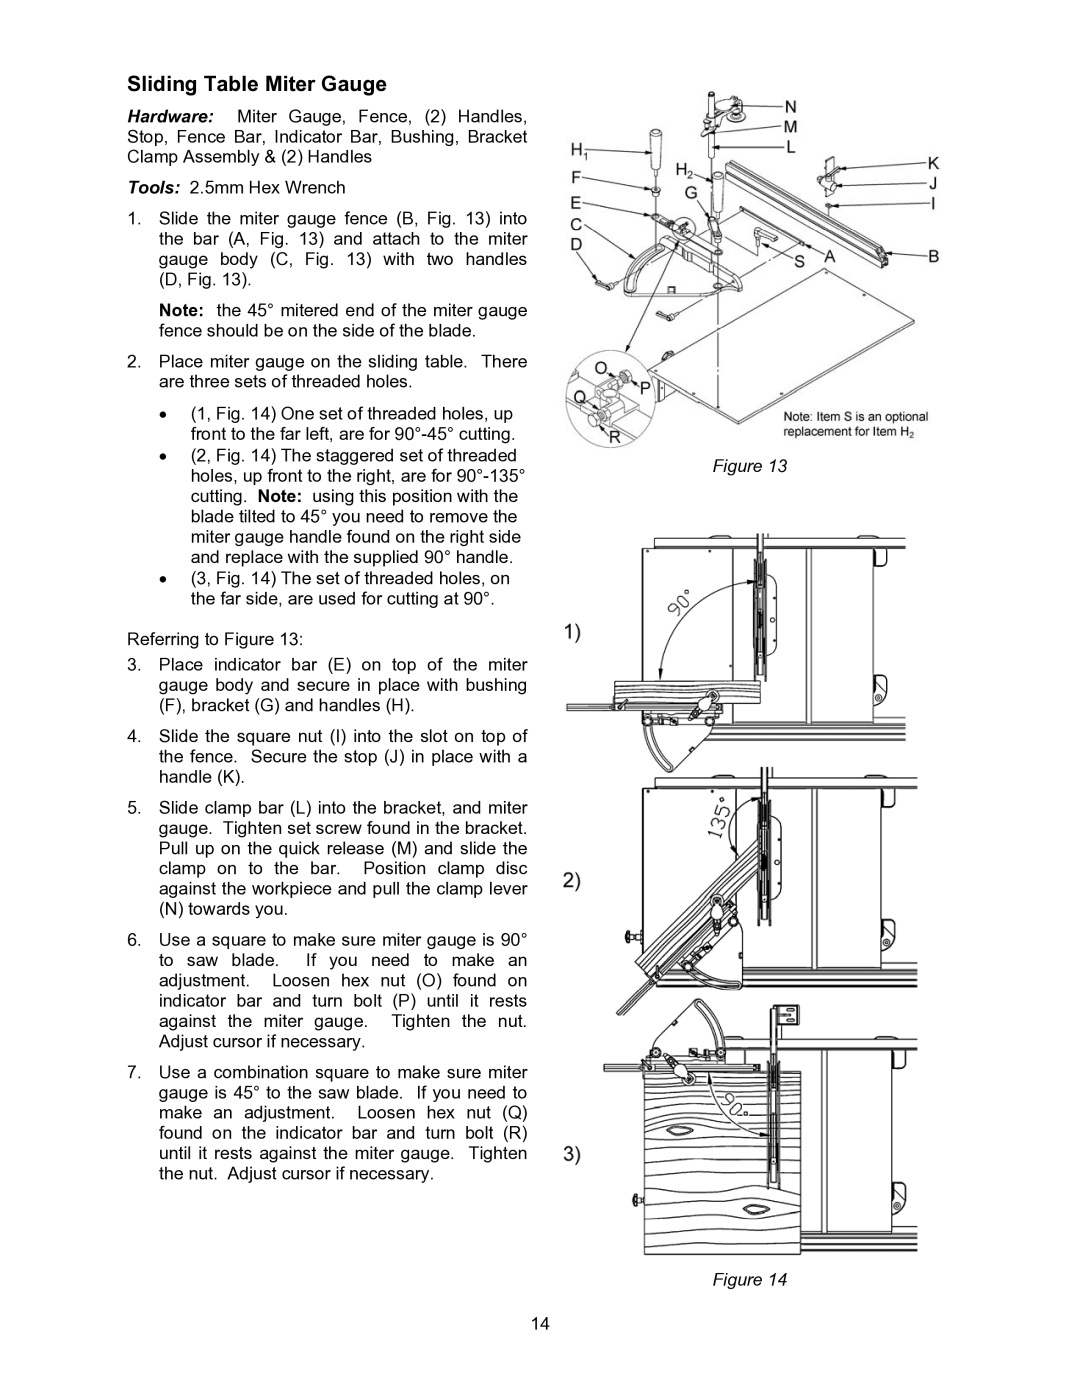
1.Slide the miter gauge fence (B, Fig. 13) into the bar (A, Fig. 13) and attach to the miter gauge body (C, Fig. 13) with two handles (D, Fig. 13).
Note: the 45° mitered end of the miter gauge fence should be on the side of the blade.
2.Place miter gauge on the sliding table. There are three sets of threaded holes.
•(1, Fig. 14) One set of threaded holes, up front to the far left, are for 90°-45° cutting.
•(2, Fig. 14) The staggered set of threaded holes, up front to the right, are for 90°-135° cutting. Note: using this position with the blade tilted to 45° you need to remove the miter gauge handle found on the right side and replace with the supplied 90° handle.
•(3, Fig. 14) The set of threaded holes, on the far side, are used for cutting at 90°.
Referring to Figure 13:
3.Place indicator bar (E) on top of the miter gauge body and secure in place with bushing (F), bracket (G) and handles (H).
4.Slide the square nut (I) into the slot on top of the fence. Secure the stop (J) in place with a handle (K).
5.Slide clamp bar (L) into the bracket, and miter gauge. Tighten set screw found in the bracket. Pull up on the quick release (M) and slide the clamp on to the bar. Position clamp disc against the workpiece and pull the clamp lever
(N) towards you.
6.Use a square to make sure miter gauge is 90° to saw blade. If you need to make an adjustment. Loosen hex nut (O) found on indicator bar and turn bolt (P) until it rests against the miter gauge. Tighten the nut. Adjust cursor if necessary.
7.Use a combination square to make sure miter gauge is 45° to the saw blade. If you need to make an adjustment. Loosen hex nut (Q) found on the indicator bar and turn bolt (R) until it rests against the miter gauge. Tighten the nut. Adjust cursor if necessary.
14
Figure 13
Figure 14