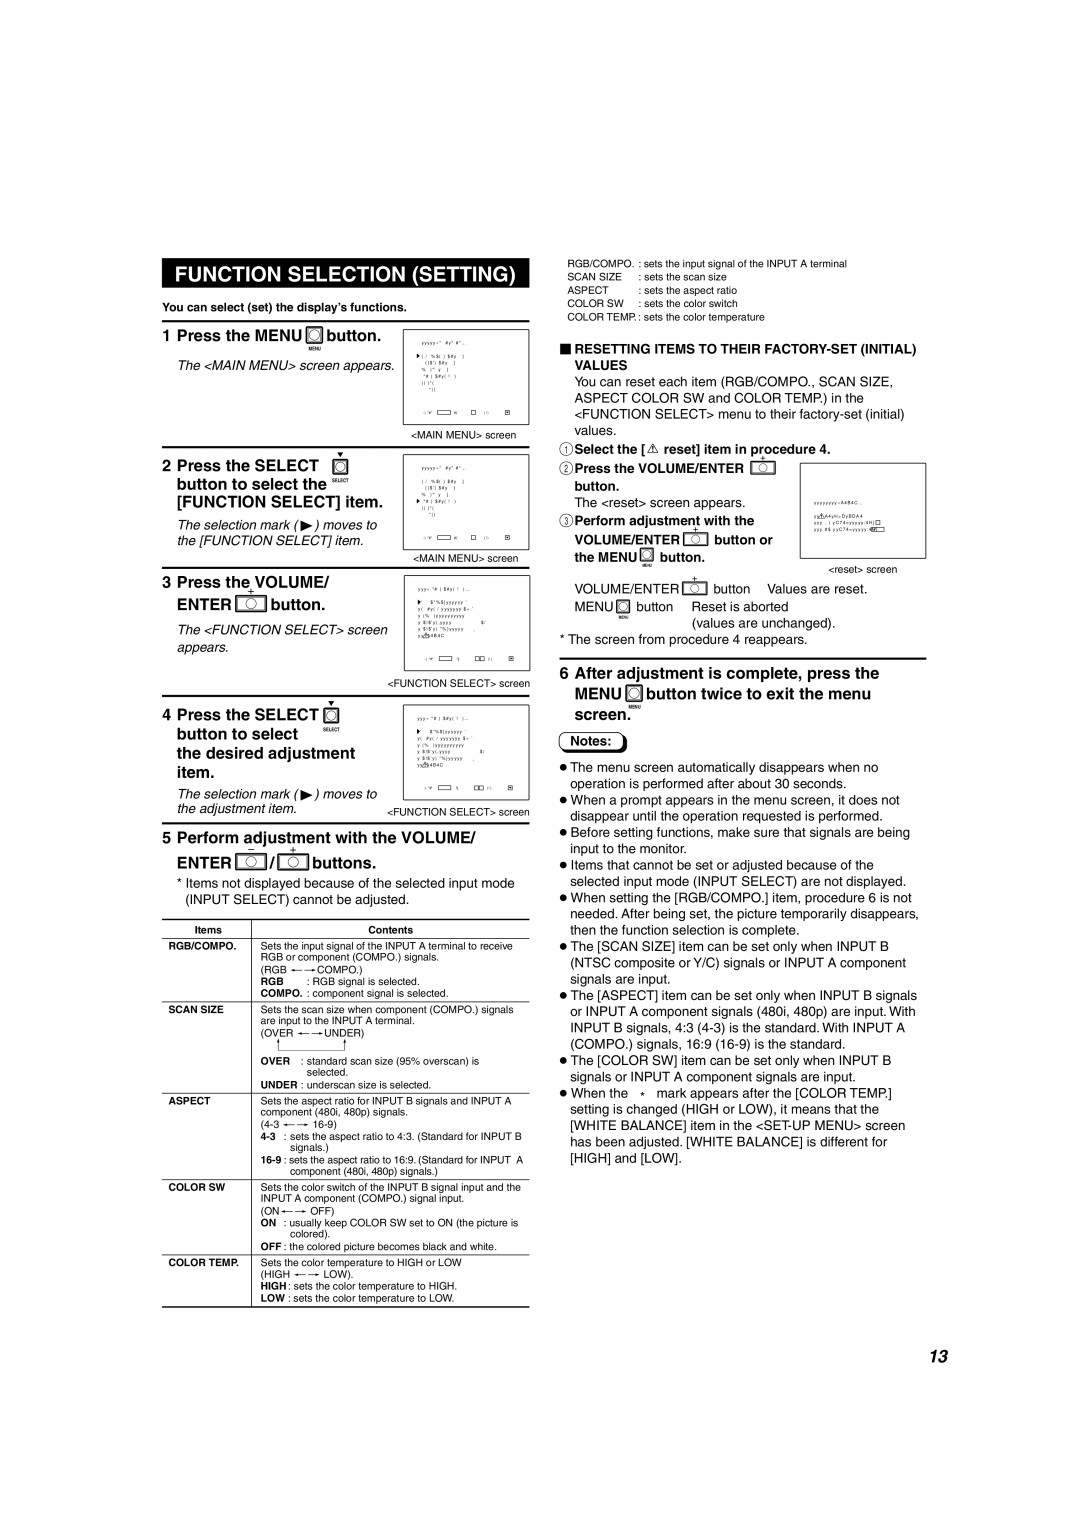
FUNCTION SELECTION (SETTING)
You can select (set) the display’s functions.
1 Press the MENU button. | <MAIN MENU>� |
MENU | � |
 SIZE/POSITION ADJ.�
The <MAIN MENU> screen appears. DISTORTION ADJ.�
PICTURE ADJ.�
FUNCTION SELECT� STATUS�
DEGAUSS�
EXIT: MENU�ENTER:�+ SELECT:�
<MAIN MENU> screen
2 Press the SELECT |
|
| <MAIN MENU>� | |||||
button to select the |
| � |
| |||||
SELECT | DISTORTION ADJ.� | |||||||
|
|
|
|
|
| SIZE/POSITION ADJ.� | ||
[FUNCTION SELECT] item. | PICTURE ADJ.� |
| ||||||
STATUS� |
| |||||||
|
|
|
|
|
|
| FUNCTION SELECT� | |
The selection mark ( 4) moves to | DEGAUSS� |
| ||||||
|
| |||||||
the [FUNCTION SELECT] item. | EXIT: MENU�ENTER:�+ | SELECT:� | ||||||
|
|
|
|
|
|
| <MAIN MENU> screen | |
|
|
|
|
|
| |||
3 Press the |
| VOLUME/ |
| <FUNCTION SELECT>� | ||||
ENTER |
|
|
| button. |
| � | :OVER� | |
|
|
|
| SCAN SIZE | ||||
|
|
|
|
|
|
| RGB/COMPO. | :RGB� |
|
|
|
|
|
|
| ASPECT | :4-3� |
The <FUNCTION SELECT> screen | COLOR SW | :ON� | ||||||
reset� | :HIGH*� | |||||||
|
|
|
|
|
|
| COLOR TEMP. | |
appears. |
|
|
|
|
|
|
|
|
|
|
|
|
|
|
| EXIT: MENU�ADJUST:�- +� SELECT:� | |
|
|
|
|
|
|
| <FUNCTION SELECT> screen | |
|
|
|
| |||||
4 Press the SELECT |
|
| <FUNCTION SELECT>� | |||||
button to select | SELECT | � |
| |||||
SCAN SIZE | :OVER� | |||||||
|
|
|
|
|
|
| RGB/COMPO. | :RGB� |
the desired adjustment | ASPECT | :4-3� | ||||||
COLOR TEMP. | :HIGH*� | |||||||
|
|
|
|
|
|
| COLOR SW | :ON� |
item. |
|
|
|
|
|
| reset� |
|
|
|
|
|
|
|
|
| |
The selection mark ( 4) moves to | EXIT: MENU�ADJUST:�- +� SELECT:� | |||||||
|
| |||||||
the adjustment item. |
|
| <FUNCTION SELECT> screen | |||||
|
|
|
|
|
|
|
|
|
5Perform adjustment with the VOLUME/
ENTER /
/ buttons.
* Items not displayed because of the selected input mode (INPUT SELECT) cannot be adjusted.
Items |
|
|
| Contents |
|
|
|
| |
RGB/COMPO. | Sets the input signal of the INPUT A terminal to receive | |||
| RGB or component (COMPO.) signals. | |||
| (RGB p[COMPO.) | |||
| RGB | : RGB signal is selected. | ||
| COMPO. : component signal is selected. | |||
|
|
|
| |
SCAN SIZE | Sets the scan size when component (COMPO.) signals | |||
| are input to the INPUT A terminal. | |||
| (OVER p[UNDER) | |||
| p | p | ||
|
|
|
|
|
| OVER : standard scan size (95% overscan) is | |||
|
|
| selected. | |
| UNDER : underscan size is selected. | |||
|
|
|
| |
ASPECT | Sets the aspect ratio for INPUT B signals and INPUT A | |||
| component (480i, 480p) signals. | |||
| ||||
| ||||
|
|
| signals.) | |
| ||||
|
|
| component (480i, 480p) signals.) | |
|
|
|
| |
COLOR SW | Sets the color switch of the INPUT B signal input and the | |||
| INPUT A component (COMPO.) signal input. | |||
| (ONp[ OFF) | |||
| ON : usually keep COLOR SW set to ON (the picture is | |||
|
|
| colored). | |
| OFF : the colored picture becomes black and white. | |||
|
|
|
| |
COLOR TEMP. | Sets the color temperature to HIGH or LOW | |||
| (HIGH p[ LOW). | |||
| HIGH : sets the color temperature to HIGH. | |||
| LOW : sets the color temperature to LOW. | |||
|
|
|
|
|
•RGB/COMPO. : sets the input signal of the INPUT A terminal
• SCAN SIZE | : sets the scan size |
• ASPECT | : sets the aspect ratio |
• COLOR SW | : sets the color switch |
•COLOR TEMP. : sets the color temperature
RESETTING ITEMS TO THEIR FACTORY-SET (INITIAL) VALUES
You can reset each item (RGB/COMPO., SCAN SIZE, ASPECT COLOR SW and COLOR TEMP.) in the <FUNCTION SELECT> menu to their
1Select the [  reset] item in procedure 4.
2Press the VOLUME/ENTER 
button.
The <reset> screen appears. |
| <reset>� |
| ||
|
|
| � |
|
|
3Perform adjustment with the | Are you sure?� |
| |||
“YES“ then +� | key.� | ||||
VOLUME/ENTER |
| button or | “NO“ | then MENU� key.� | |
|
|
|
| ||
the MENU button.
MENU
<reset> screen
VOLUME/ENTER button… Values are reset. MENU
 button… Reset is aborted
MENU
(values are unchanged).
* The screen from procedure 4 reappears.
6After adjustment is complete, press the
MENU button twice to exit the menu screen.MENU
Notes:
●The menu screen automatically disappears when no operation is performed after about 30 seconds.
●When a prompt appears in the menu screen, it does not disappear until the operation requested is performed.
●Before setting functions, make sure that signals are being input to the monitor.
●Items that cannot be set or adjusted because of the selected input mode (INPUT SELECT) are not displayed.
●When setting the [RGB/COMPO.] item, procedure 6 is not needed. After being set, the picture temporarily disappears, then the function selection is complete.
●The [SCAN SIZE] item can be set only when INPUT B (NTSC composite or Y/C) signals or INPUT A component signals are input.
●The [ASPECT] item can be set only when INPUT B signals or INPUT A component signals (480i, 480p) are input. With INPUT B signals, 4:3
●The [COLOR SW] item can be set only when INPUT B signals or INPUT A component signals are input.
●When the “ * ” mark appears after the [COLOR TEMP.] setting is changed (HIGH or LOW), it means that the [WHITE BALANCE] item in the
13