Installation
CAUTION
•Do not rest your arm on the monitor or lean against the monitor.
•Do not touch the LCD panel when installing the monitor.
•Make sure to install the monitor securely to prevent the monitor from falling over, which causes damage to the monitor or injury.
When shipped from factory, the stand is attached to the monitor.
You can tilt the monitor from about 20° upward to about 10° downward.
| • When the monitor is not |
About 20° | tilted (0°), the guidelines |
| align as illustrated. |
0° | Guidelines |
| |
About 10° |
|
CAUTION
•Be careful not to pinch your fingers in the gap between the monitor and the stand.
•When the stand is attached to the lower position (☞ page 5), you cannot tilt the monitor downward.
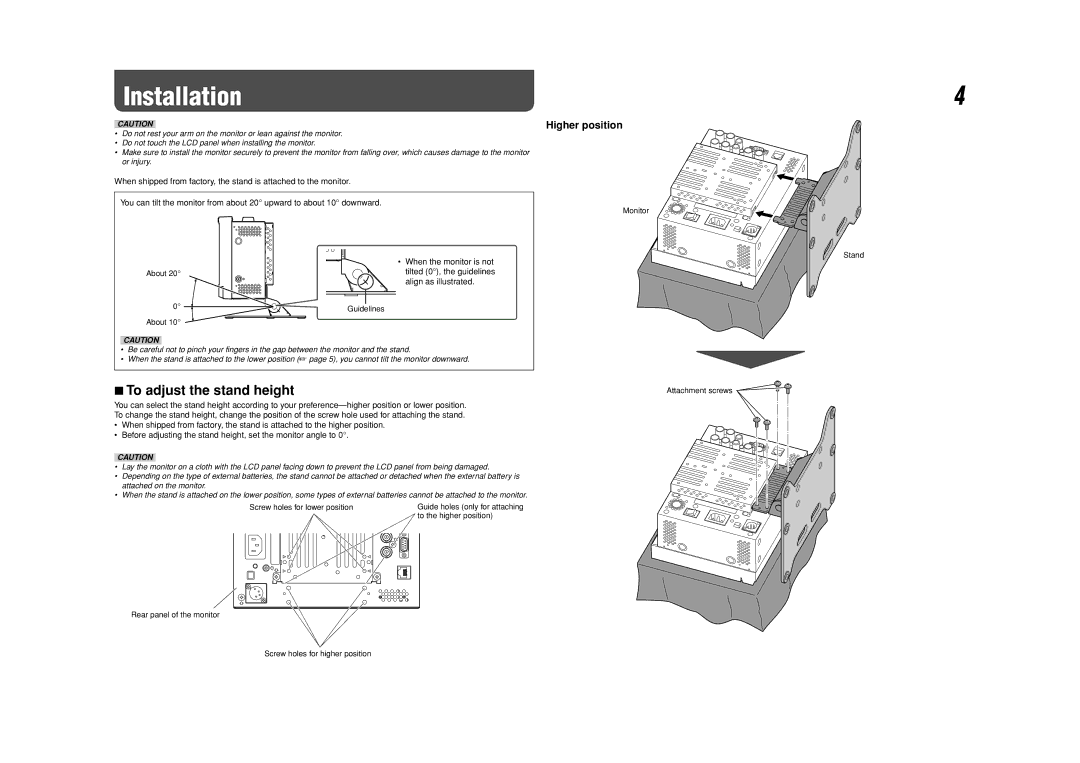
7To adjust the stand height
You can select the stand height according to your
•When shipped from factory, the stand is attached to the higher position.
•Before adjusting the stand height, set the monitor angle to 0°.
CAUTION
•Lay the monitor on a cloth with the LCD panel facing down to prevent the LCD panel from being damaged.
•Depending on the type of external batteries, the stand cannot be attached or detached when the external battery is attached on the monitor.
•When the stand is attached on the lower position, some types of external batteries cannot be attached to the monitor.
Screw holes for lower position | Guide holes (only for attaching |
| to the higher position) |
Rear panel of the monitor
Higher position
Monitor
Attachment screws
4
Stand
Screw holes for higher position