18


 RECORDING
 Advanced
 Features
Video Light (GR-AX827/AX627 only)
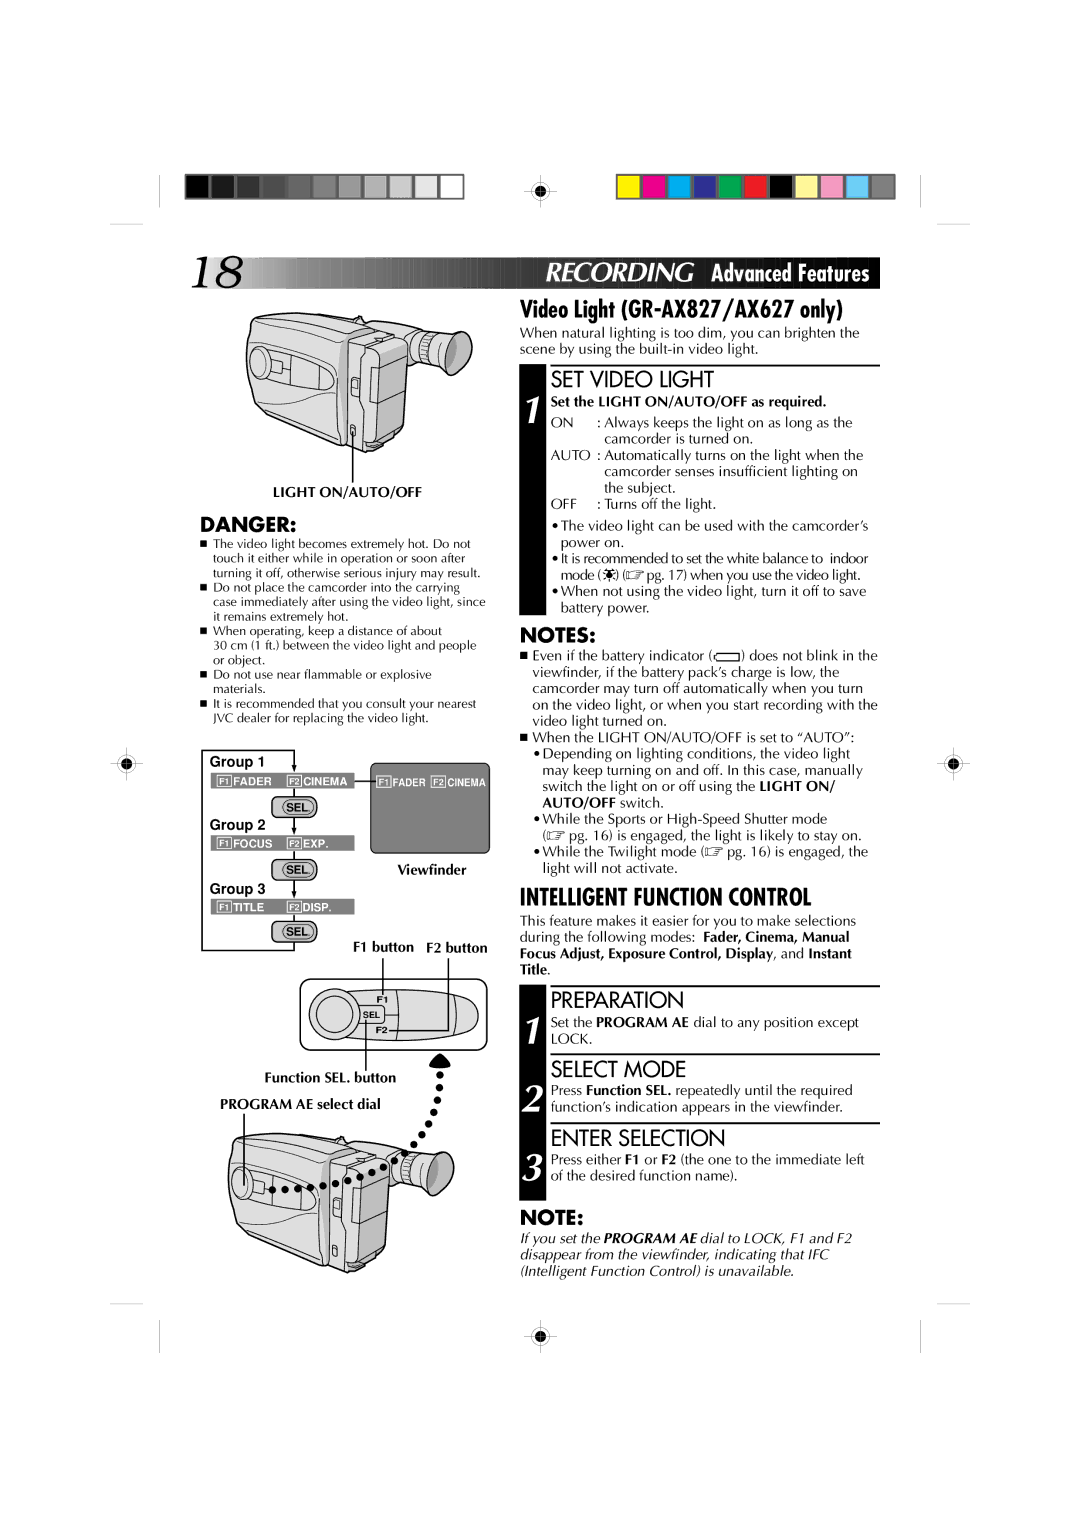
When natural lighting is too dim, you can brighten the scene by using the
LIGHT ON/AUTO/OFF
DANGER:
■The video light becomes extremely hot. Do not touch it either while in operation or soon after turning it off, otherwise serious injury may result.
■Do not place the camcorder into the carrying case immediately after using the video light, since it remains extremely hot.
■When operating, keep a distance of about
30 cm (1 ft.) between the video light and people or object.
■Do not use near flammable or explosive materials.
■It is recommended that you consult your nearest JVC dealer for replacing the video light.
Group 1
F1 FADER F2 CINEMA ![]() F1 FADER F2 CINEMA
F1 FADER F2 CINEMA
SEL.
Group 2
F1 FOCUS F2 EXP.
SEL.Viewfinder
Group 3
F1 TITLE | F2 DISP. |
SET VIDEO LIGHT | |
Set the LIGHT ON/AUTO/OFF as required. | |
1 ON | : Always keeps the light on as long as the |
| camcorder is turned on. |
AUTO : Automatically turns on the light when the | |
| camcorder senses insufficient lighting on |
| the subject. |
OFF | : Turns off the light. |
•The video light can be used with the camcorder’s power on.
•It is recommended to set the white balance to indoor mode (![]()
![]()
![]() ) (☞ pg. 17) when you use the video light.
) (☞ pg. 17) when you use the video light.
•When not using the video light, turn it off to save battery power.
NOTES:
■Even if the battery indicator (![]() ) does not blink in the viewfinder, if the battery pack’s charge is low, the camcorder may turn off automatically when you turn on the video light, or when you start recording with the video light turned on.
) does not blink in the viewfinder, if the battery pack’s charge is low, the camcorder may turn off automatically when you turn on the video light, or when you start recording with the video light turned on.
■When the LIGHT ON/AUTO/OFF is set to “AUTO”: •Depending on lighting conditions, the video light
may keep turning on and off. In this case, manually switch the light on or off using the LIGHT ON/ AUTO/OFF switch.
•While the Sports or
•While the Twilight mode (☞ pg. 16) is engaged, the light will not activate.
INTELLIGENT FUNCTION CONTROL
SEL.
F1 button F2 button
F1
SEL
F2
Function SEL. button
PROGRAM AE select dial
This feature makes it easier for you to make selections during the following modes: Fader, Cinema, Manual Focus Adjust, Exposure Control, Display, and Instant Title.
PREPARATION
1 Set the PROGRAM AE dial to any position except LOCK.
SELECT MODE
2 Press Function SEL. repeatedly until the required function’s indication appears in the viewfinder.
ENTER SELECTION
3 Press either F1 or F2 (the one to the immediate left of the desired function name).
NOTE:
If you set the PROGRAM AE dial to LOCK, F1 and F2 disappear from the viewfinder, indicating that IFC (Intelligent Function Control) is unavailable.
