QUICK
QUICK
 OPERATION
 GUIDE
GUIDE


 (D.S.C.)


 EN
EN 7
7
SUPPLY POWER | SHOOTING |
| |
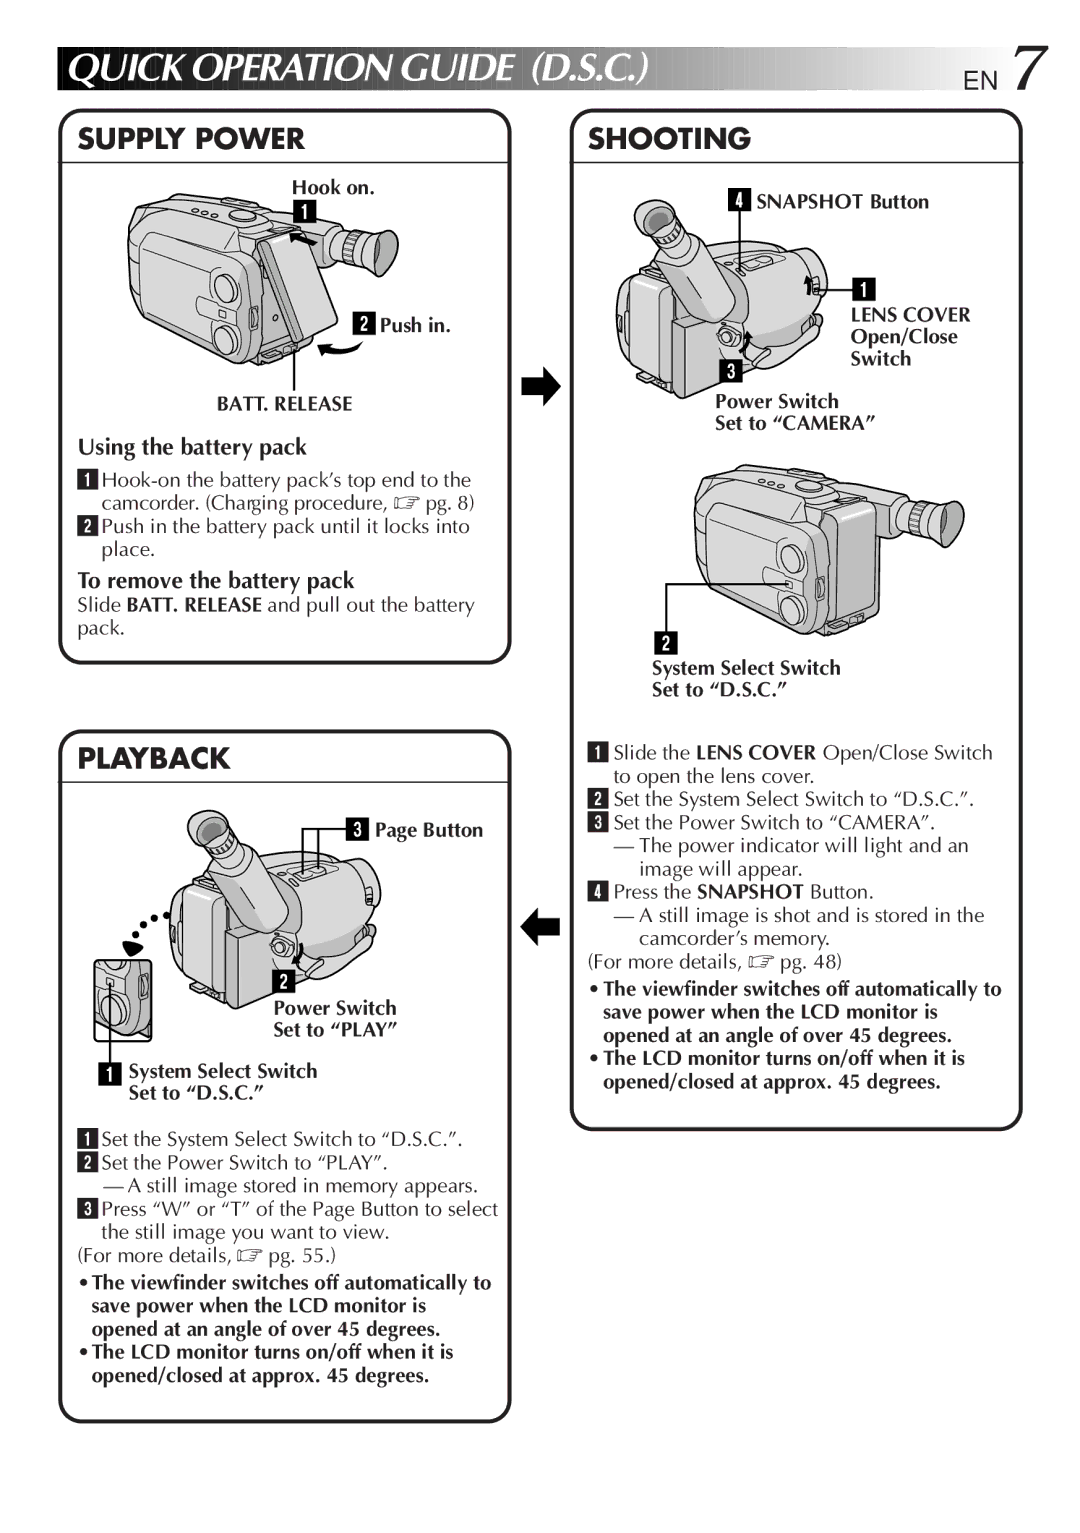
Hook on. | 4 SNAPSHOT Button | ||
1 | |||
|
| ||
|
| 1 | |
2Push in. |
| LENS COVER | |
| Open/Close | ||
|
| ||
| 3 | Switch | |
|
| ||
BATT. RELEASE | Power Switch |
| |
| Set to “CAMERA” | ||
Using the battery pack
1
2Push in the battery pack until it locks into place.
To remove the battery pack
Slide BATT. RELEASE and pull out the battery pack.
PLAYBACK

 3 Page Button
![]()
![]() 2
2
Power Switch
Set to “PLAY”
1System Select Switch Set to “D.S.C.”
1Set the System Select Switch to “D.S.C.”.
2Set the Power Switch to “PLAY”.
—A still image stored in memory appears. 3Press “W” or “T” of the Page Button to select
the still image you want to view. (For more details, ☞ pg. 55.)
•The viewfinder switches off automatically to save power when the LCD monitor is opened at an angle of over 45 degrees.
•The LCD monitor turns on/off when it is opened/closed at approx. 45 degrees.
2
System Select Switch
Set to “D.S.C.”
1Slide the LENS COVER Open/Close Switch to open the lens cover.
2Set the System Select Switch to “D.S.C.”.
3 Set the Power Switch to “CAMERA”.
—The power indicator will light and an image will appear.
4Press the SNAPSHOT Button.
—A still image is shot and is stored in the camcorder’s memory.
(For more details,
•The viewfinder switches off automatically to save power when the LCD monitor is opened at an angle of over 45 degrees.
•The LCD monitor turns on/off when it is opened/closed at approx. 45 degrees.