48![]()
![]()
![]() EN
EN![]()
![]()
![]()
![]()
![]()
![]()
![]()
![]()
![]()
![]()
![]()
![]()
![]()
![]()
![]()


 DIGITAL
 STILL
STILL

 CAMERA
 (D.S.C.)


 SHOOTING


MODE
SNAPSHOT
Basic Shooting
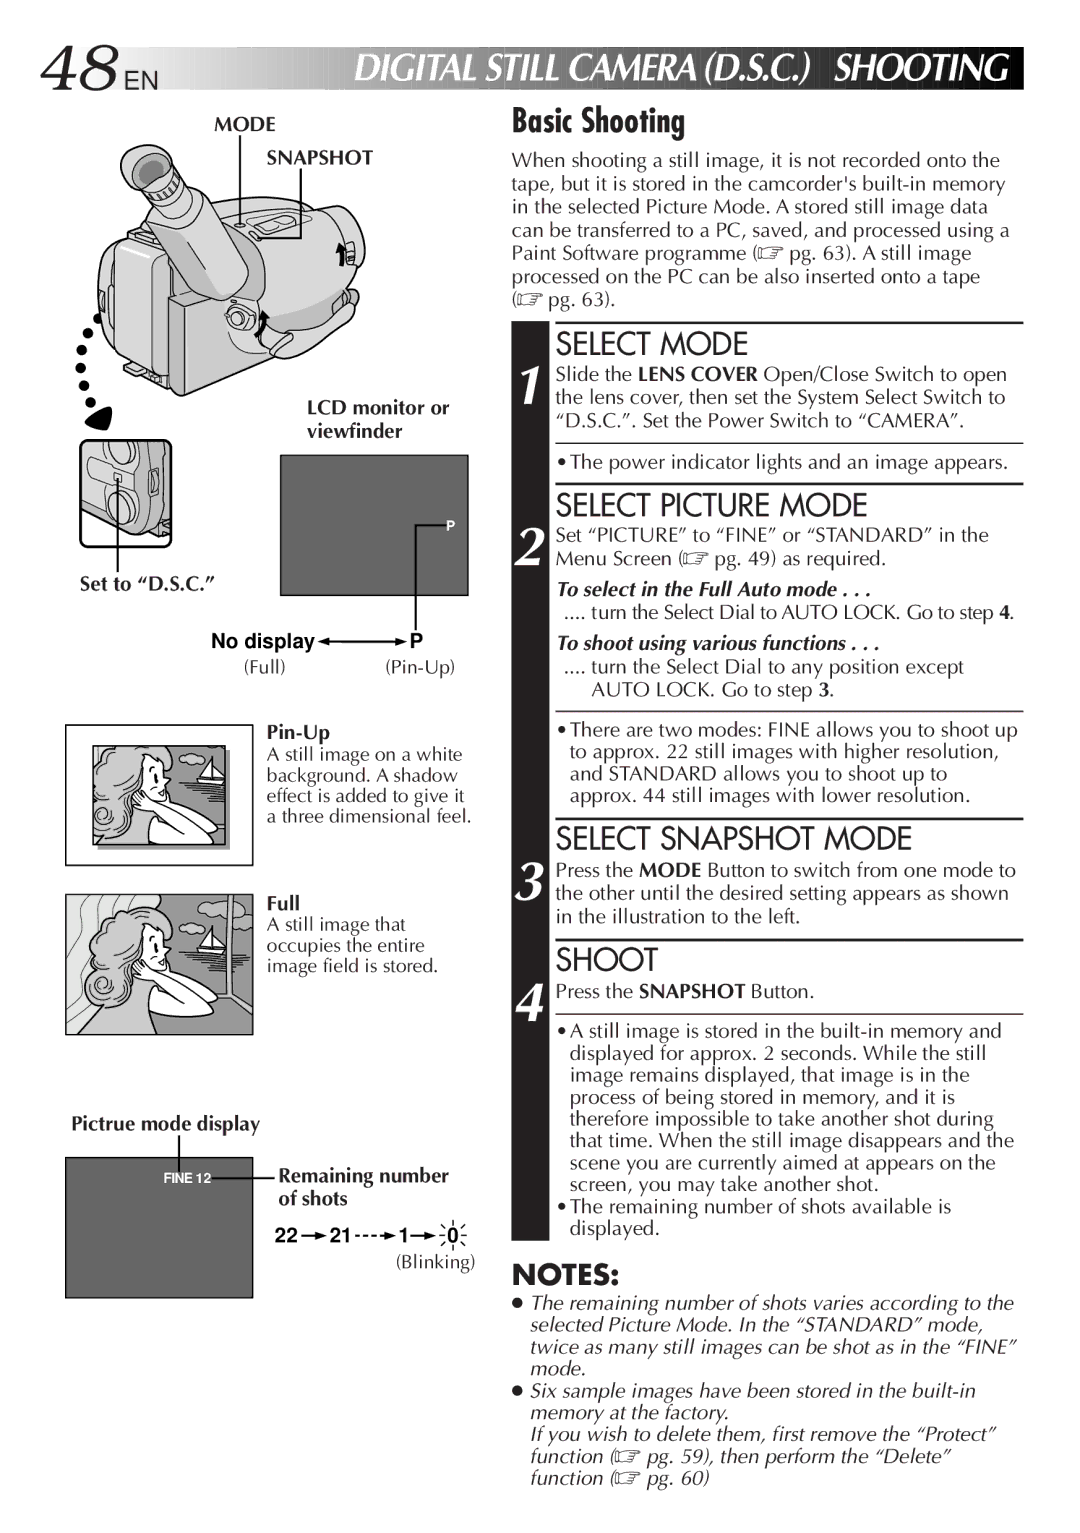
When shooting a still image, it is not recorded onto the tape, but it is stored in the camcorder's
SELECT MODE
Set to “D.S.C.”
LCD monitor or viewfinder
P
1 Slide the LENS COVER Open/Close Switch to open the lens cover, then set the System Select Switch to “D.S.C.”. Set the Power Switch to “CAMERA”.
•The power indicator lights and an image appears.
SELECT PICTURE MODE
2 Set “PICTURE” to “FINE” or “STANDARD” in the Menu Screen (☞ pg. 49) as required.
To select in the Full Auto mode . . .
.... turn the Select Dial to AUTO LOCK. Go to step 4.
No display | P |
(Full)
A still image on a white background. A shadow effect is added to give it a three dimensional feel.
To shoot using various functions . . .
.... turn the Select Dial to any position except
AUTO LOCK. Go to step 3.
•There are two modes: FINE allows you to shoot up to approx. 22 still images with higher resolution, and STANDARD allows you to shoot up to approx. 44 still images with lower resolution.
SELECT SNAPSHOT MODE
Pictrue mode display
FINE 12
Full
A still image that occupies the entire image field is stored.
Remaining number of shots
22 21
21  1
1 0
0
(Blinking)
3 Press the MODE Button to switch from one mode to the other until the desired setting appears as shown in the illustration to the left.
SHOOT
4 Press the SNAPSHOT Button.
•A still image is stored in the
•The remaining number of shots available is displayed.
NOTES:
●The remaining number of shots varies according to the selected Picture Mode. In the “STANDARD” mode, twice as many still images can be shot as in the “FINE” mode.
●Six sample images have been stored in the
If you wish to delete them, first remove the “Protect” function (☞ pg. 59), then perform the “Delete” function (☞ pg. 60)
