![]()
![]()
![]()
![]()
![]()
![]()
![]()
![]()
![]()
![]()
![]()
![]()
![]()
![]()
![]()
![]()
![]()
![]()
![]()
![]()
![]()
![]()
![]()
![]()
![]()
![]()
![]()
![]()
![]()
![]()
![]()
![]()
![]()
![]()
![]()
![]()
![]()
![]()
![]()
![]()
![]()
![]()
![]()
![]()
![]()
![]()
![]()
![]()
![]()
![]()
![]()
![]()
![]()
![]()
![]()
![]()
![]()
![]()
![]()
![]()
![]()
![]()
![]()
![]()
![]()
![]()
![]()
![]()
![]()
![]()
![]()
![]()
![]()
![]()
![]()
![]()
![]()
![]()
![]()
![]()
![]()
![]()
![]()
![]()
![]()
![]()
![]()
![]()
![]()
![]()
![]()
![]()
![]()
![]()
![]()
![]()
![]()
![]()
![]()
![]()
![]()
![]()
![]()
![]()
![]()
![]()
![]()
![]()
![]()
![]() EN
EN![]() 49
49![]()
![]()
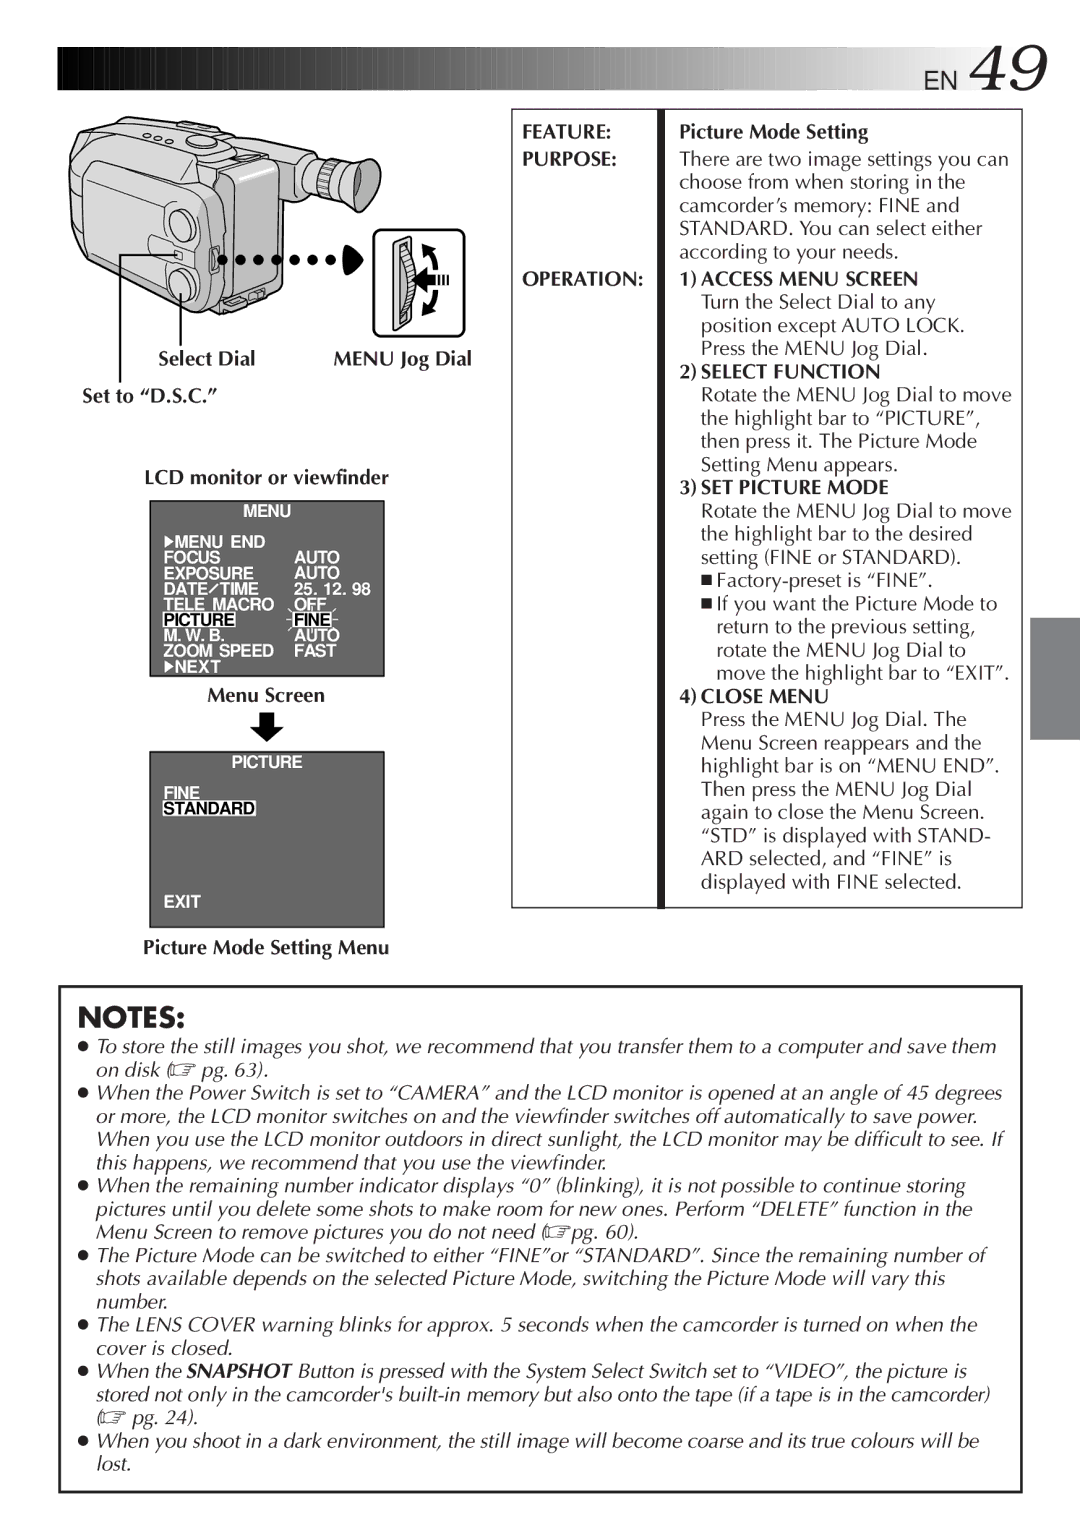
Select Dial | MENU Jog Dial |
Set to “D.S.C.”
LCD monitor or viewfinder
|
| MENU |
|
|
| 4MENU END | AUTO | ||
| FOCUS | |||
| EXPOSURE | AUTO | ||
| DATE TIME | 25. 12. 98 | ||
| TELE MACRO | OFF | ||
| PICTURE |
| FINE |
|
| M. W. B. |
| AUTO |
|
| ZOOM SPEED | FAST | ||
| 4NEXT |
|
| |
Menu Screen
PICTURE
FINE
STANDARD
EXIT
Picture Mode Setting Menu
FEATURE:
PURPOSE:
OPERATION:
Picture Mode Setting
There are two image settings you can choose from when storing in the camcorder’s memory: FINE and STANDARD. You can select either according to your needs.
1)ACCESS MENU SCREEN Turn the Select Dial to any position except AUTO LOCK. Press the MENU Jog Dial.
2)SELECT FUNCTION
Rotate the MENU Jog Dial to move the highlight bar to “PICTURE”, then press it. The Picture Mode Setting Menu appears.
3)SET PICTURE MODE
Rotate the MENU Jog Dial to move the highlight bar to the desired setting (FINE or STANDARD).
■
■If you want the Picture Mode to return to the previous setting, rotate the MENU Jog Dial to move the highlight bar to “EXIT”.
4)CLOSE MENU
Press the MENU Jog Dial. The Menu Screen reappears and the highlight bar is on “MENU END”. Then press the MENU Jog Dial again to close the Menu Screen. “STD” is displayed with STAND- ARD selected, and “FINE” is displayed with FINE selected.
NOTES:
●To store the still images you shot, we recommend that you transfer them to a computer and save them on disk (☞ pg. 63).
●When the Power Switch is set to “CAMERA” and the LCD monitor is opened at an angle of 45 degrees or more, the LCD monitor switches on and the viewfinder switches off automatically to save power. When you use the LCD monitor outdoors in direct sunlight, the LCD monitor may be difficult to see. If this happens, we recommend that you use the viewfinder.
●When the remaining number indicator displays “0” (blinking), it is not possible to continue storing
pictures until you delete some shots to make room for new ones. Perform “DELETE” function in the Menu Screen to remove pictures you do not need (☞pg. 60).
●The Picture Mode can be switched to either “FINE”or “STANDARD”. Since the remaining number of shots available depends on the selected Picture Mode, switching the Picture Mode will vary this number.
●The LENS COVER warning blinks for approx. 5 seconds when the camcorder is turned on when the cover is closed.
●When the SNAPSHOT Button is pressed with the System Select Switch set to “VIDEO”, the picture is
stored not only in the camcorder's
●When you shoot in a dark environment, the still image will become coarse and its true colours will be lost.