MAINTENANCE
Fitting the cutting unit
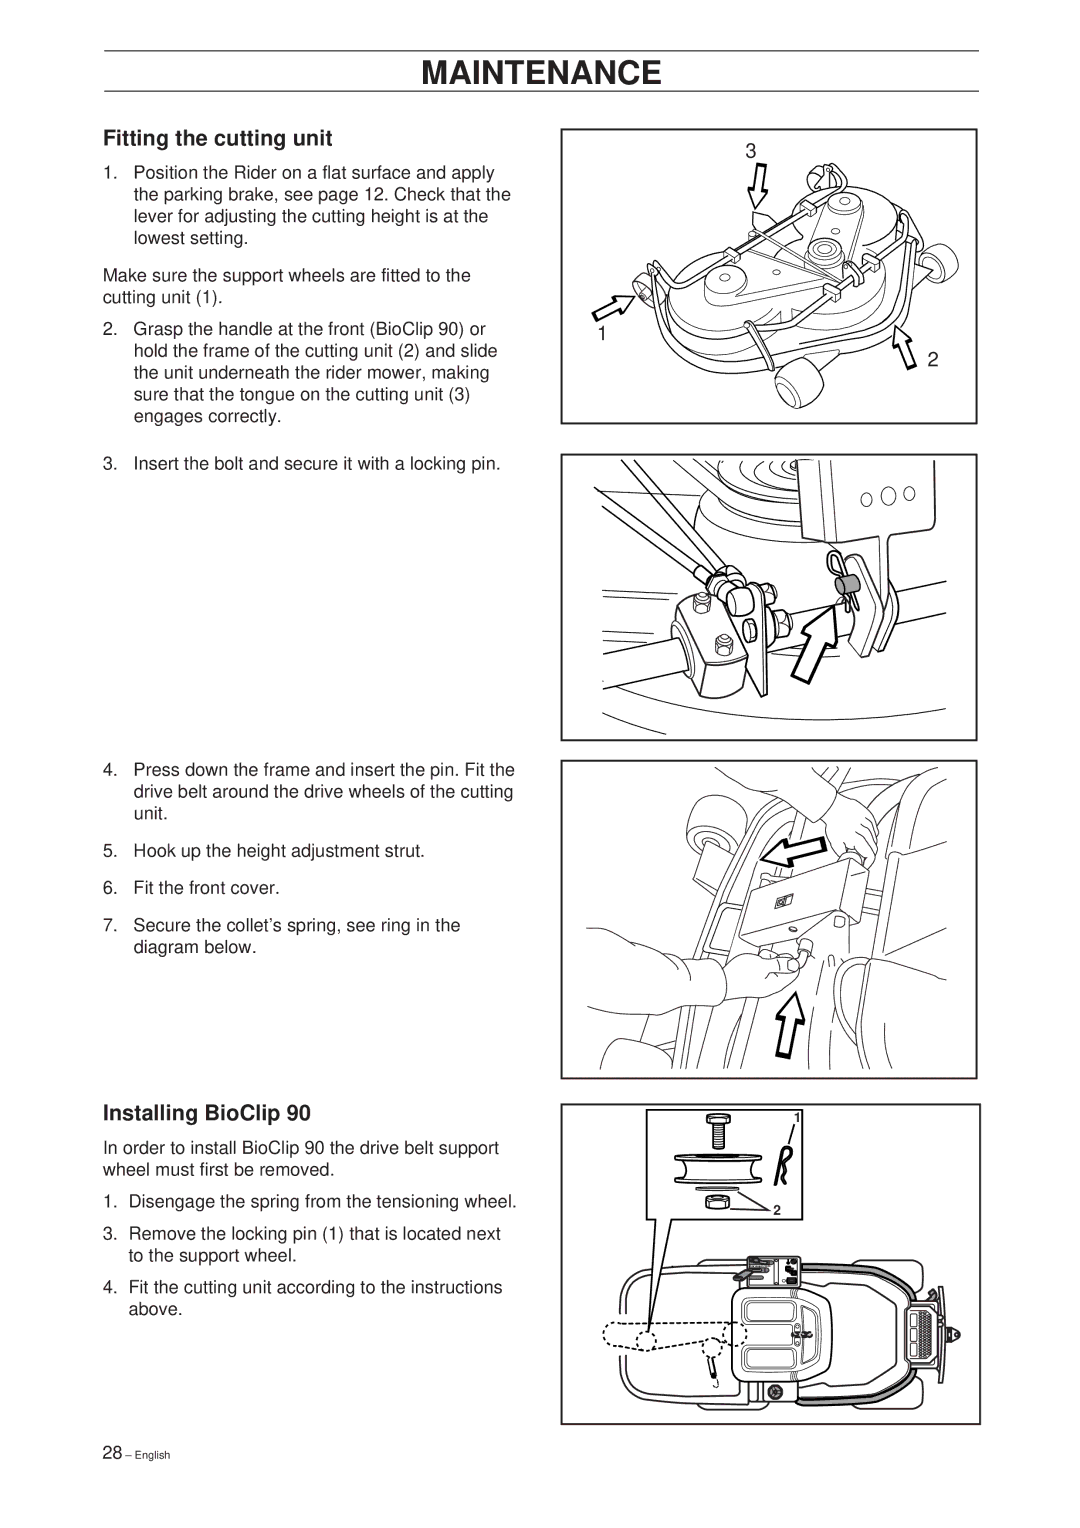
1.Position the Rider on a flat surface and apply the parking brake, see page 12. Check that the lever for adjusting the cutting height is at the lowest setting.
Make sure the support wheels are fitted to the cutting unit (1).
2.Grasp the handle at the front (BioClip 90) or hold the frame of the cutting unit (2) and slide the unit underneath the rider mower, making sure that the tongue on the cutting unit (3) engages correctly.
3.Insert the bolt and secure it with a locking pin.
3 |
1 |
2 |
4.Press down the frame and insert the pin. Fit the drive belt around the drive wheels of the cutting unit.
5.Hook up the height adjustment strut.
6.Fit the front cover.
7.Secure the collet’s spring, see ring in the diagram below.
Installing BioClip 90
In order to install BioClip 90 the drive belt support wheel must first be removed.
1. Disengage the spring from the tensioning wheel.
3.Remove the locking pin (1) that is located next to the support wheel.
4.Fit the cutting unit according to the instructions above.
1
![]() 2
2
9 |
28 – English