MAINTENANCE
Replacing the cutting unit belts
Replacing the belts on a BioClip unit
A BioClip unit is driven by two toothed belts that synchronise the rotation of the blades. The belts sit underneath a cover on the cutting unit.
1. Dismantling the cutting unit, see page 30.
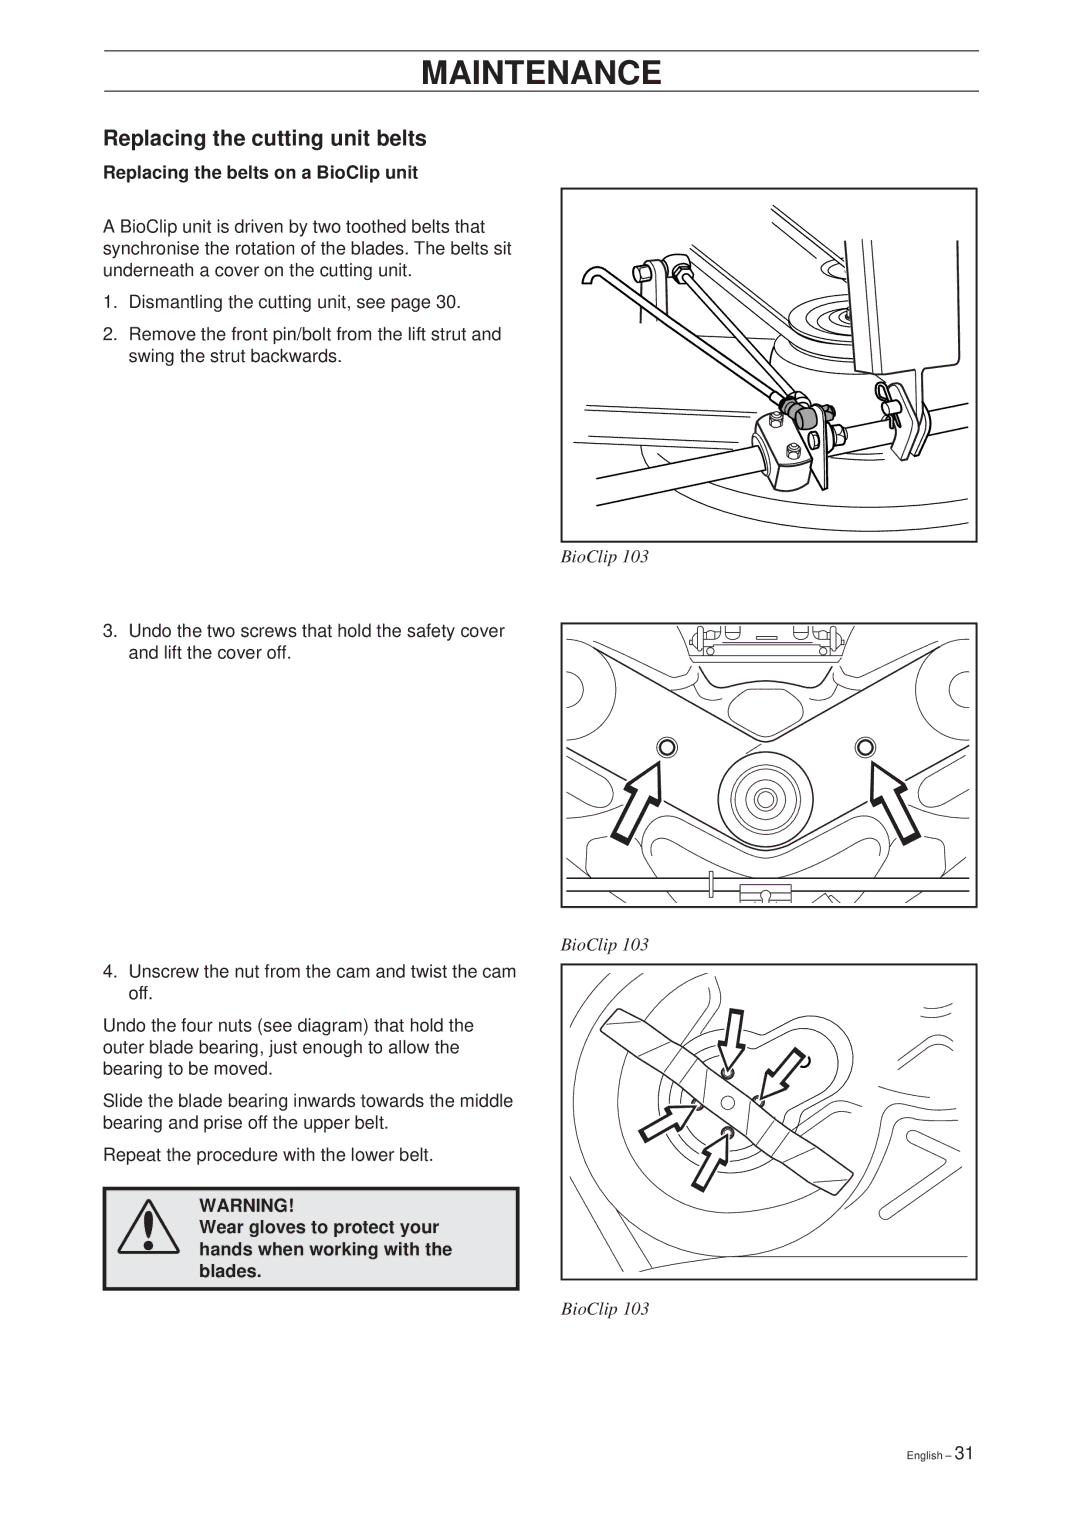
2. Remove the front pin/bolt from the lift strut and swing the strut backwards.
3.Undo the two screws that hold the safety cover and lift the cover off.
4.Unscrew the nut from the cam and twist the cam off.
Undo the four nuts (see diagram) that hold the outer blade bearing, just enough to allow the bearing to be moved.
Slide the blade bearing inwards towards the middle bearing and prise off the upper belt.
Repeat the procedure with the lower belt.
WARNING!
Wear gloves to protect your hands when working with the blades.
BioClip 103
BioClip 103
BioClip 103
English – 31