![]()
![]()
![]()
![]()
![]()
![]()
![]()
![]()
![]()
![]()
![]()
![]()
![]()
![]()
![]()
![]()
![]()
![]()
![]()
![]()
![]()
![]()
![]()
![]()
![]()
![]()
![]()
![]()
![]()
![]()
![]()
![]()
![]()
![]()
![]()
![]()
![]()
![]()
![]()
![]()
![]()
![]()
![]()
![]()
![]()
![]()
![]()
![]()
![]()
![]()
![]()
![]()
![]()
![]()
![]()
![]()
![]()
![]()
![]()
![]()
![]()
![]()
![]()
![]()
![]()
![]()
![]()
![]() EN
EN![]() 49
49![]()
![]()
Manual White Balance Operation
If the camera is operating in manual mode, perform a Manual White Balance when shooting under various types of lighting
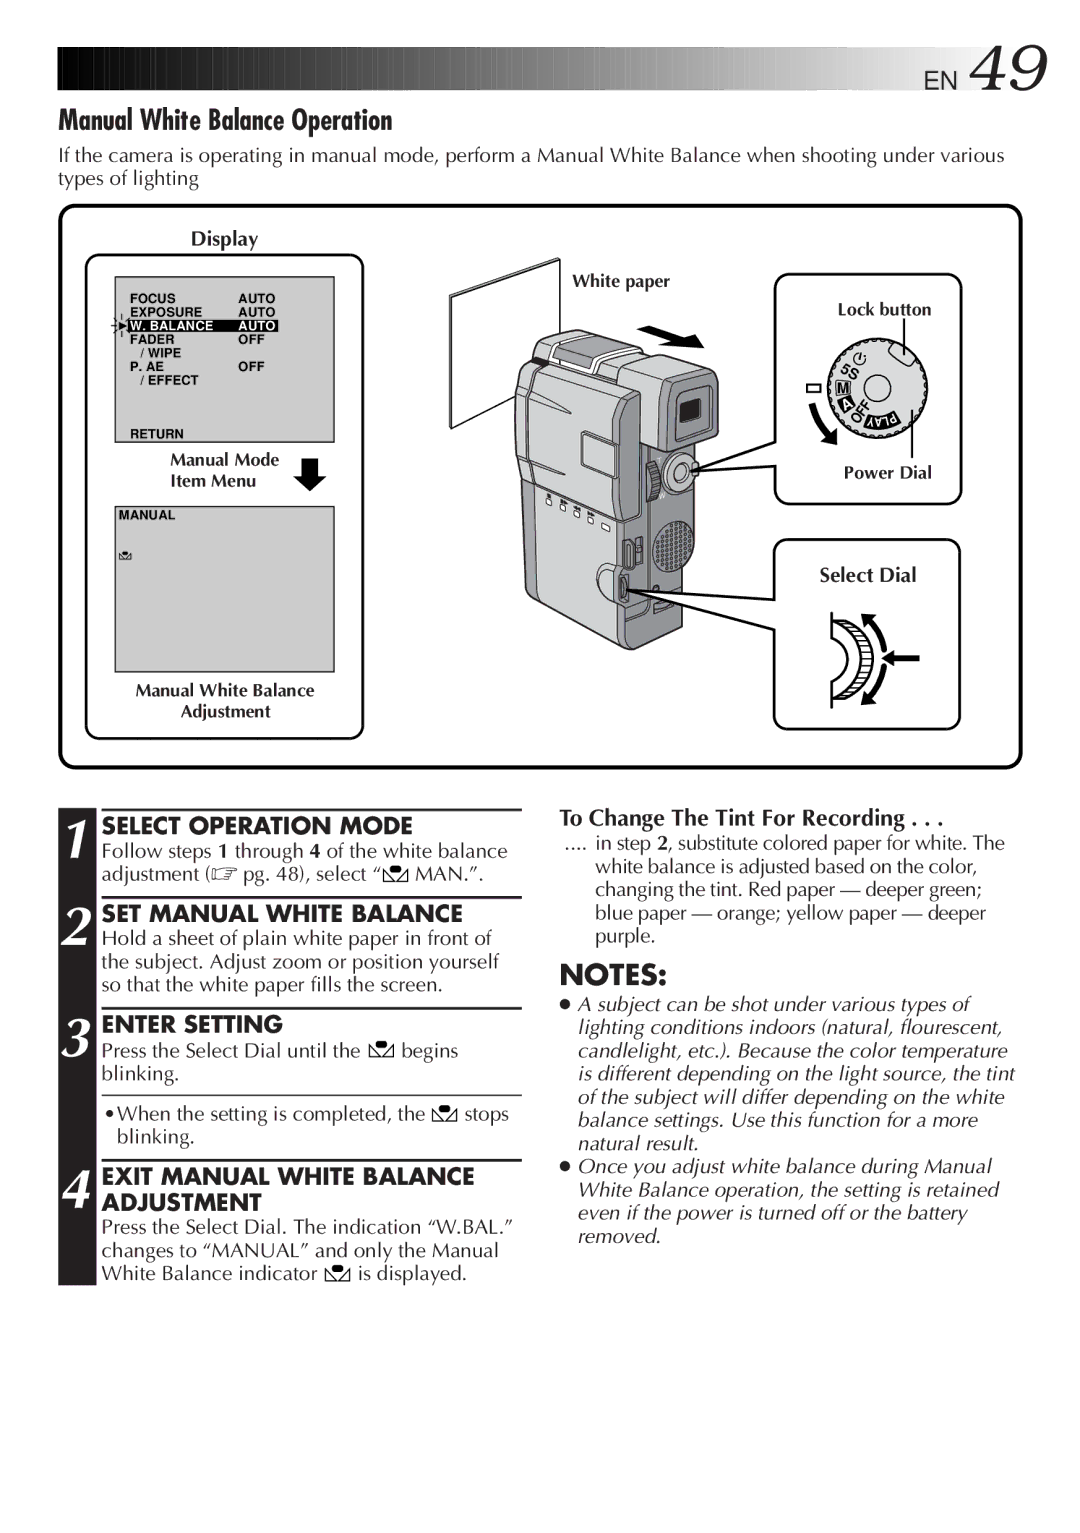
Display
| FOCUS | AUTO |
4 | EXPOSURE | AUTO |
W. BALANCE | AUTO | |
| FADER | OFF |
| / WIPE |
|
| P. AE | OFF |
| / EFFECT |
|
RETURN
Manual Mode
Item Menu
MANUAL
PAUSE
White paper
Lock button
5S |
| |
M | OFF Y |
|
A | P | |
|
| |
|
| AL |
Power Dial
Select Dial
Manual White Balance
Adjustment
1 SELECT OPERATION MODE
Follow steps 1 through 4 of the white balance adjustment (☞ pg. 48), select “![]() MAN.”.
MAN.”.
2 SET MANUAL WHITE BALANCE Hold a sheet of plain white paper in front of the subject. Adjust zoom or position yourself so that the white paper fills the screen.
3 ENTER SETTING
Press the Select Dial until the ![]() begins blinking.
begins blinking.
•When the setting is completed, the ![]() stops blinking.
stops blinking.
4 EXIT MANUAL WHITE BALANCE ADJUSTMENT
Press the Select Dial. The indication “W.BAL.” changes to “MANUAL” and only the Manual White Balance indicator ![]() is displayed.
is displayed.
To Change The Tint For Recording . . .
.... in step 2, substitute colored paper for white. The
white balance is adjusted based on the color, changing the tint. Red paper — deeper green; blue paper — orange; yellow paper — deeper purple.
NOTES:
●A subject can be shot under various types of lighting conditions indoors (natural, flourescent, candlelight, etc.). Because the color temperature is different depending on the light source, the tint of the subject will differ depending on the white balance settings. Use this function for a more natural result.
●Once you adjust white balance during Manual White Balance operation, the setting is retained even if the power is turned off or the battery removed.