58

 EN
EN


 PLAYBACK

Basic![]() Connections
Connections![]()
![]() (Cont.)
(Cont.)![]()
![]()
![]()
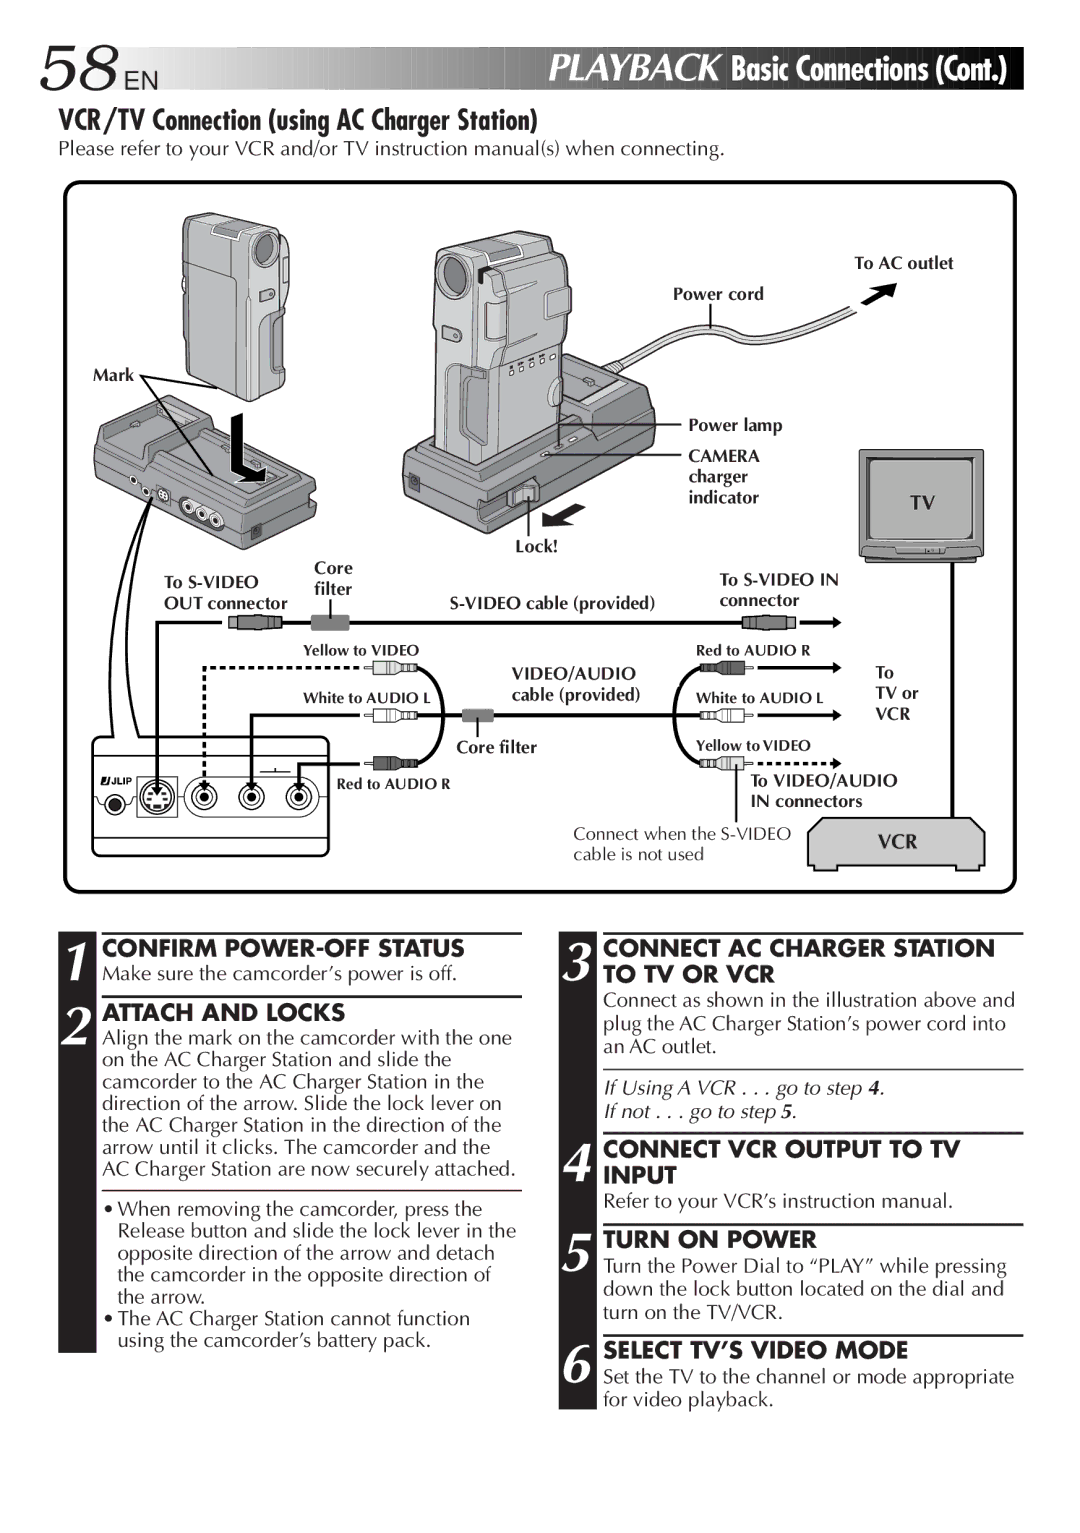
VCR/TV Connection (using AC Charger Station)
Please refer to your VCR and/or TV instruction manual(s) when connecting.
To AC outlet
Power cord
Mark
Power lamp |
|
CAMERA |
|
charger |
|
indicator | TV |
|
| Lock! |
|
|
To | Core |
| To |
|
filter |
|
| ||
OUT connector | connector |
| ||
|
| |||
| Yellow to VIDEO |
| Red to AUDIO R |
|
|
| VIDEO/AUDIO |
| To |
| White to AUDIO L | cable (provided) | White to AUDIO L | TV or |
|
|
|
| VCR |
|
| Core filter | Yellow to VIDEO |
|
Red to AUDIO R
1 CONFIRM
2 ATTACH AND LOCKS
Align the mark on the camcorder with the one on the AC Charger Station and slide the camcorder to the AC Charger Station in the direction of the arrow. Slide the lock lever on the AC Charger Station in the direction of the arrow until it clicks. The camcorder and the AC Charger Station are now securely attached.
•When removing the camcorder, press the Release button and slide the lock lever in the opposite direction of the arrow and detach the camcorder in the opposite direction of the arrow.
•The AC Charger Station cannot function using the camcorder’s battery pack.
To VIDEO/AUDIO
IN connectors
Connect when the | VCR | |
cable is not used | ||
|
3 CONNECT AC CHARGER STATION TO TV OR VCR
Connect as shown in the illustration above and plug the AC Charger Station’s power cord into an AC outlet.
If Using A VCR . . . go to step 4.
If not . . . go to step 5.
4 CONNECTINPUT VCR OUTPUT TO TV Refer to your VCR’s instruction manual.
5 TURN ON POWER
Turn the Power Dial to “PLAY” while pressing down the lock button located on the dial and turn on the TV/VCR.
6 SELECT TV’S VIDEO MODE
Set the TV to the channel or mode appropriate for video playback.