30

 EN
EN


 RECORDING

Advanced Features
 (Cont.)


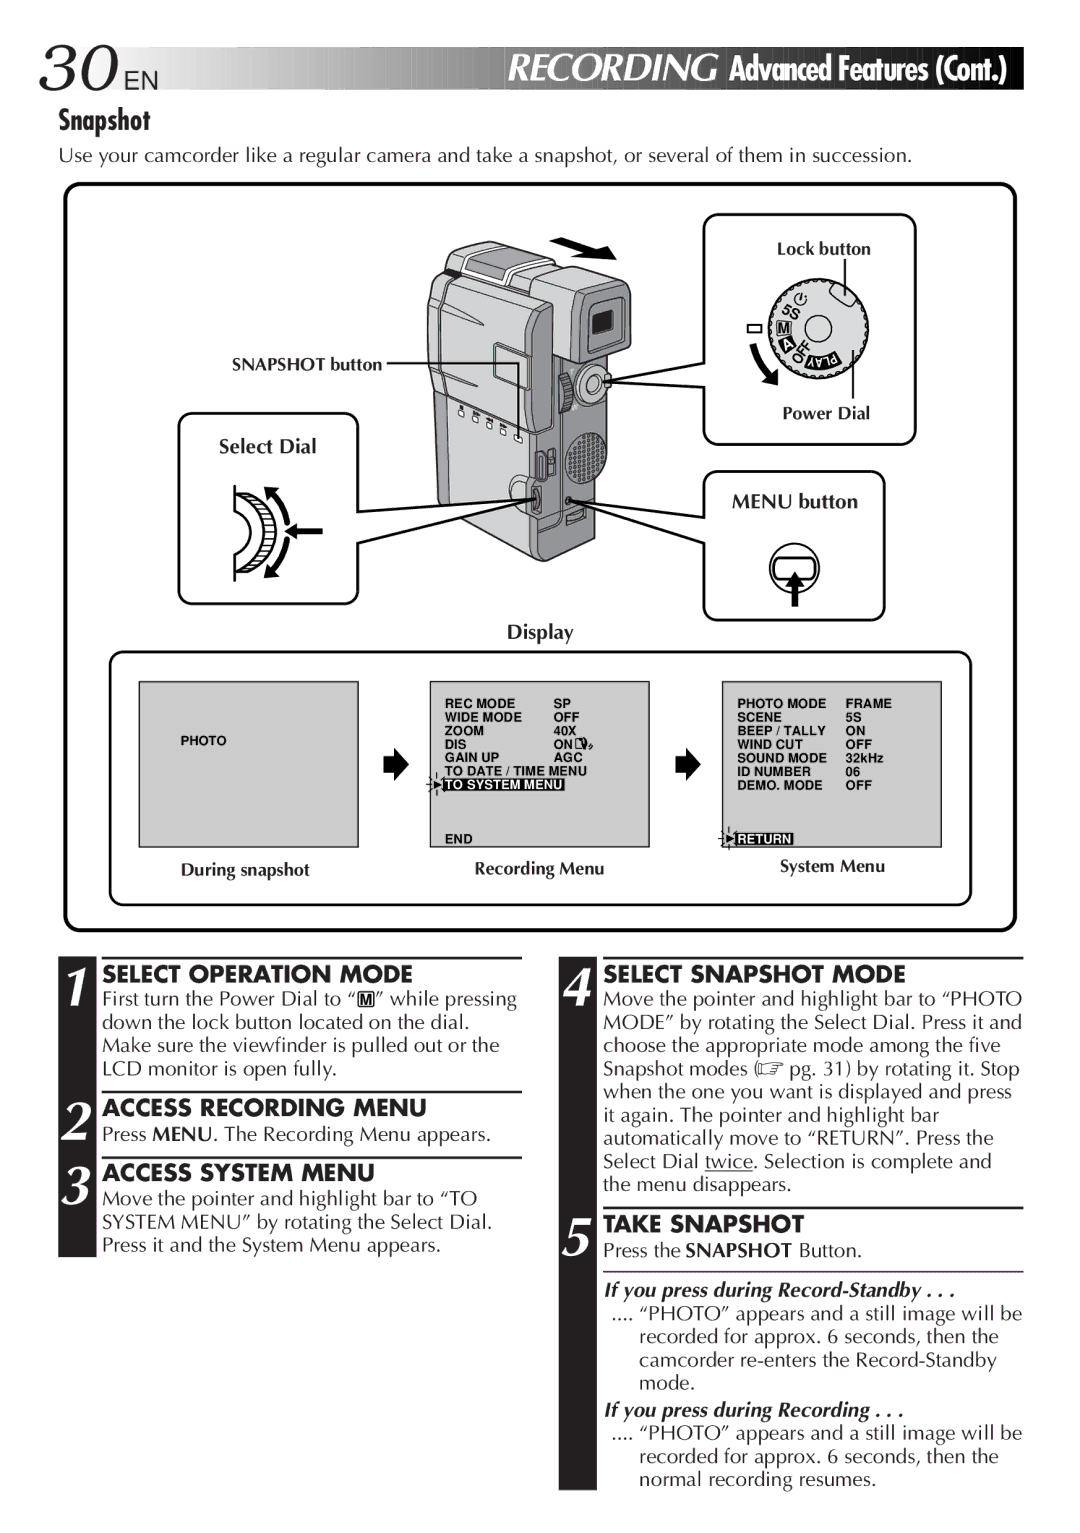
Snapshot
Use your camcorder like a regular camera and take a snapshot, or several of them in succession.
Lock button
SNAPSHOT button
Select Dial
5S |
| |
M | OFF Y |
|
A | P | |
|
| |
|
| AL |
Power Dial
MENU button
Display
PHOTO
During snapshot
REC MODE | SP |
WIDE MODE | OFF |
ZOOM | 40X |
DIS | ON |
GAIN UP | AGC |
TO DATE / TIME MENU
4TO SYSTEM MENU
END
Recording Menu
PHOTO MODE | FRAME |
SCENE | 5S |
BEEP / TALLY | ON |
WIND CUT | OFF |
SOUND MODE | 32kHz |
ID NUMBER | 06 |
DEMO. MODE | OFF |
4RETURN
System Menu
SELECT OPERATION MODE | ||
1 First turn the Power Dial to “ | M | ” while pressing |
down the lock button located on the dial. Make sure the viewfinder is pulled out or the LCD monitor is open fully.
2 ACCESS RECORDING MENU Press MENU. The Recording Menu appears.
3 ACCESS SYSTEM MENU
Move the pointer and highlight bar to “TO SYSTEM MENU” by rotating the Select Dial. Press it and the System Menu appears.
4 SELECT SNAPSHOT MODE
Move the pointer and highlight bar to “PHOTO MODE” by rotating the Select Dial. Press it and choose the appropriate mode among the five Snapshot modes (☞ pg. 31) by rotating it. Stop when the one you want is displayed and press it again. The pointer and highlight bar automatically move to “RETURN”. Press the Select Dial twice. Selection is complete and the menu disappears.
5 TAKE SNAPSHOT
Press the SNAPSHOT Button.
If you press during Record-Standby . . .
.... “PHOTO” appears and a still image will be
recorded for approx. 6 seconds, then the camcorder
If you press during Recording . . .
.... “PHOTO” appears and a still image will be
recorded for approx. 6 seconds, then the normal recording resumes.