18
 EN
EN


 SUPPLYING
 THE
THE POWER
POWER
Charging the battery
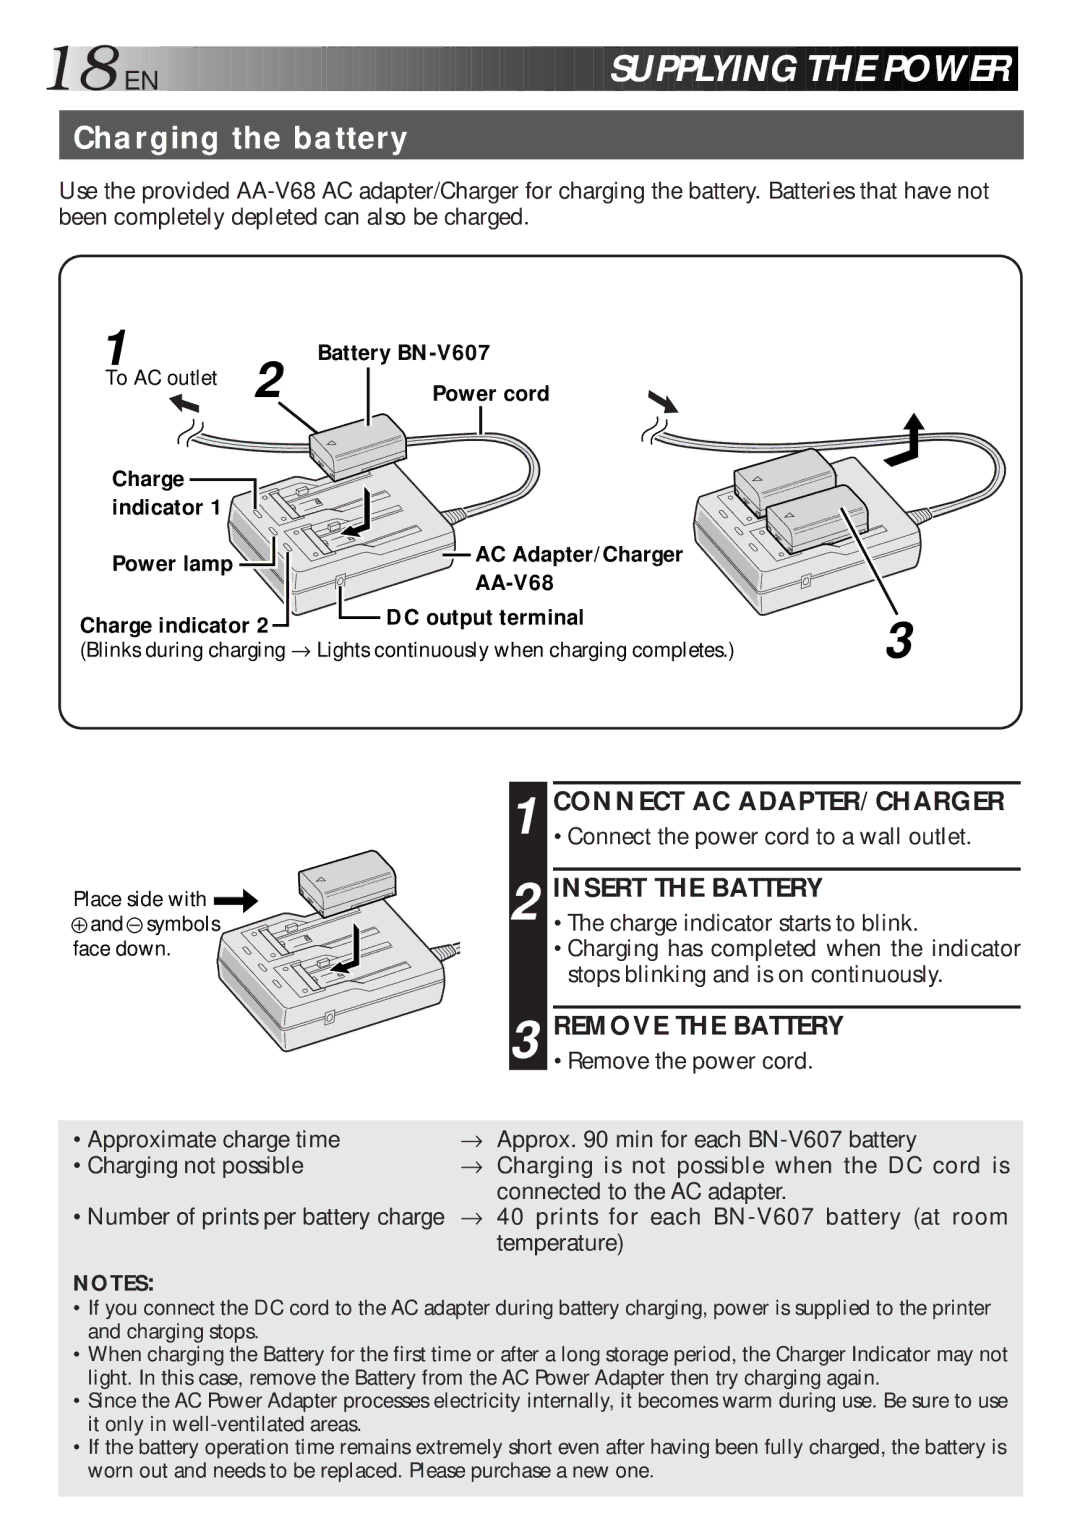
Use the provided
1 | 2 | Battery |
|
To AC outlet | Power cord |
| |
Charge |
|
|
|
indicator 1 |
|
|
|
Power lamp |
| AC Adapter/Charger |
|
|
| ||
|
|
| |
Charge indicator 2 | DC output terminal | 3 | |
| |||
(Blinks during charging → Lights continuously when charging completes.) | |||
Place side with ![]()
![]() and
and ![]() symbols face down.
symbols face down.
1 CONNECT AC ADAPTER/CHARGER •Connect the power cord to a wall outlet.
2 INSERT THE BATTERY
•The charge indicator starts to blink. •Charging has completed when the indicator
stops blinking and is on continuously.
3 REMOVE THE BATTERY •Remove the power cord.
•Approximate charge time | → Approx. 90 min for each |
•Charging not possible | → Charging is not possible when the DC cord is |
| connected to the AC adapter. |
•Number of prints per battery charge | → 40 prints for each |
| temperature) |
NOTES:
•If you connect the DC cord to the AC adapter during battery charging, power is supplied to the printer and charging stops.
•When charging the Battery for the first time or after a long storage period, the Charger Indicator may not light. In this case, remove the Battery from the AC Power Adapter then try charging again.
•Since the AC Power Adapter processes electricity internally, it becomes warm during use. Be sure to use it only in
•If the battery operation time remains extremely short even after having been fully charged, the battery is worn out and needs to be replaced. Please purchase a new one.
