50![]()
![]()
![]() EN
EN![]()
![]()
![]()
![]()
![]()
![]()
![]()
![]()
![]()
![]()
![]()
![]()
![]()
![]()
![]()
![]()
![]()
![]()
![]()
![]()
![]()
![]()
![]()
![]()
![]()
![]()
![]()
![]()
![]()
![]()
![]()
![]()
![]()
![]()
![]()
![]()
![]()
![]()
![]()
![]()
![]()
![]()
![]()
![]()
![]()
![]()
![]()
![]()
![]()
![]()
![]()


 EDITING
 (cont.)


You can use your VCR as the player or the recorder.
Edit To Or
From Another 1
VCR
| VIDEO OUT | 2 | |
Player | Your VCR | ||
| |||
|
| 3 | |
| AUDIO OUT |
| |
| Audio/Video cable |
| |
| (supplied) |
| |
VIDEO IN | AUDIO IN |
|
4 |
Recorder | Another VCR |
5
MAKE CONNECTIONS
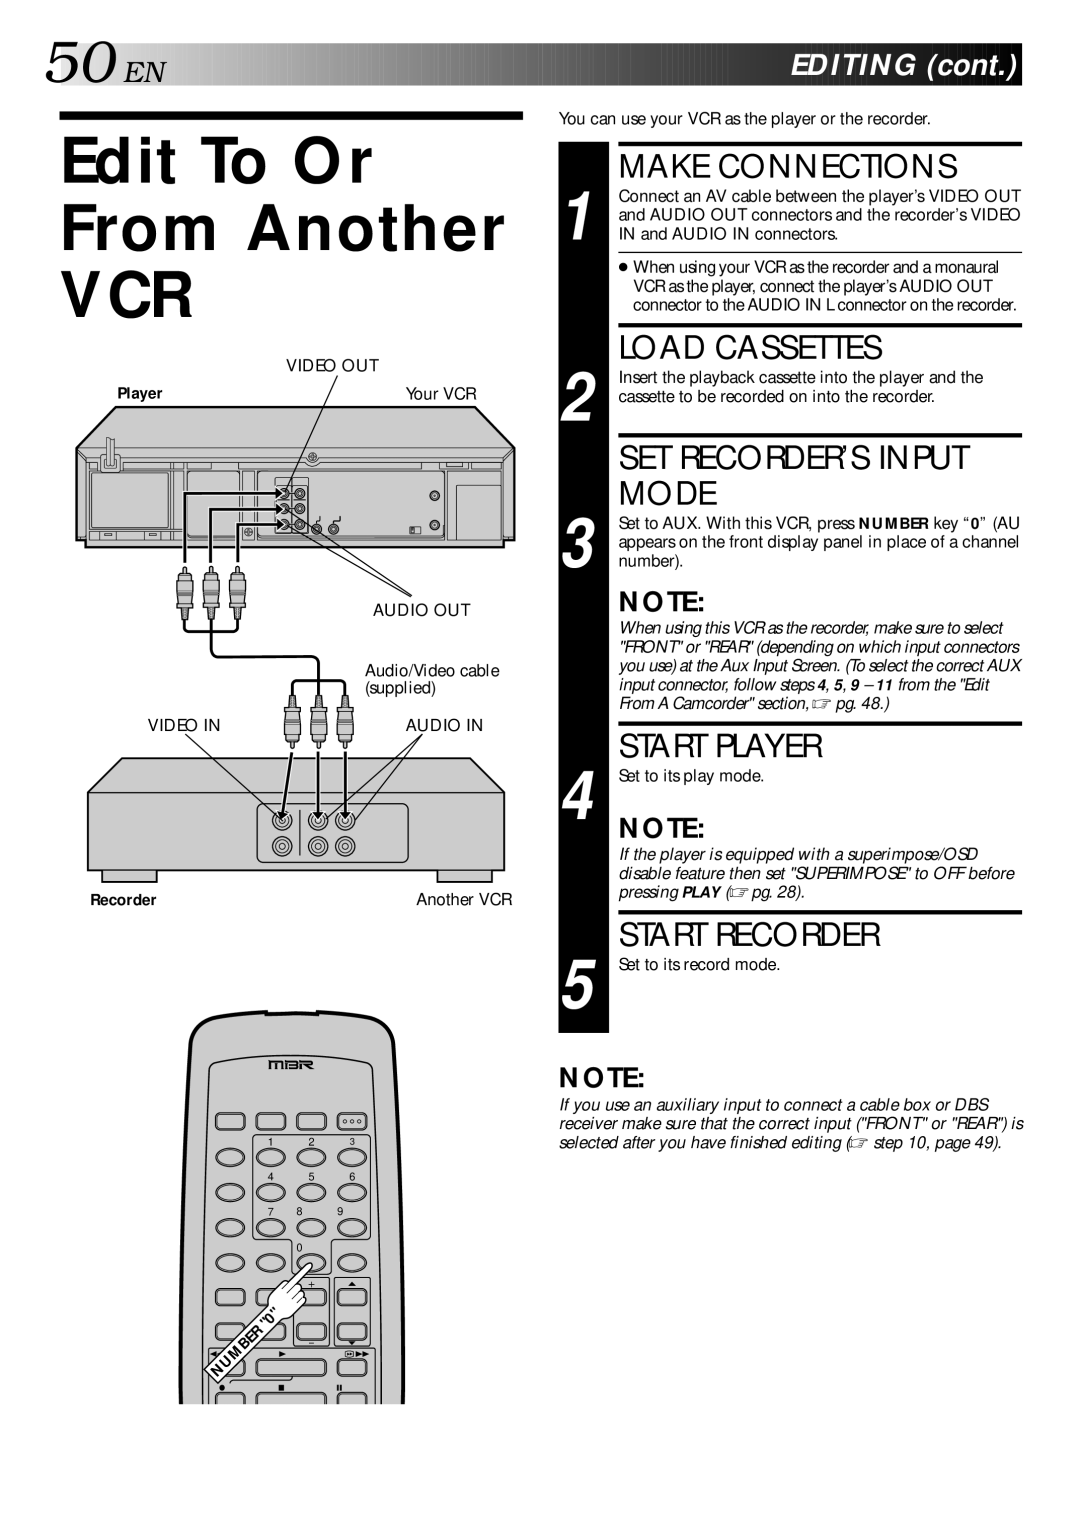
Connect an AV cable between the player’s VIDEO OUT and AUDIO OUT connectors and the recorder’s VIDEO IN and AUDIO IN connectors.
●When using your VCR as the recorder and a monaural VCR as the player, connect the player’s AUDIO OUT connector to the AUDIO IN L connector on the recorder.
LOAD CASSETTES
Insert the playback cassette into the player and the cassette to be recorded on into the recorder.
SET RECORDER’S INPUT MODE
Set to AUX. With this VCR, press NUMBER key “0” (AU appears on the front display panel in place of a channel number).
NOTE:
When using this VCR as the recorder, make sure to select "FRONT" or "REAR" (depending on which input connectors you use) at the Aux Input Screen. (To select the correct AUX input connector, follow steps 4, 5, 9 – 11 from the "Edit From A Camcorder" section, ☞ pg. 48.)
START PLAYER
Set to its play mode.
NOTE:
If the player is equipped with a superimpose/OSD disable feature then set "SUPERIMPOSE" to OFF before pressing PLAY (☞ pg. 28).
START RECORDER
Set to its record mode.
|
|
| NOTE: |
|
|
| If you use an auxiliary input to connect a cable box or DBS |
|
|
| receiver make sure that the correct input ("FRONT" or "REAR") is |
1 | 2 | 3 | selected after you have finished editing (☞ step 10, page 49). |
4 | 5 | 6 |
|
7 | 8 | 9 |
|
| 0 |
|
|
1![]() 3
3 ![]() Á
Á
¦ 7 8
