10![]()
![]()
![]() EN
EN![]()
![]()
![]()
![]()
![]()
![]()
![]()
![]()
![]()
![]()
![]()
![]()
![]()
![]()
![]()
![]()
![]()
![]()
![]()
![]()
![]()
![]()
![]()
![]()
![]()
![]()
![]()
![]()
![]()
![]()
![]()
![]()
![]()
![]()
![]()
![]()
![]()
![]()
![]()
![]()
![]()
![]()
![]()
![]()
![]()
![]()
![]()
![]()
![]()
![]()
![]()
![]()
![]()
![]()
![]()
![]()
![]()
![]()
![]()
![]()
![]()
![]()
![]()
![]()
![]()
![]()
![]()
![]()
![]()
![]()
![]()
![]()
![]()
![]()
![]()
![]()
![]()
![]()
![]()
![]()
![]() PLAYBACK
PLAYBACK![]()
![]()
![]()
Basic
Playback
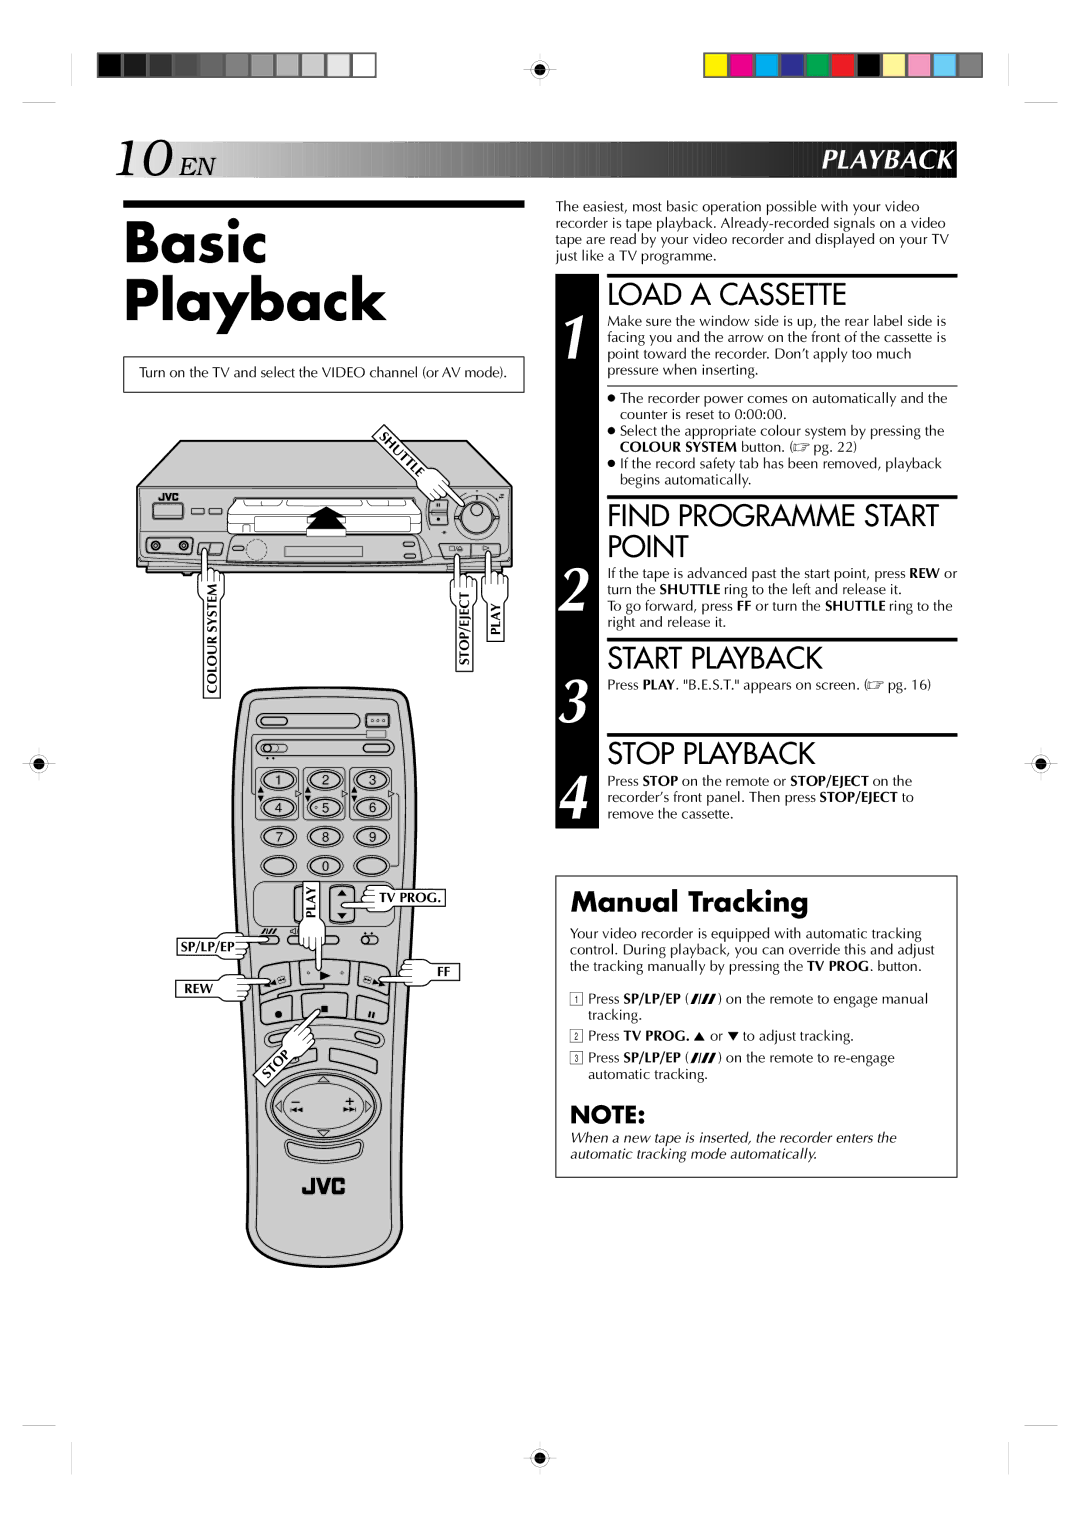
Turn on the TV and select the VIDEO channel (or AV mode).
HUTTLE
6
q
COLOUR SYSTEM | STOP/EJECT | PLAY |
1 2 3
4 | 5 | 6 |
7 8 9
0
The easiest, most basic operation possible with your video recorder is tape playback.
1 |
| LOAD A CASSETTE |
| Make sure the window side is up, the rear label side is | |
| facing you and the arrow on the front of the cassette is | |
| point toward the recorder. Don’t apply too much | |
|
| pressure when inserting. |
|
|
|
|
| ● The recorder power comes on automatically and the |
|
| counter is reset to 0:00:00. |
|
| ● Select the appropriate colour system by pressing the |
|
| COLOUR SYSTEM button. (☞ pg. 22) |
|
| ● If the record safety tab has been removed, playback |
|
| begins automatically. |
|
|
|
|
| FIND PROGRAMME START |
2 |
| POINT |
| If the tape is advanced past the start point, press REW or | |
turn the SHUTTLE ring to the left and release it. | ||
To go forward, press FF or turn the SHUTTLE ring to the | ||
| right and release it. | |
|
|
|
3 |
| START PLAYBACK |
| Press PLAY. "B.E.S.T." appears on screen. (☞ pg. 16) | |
4 |
| STOP PLAYBACK |
| Press STOP on the remote or STOP/EJECT on the | |
| recorder’s front panel. Then press STOP/EJECT to | |
| remove the cassette. | |
PLAY
SP/LP/EP![]()
REW
STOP![]()
TV PROG.
FF
Manual Tracking
Your video recorder is equipped with automatic tracking control. During playback, you can override this and adjust the tracking manually by pressing the TV PROG. button.
1Press SP/LP/EP (![]()
![]() ) on the remote to engage manual tracking.
) on the remote to engage manual tracking.
2Press TV PROG. 5 or ° to adjust tracking.
3Press SP/LP/EP (![]()
![]() ) on the remote to
) on the remote to
NOTE:
When a new tape is inserted, the recorder enters the automatic tracking mode automatically.