Adjusting the Equalization Patterns
—DIGITAL EQ
You can adjust the equalization patterns to your preference.
•Once you have made adjustment, it is memorized for each source.
Using the
2.Press CONTROL UP 5 or DOWN ∞ repeatedly to adjust the
frequency level.
The DIGITAL EQ indicator lights up on the display.
•The frequency level changes from
CONTROL
DOWN UP
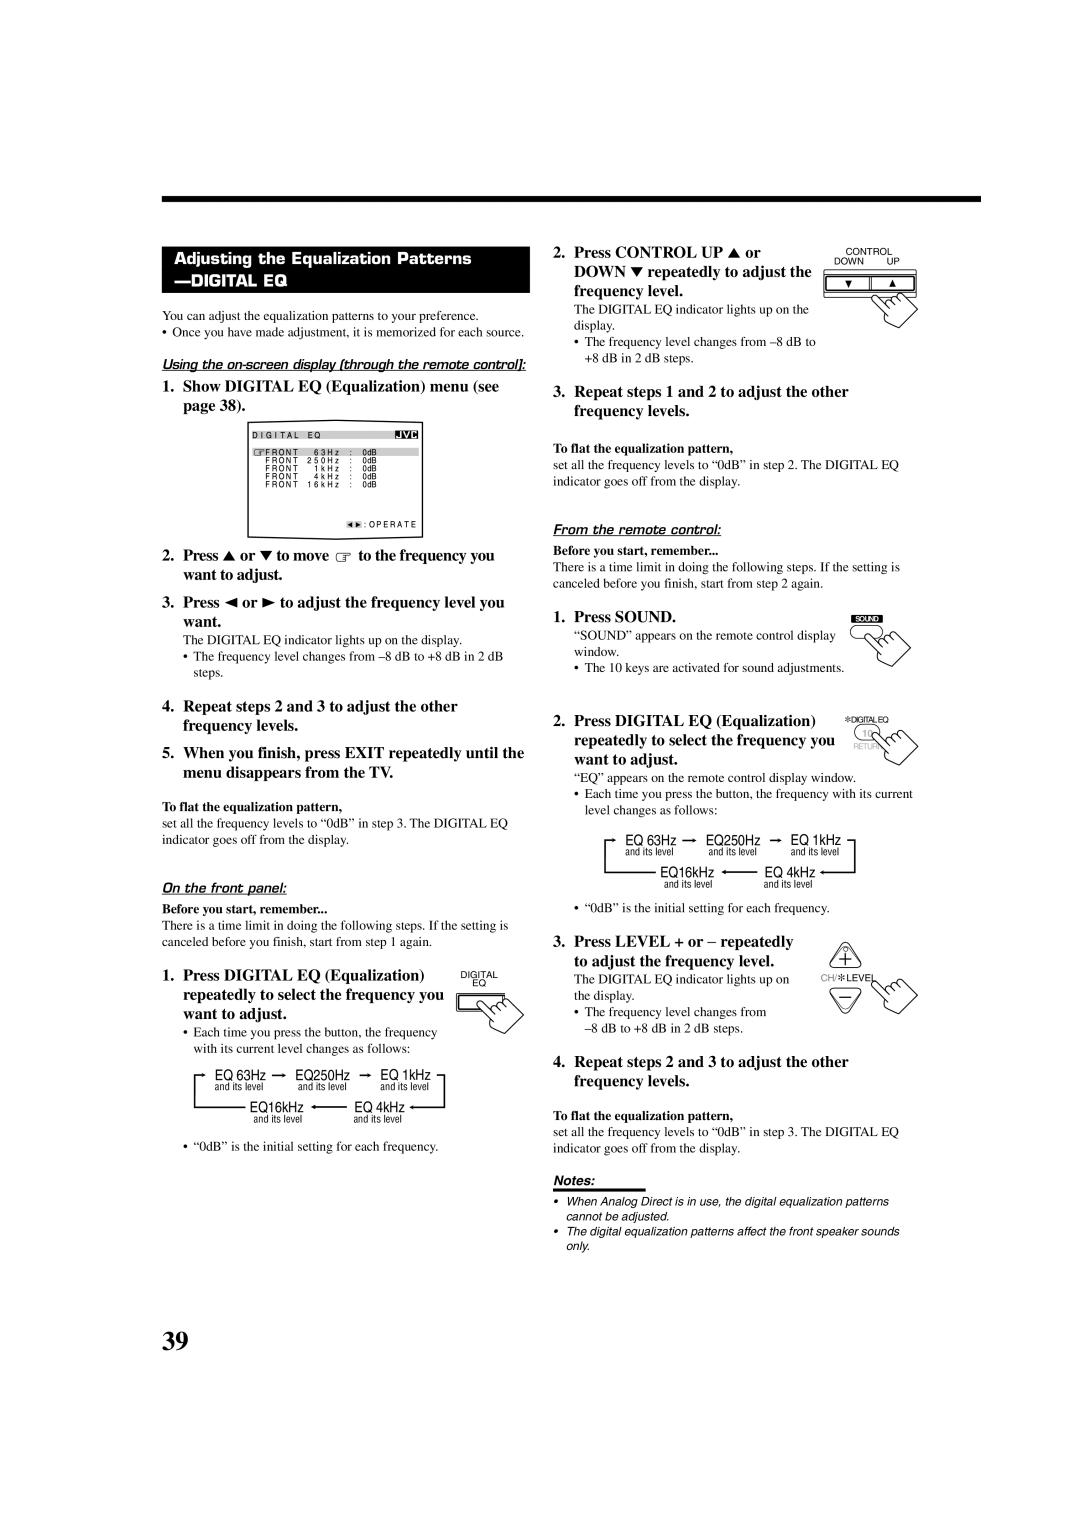
1.Show DIGITAL EQ (Equalization) menu (see page 38).
2.Press 5 or ∞ to move ![]() to the frequency you want to adjust.
to the frequency you want to adjust.
3.Press 2 or 3 to adjust the frequency level you
want.
The DIGITAL EQ indicator lights up on the display.
•The frequency level changes from
4.Repeat steps 2 and 3 to adjust the other frequency levels.
5.When you finish, press EXIT repeatedly until the menu disappears from the TV.
To flat the equalization pattern,
set all the frequency levels to “0dB” in step 3. The DIGITAL EQ indicator goes off from the display.
On the front panel:
Before you start, remember...
There is a time limit in doing the following steps. If the setting is canceled before you finish, start from step 1 again.
1. Press DIGITAL EQ (Equalization) | DIGITAL | LEV |
repeatedly to select the frequency you | EQ | ADJU |
|
| |
|
| |
want to adjust. |
|
|
|
| |
|
|
•Each time you press the button, the frequency with its current level changes as follows:
EQ 63Hz  EQ250Hz
  EQ 1kHz
and its level and its level and its level
EQ16kHz | EQ 4kHz |
and its level | and its level |
•“0dB” is the initial setting for each frequency.
3.Repeat steps 1 and 2 to adjust the other frequency levels.
To flat the equalization pattern,
set all the frequency levels to “0dB” in step 2. The DIGITAL EQ indicator goes off from the display.
From the remote control:
Before you start, remember...
There is a time limit in doing the following steps. If the setting is canceled before you finish, start from step 2 again.
1. Press SOUND. | SOUND |
“SOUND” appears on the remote control display window.
•The 10 keys are activated for sound adjustments.
2. Press DIGITAL EQ (Equalization) | ∗DIGITALEQ |
repeatedly to select the frequency you | 10 |
RETURN | |
want to adjust. |
|
“EQ” appears on the remote control display window.
•Each time you press the button, the frequency with its current level changes as follows:
EQ 63Hz |
| EQ250Hz |
|
| EQ 1kHz |
| |
and its level |
| and its level |
|
| and its level | ||
EQ16kHz | EQ 4kHz |
|
| ||||
|
| ||||||
and its level | and its level | ||||||
• “0dB” is the initial setting for each frequency.
3. Press LEVEL + or − repeatedly | + |
to adjust the frequency level. | |
The DIGITAL EQ indicator lights up on | CH/∗LEVEL |
the display. | − |
•The frequency level changes from
4.Repeat steps 2 and 3 to adjust the other frequency levels.
To flat the equalization pattern,
set all the frequency levels to “0dB” in step 3. The DIGITAL EQ indicator goes off from the display.
Notes:
•When Analog Direct is in use, the digital equalization patterns cannot be adjusted.
•The digital equalization patterns affect the front speaker sounds only.
39