12

 EN
EN 


 R
R E
E CORDING Basic
 Recording
 (cont.)
Shooting while watching the LCD monitor

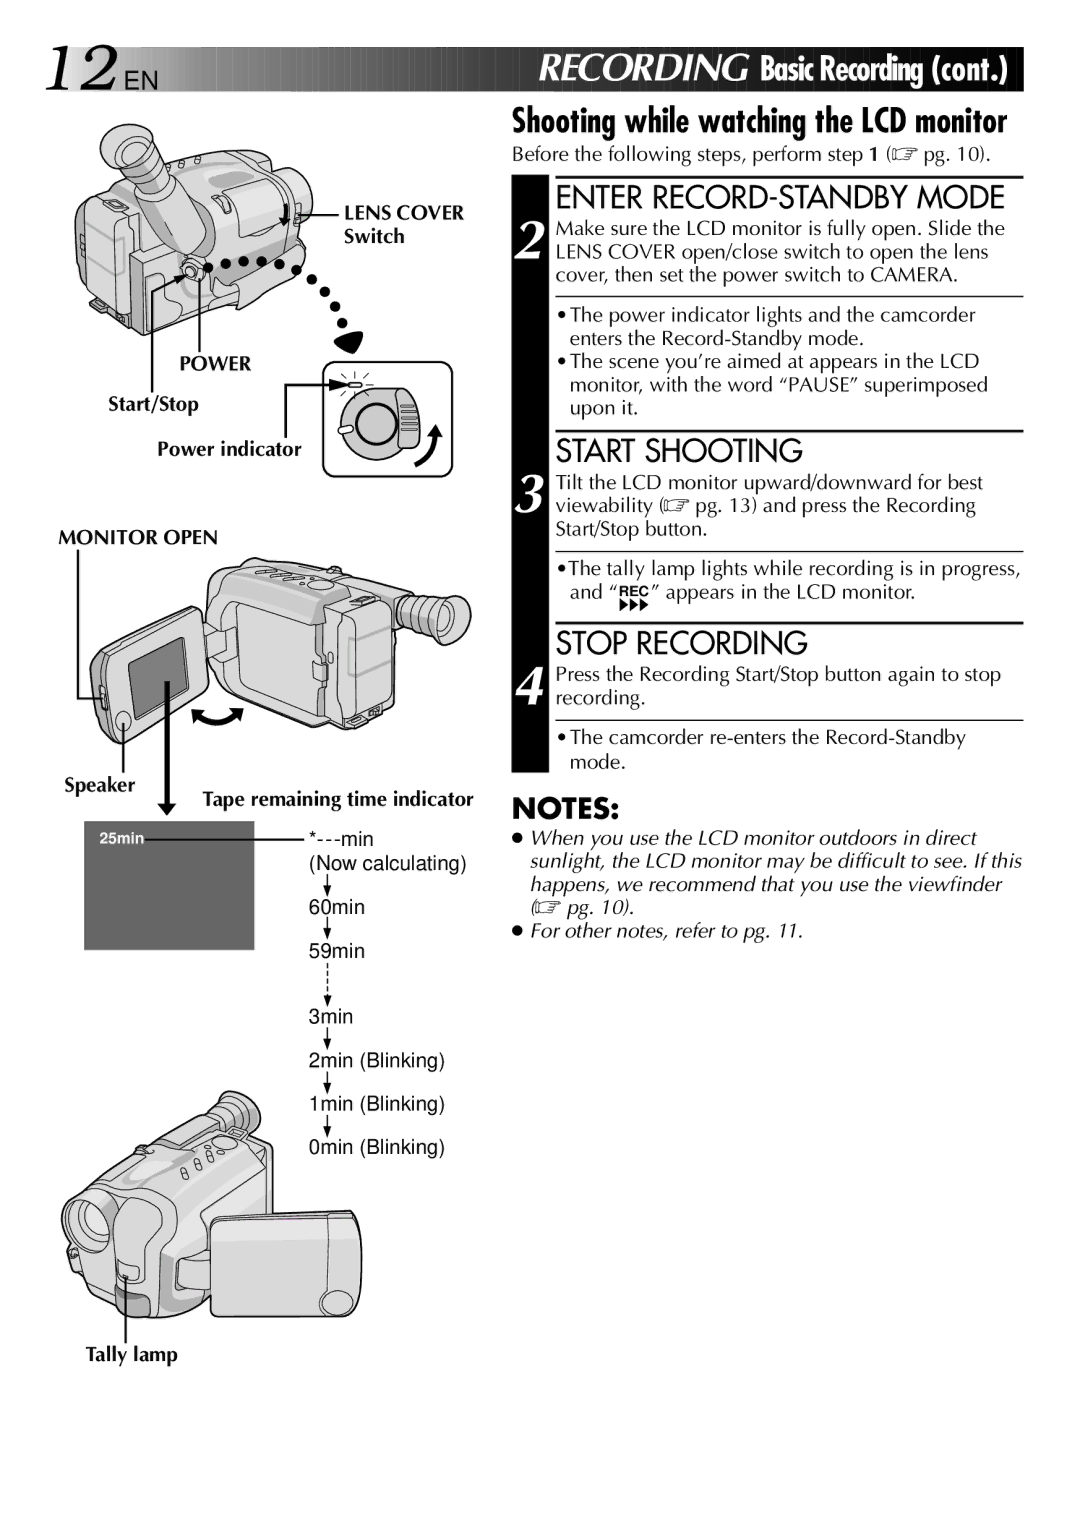
 LENS COVER
Switch
POWER
Start/Stop
Power indicator
MONITOR OPEN
Speaker
Tape remaining time indicator
Before the following steps, perform step 1 (☞ pg. 10).
ENTER RECORD-STANDBY MODE
2 Make sure the LCD monitor is fully open. Slide the LENS COVER open/close switch to open the lens cover, then set the power switch to CAMERA.
•The power indicator lights and the camcorder enters the
•The scene you’re aimed at appears in the LCD monitor, with the word “PAUSE” superimposed upon it.
START SHOOTING
3 Tilt the LCD monitor upward/downward for best viewability (☞ pg. 13) and press the Recording Start/Stop button.
•The tally lamp lights while recording is in progress, and “REC ” appears in the LCD monitor.
STOP RECORDING
4 Press the Recording Start/Stop button again to stop recording.
•The camcorder
NOTES:
25min | |
| (Now calculating) |
| 60min |
| 59min |
| 3min |
| 2min (Blinking) |
| 1min (Blinking) |
| 0min (Blinking) |
●When you use the LCD monitor outdoors in direct sunlight, the LCD monitor may be difficult to see. If this
happens, we recommend that you use the viewfinder (☞ pg. 10).
●For other notes, refer to pg. 11.
Tally lamp