Getting Started |
| Continued |
|
|
|
Unpacking | Connecting Antennas | |
|
|
|
English
After unpacking, check to be sure that you have all the following items.
The number in the parentheses indicates the quantity of the pieces supplied.
•AM loop antenna (1)
•FM antenna (1)
•Remote control (1)
•Batteries (2)
•Video cord (1)
•AC plug adaptor (except for Argentina: 1)
If any is missing, consult your dealer immediately.
Putting the Batteries into the Remote Control
Insert the batteries —
When the remote control can no longer operate the unit, replace both batteries at the same time.
1 |
2 |
AA(15F) |
3 |
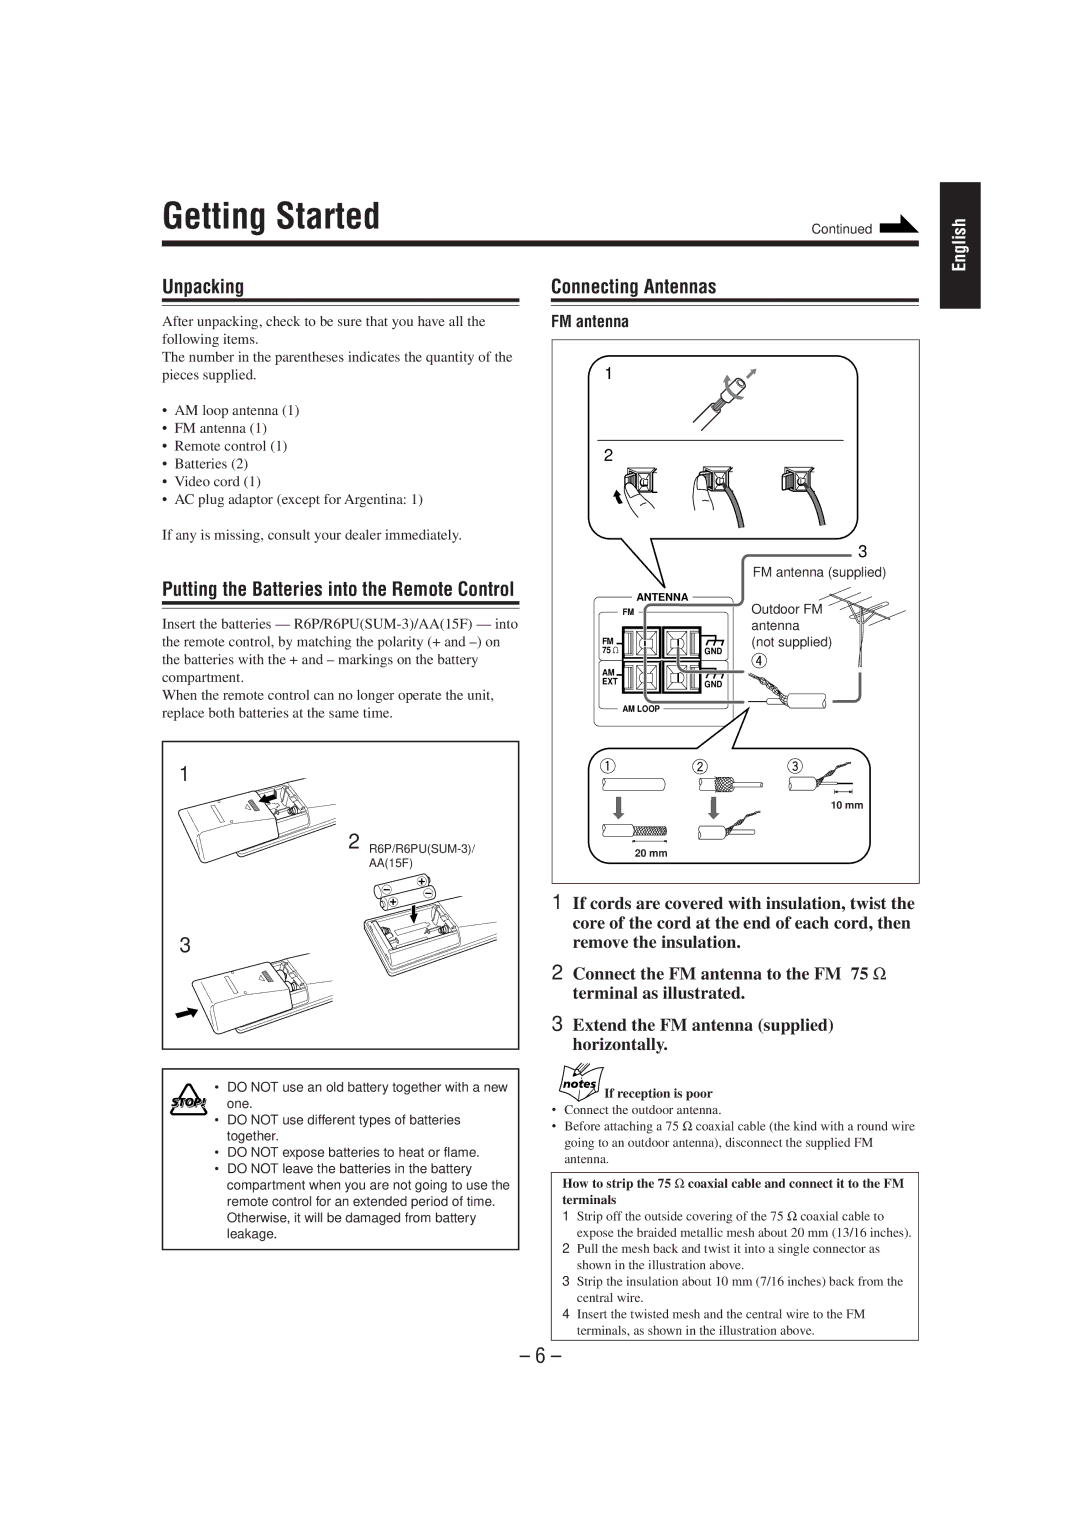
FM antenna
1 |
|
2 |
|
| 3 |
| FM antenna (supplied) |
ANTENNA | Outdoor FM |
FM | |
| antenna |
FM | (not supplied) |
75 | GND |
AM |
|
EXT | GND |
| |
AM LOOP |
|
| 10 mm |
20 mm |
|
1If cords are covered with insulation, twist the core of the cord at the end of each cord, then remove the insulation.
2Connect the FM antenna to the FM 75 Ω terminal as illustrated.
3Extend the FM antenna (supplied) horizontally.
• DO NOT use an old battery together with a new ![]()
![]()
![]() one.
one.
•DO NOT use different types of batteries together.
•DO NOT expose batteries to heat or flame.
•DO NOT leave the batteries in the battery compartment when you are not going to use the remote control for an extended period of time. Otherwise, it will be damaged from battery leakage.
If reception is poor
•Connect the outdoor antenna.
•Before attaching a 75 Ω coaxial cable (the kind with a round wire going to an outdoor antenna), disconnect the supplied FM antenna.
How to strip the 75 Ω coaxial cable and connect it to the FM terminals
1Strip off the outside covering of the 75 Ω coaxial cable to
expose the braided metallic mesh about 20 mm (13/16 inches).
2Pull the mesh back and twist it into a single connector as shown in the illustration above.
3Strip the insulation about 10 mm (7/16 inches) back from the central wire.
4Insert the twisted mesh and the central wire to the FM terminals, as shown in the illustration above.
– 6 –