
RX-E100RSL specifications
The JVC RX-E100RSL is a standout receiver that perfectly blends modern technology with user-friendly features, making it an excellent choice for both casual listeners and serious audiophiles. This receiver is designed to provide high-quality sound performance without sacrificing ease of use.One of the main features of the JVC RX-E100RSL is its robust power output, delivering 100 watts per channel. This substantial wattage ensures that it can drive a variety of speakers without compromising sound quality. Users will appreciate the clean and clear audio performance across all frequency ranges, whether they are engaging in a casual listening session or hosting a party with friends.
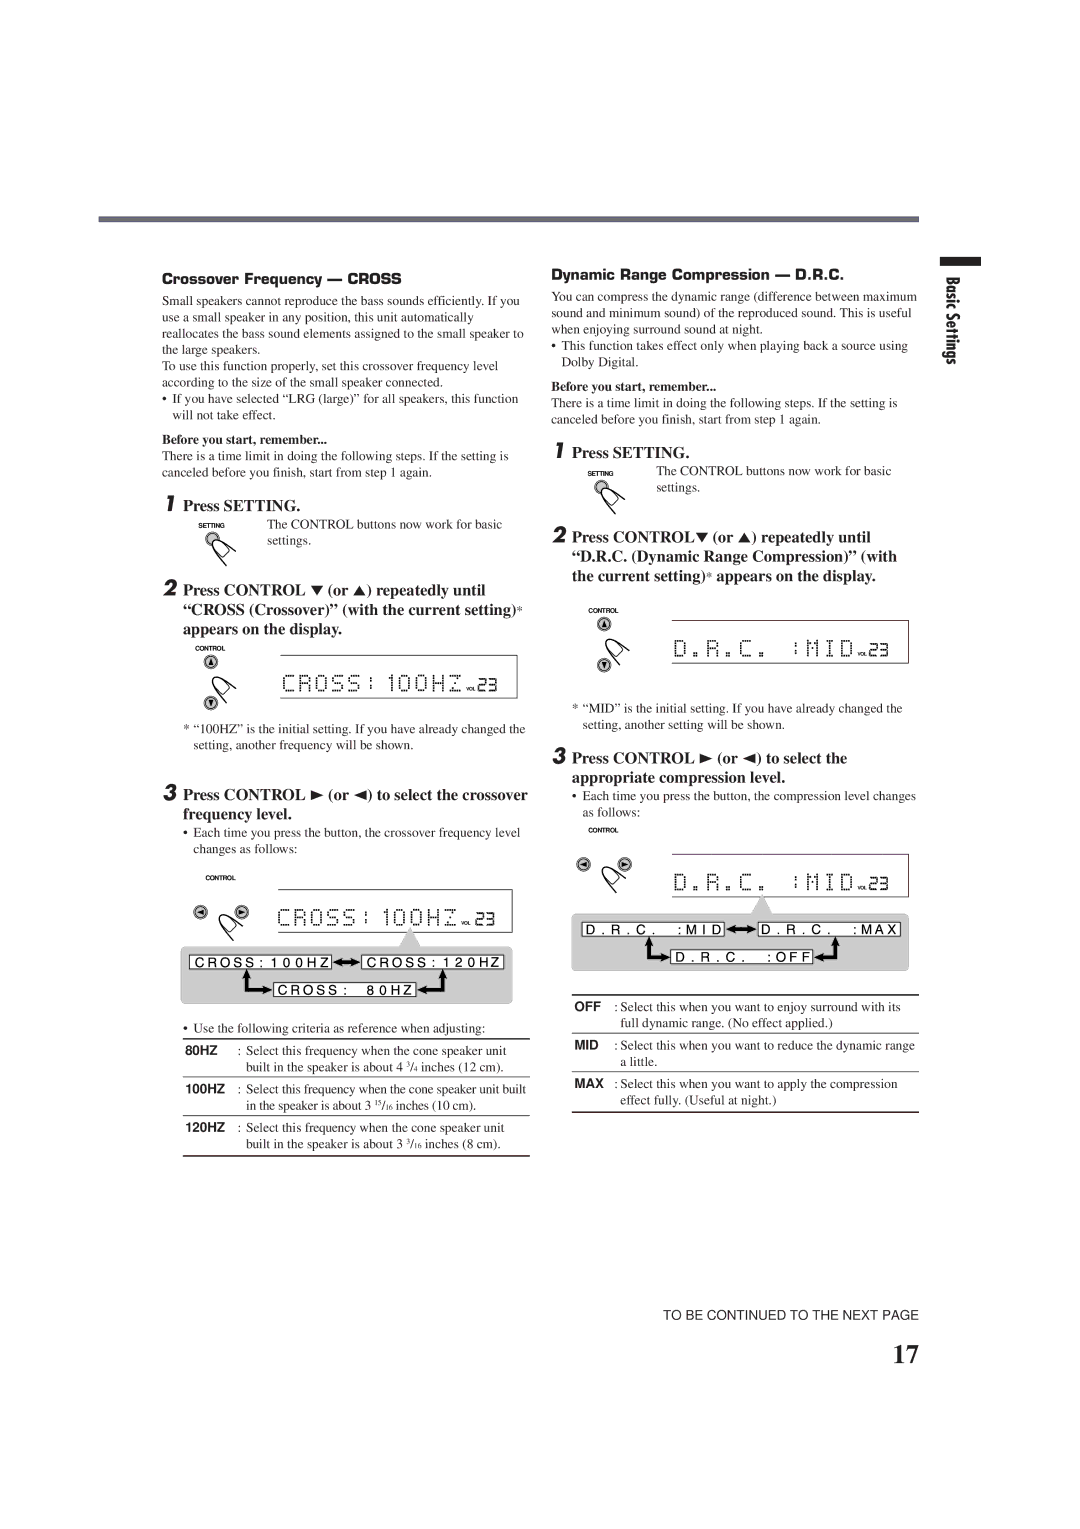
The RX-E100RSL is equipped with advanced digital signal processing technologies, enhancing the clarity and richness of audio. It supports various sound modes, enabling users to tailor their listening experience to suit different genres or personal preferences. The inclusion of built-in equalization options further allows for precise adjustments, contributing to optimal sound customization.
Another noteworthy characteristic of the RX-E100RSL is its connectivity options. The receiver features multiple inputs, including HDMI, optical, and analog connections, making it versatile for any home entertainment setup. Bluetooth connectivity is also integrated, allowing for wireless streaming from smartphones or tablets. This feature caters to the modern listener's preference for seamless audio streaming.
For video enthusiasts, the RX-E100RSL supports high-definition video pass-through, which means it can transmit video signals directly to your television while maintaining audio quality. It is designed to accommodate a wide range of devices, making it a suitable component in any home theater system.
In terms of build quality, the JVC RX-E100RSL boasts a sleek and stylish design, making it an attractive addition to any audio setup. The user interface is intuitive, with clear controls and a responsive display, simplifying the experience for users of all levels of expertise.
Overall, the JVC RX-E100RSL is an impressive receiver that combines advanced technology with practical features. Its powerful output, connectivity options, and customizable sound settings make it an ideal choice for anyone looking to enhance their audio experience at home. Whether you are watching movies, enjoying music, or playing video games, the RX-E100RSL delivers a satisfying audio performance that enriches your entertainment.