Setting DVD preferences
 : Speaker setting menu (SPK. SETTING)
7Level menu (LEVEL)
FRONT LEFT SPEAKER/FRONT RIGHT SPEAKER/CENTER SPEAKER/SURROUND RIGHT SPEAKER/SURROUND LEFT SPEAKER
While monitoring the test tone, adjust the center and surround speakers volume as much as that of the front speakers.
You can adjust the output level in the
TEST TONE*
Outputs the test tone.
*The test tone comes out of all of the activated speakers in the following sequence:
s Front left speaker s Center speaker s Front right speaker s Surround right speaker s Surround left speaker s (back to the beginning)
NOTE
• Adjustment of subwoofer output level is not available.
7Subwoofer menu (SUBWOOFER)
LEVEL
You can set the output level of the subwoofer in the
CROSS OVER
The signals below the preset frequency level will be sent to and be reproduced by the subwoofer.
Select one of the crossover frequency levels according to the size of the small speaker connected.
•120Hz: Select when the cone speaker unit built in the speaker is about 8 cm.
•150Hz: Select when the cone speaker unit built in the speaker is about 6 cm.
•200Hz: Select when the cone speaker unit built in the speaker is about 5 cm.
 : Other setting menu (OTHERS)
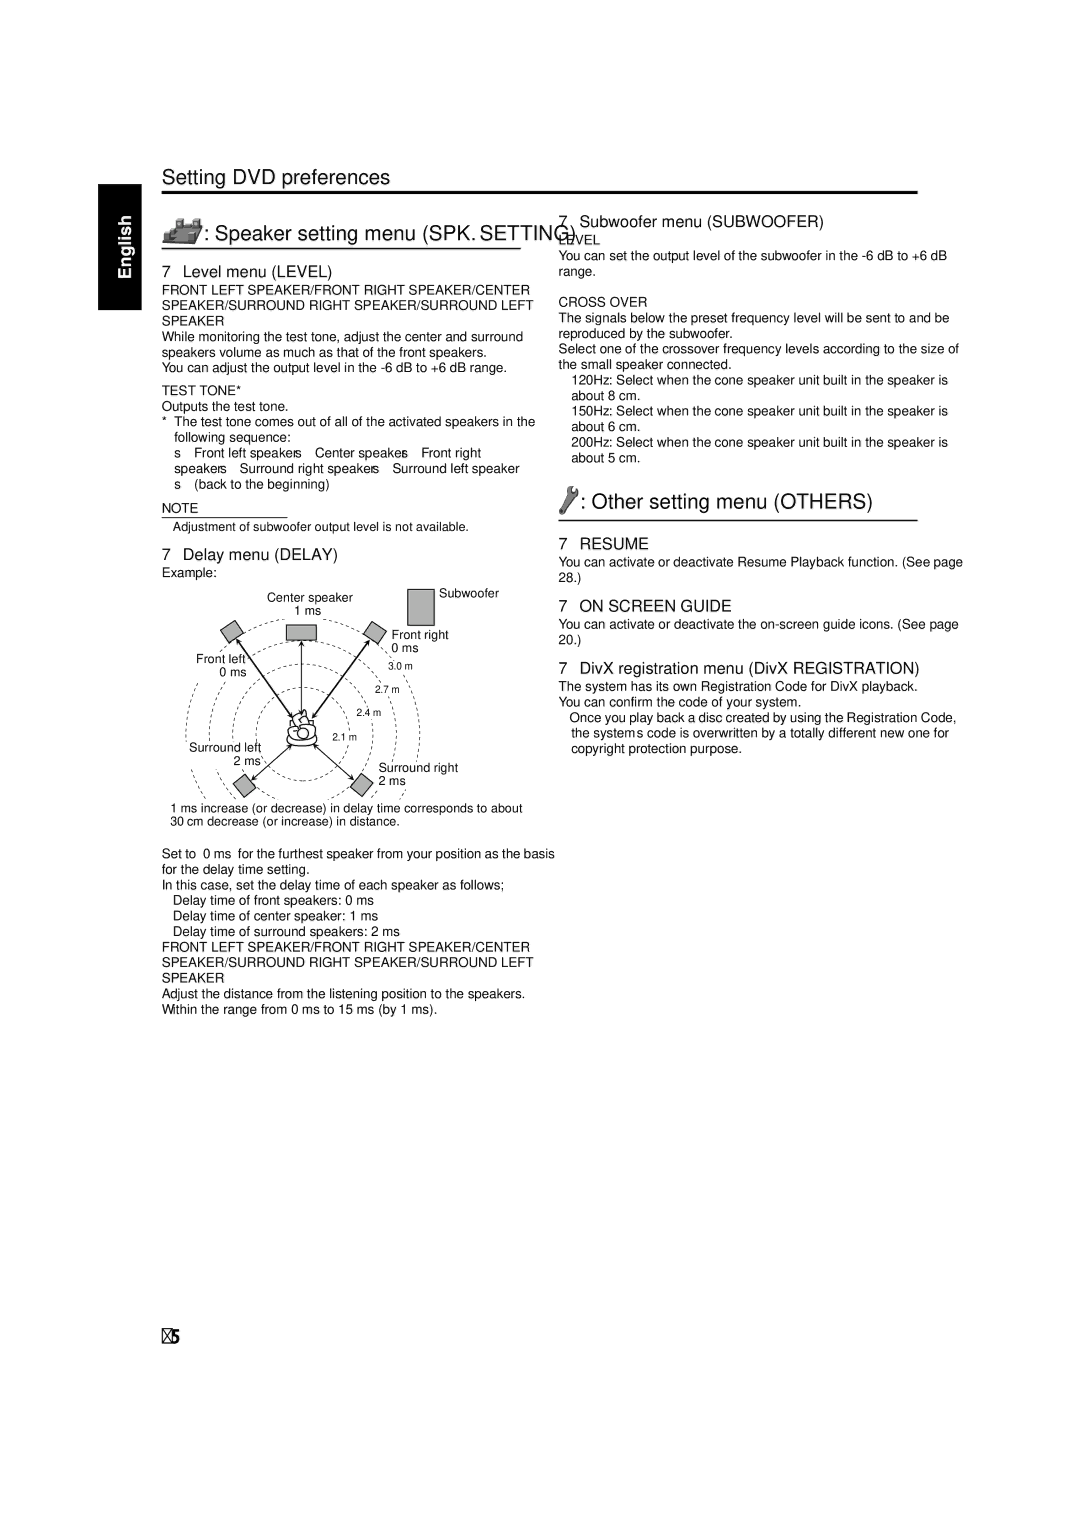
7Delay menu (DELAY)
Example:
Center speaker | Subwoofer | |
1 ms |
| |
| Front right | |
Front left | 0 ms | |
3.0 m | ||
0 ms | ||
| ||
| 2.7 m |
2.4 m
2.1 m
Surround left
2 ms
Surround right 2 ms
1 ms increase (or decrease) in delay time corresponds to about 30 cm decrease (or increase) in distance.
Set to “0 ms” for the furthest speaker from your position as the basis for the delay time setting.
In this case, set the delay time of each speaker as follows;
•Delay time of front speakers: 0 ms
•Delay time of center speaker: 1 ms
•Delay time of surround speakers: 2 ms
FRONT LEFT SPEAKER/FRONT RIGHT SPEAKER/CENTER SPEAKER/SURROUND RIGHT SPEAKER/SURROUND LEFT SPEAKER
Adjust the distance from the listening position to the speakers.
Within the range from 0 ms to 15 ms (by 1 ms).
7RESUME
You can activate or deactivate Resume Playback function. (See page 28.)
7ON SCREEN GUIDE
You can activate or deactivate the
7DivX registration menu (DivX REGISTRATION)
The system has its own Registration Code for DivX playback. You can confirm the code of your system.
•Once you play back a disc created by using the Registration Code, the system’s code is overwritten by a totally different new one for copyright protection purpose.
35
