Getting started
Connections
• Do not connect the AC power cord until all other connections have been made. |
|
• Since different components often have different terminal names, carefully read the instructions supplied with the components y | ou are going |
to connect. |
|
Connecting a TV
To view pictures and |
| |
• You can get better picture quality in the order — Component video > |
| |
• | Distortion of picture may occur when connecting to the TV via a VCR, or to a TV with a |
|
• | You need to set “MONITOR TYPE” in the PICTURE menu correctly according to the aspect ratio of your TV. ( | A pg. 49) |
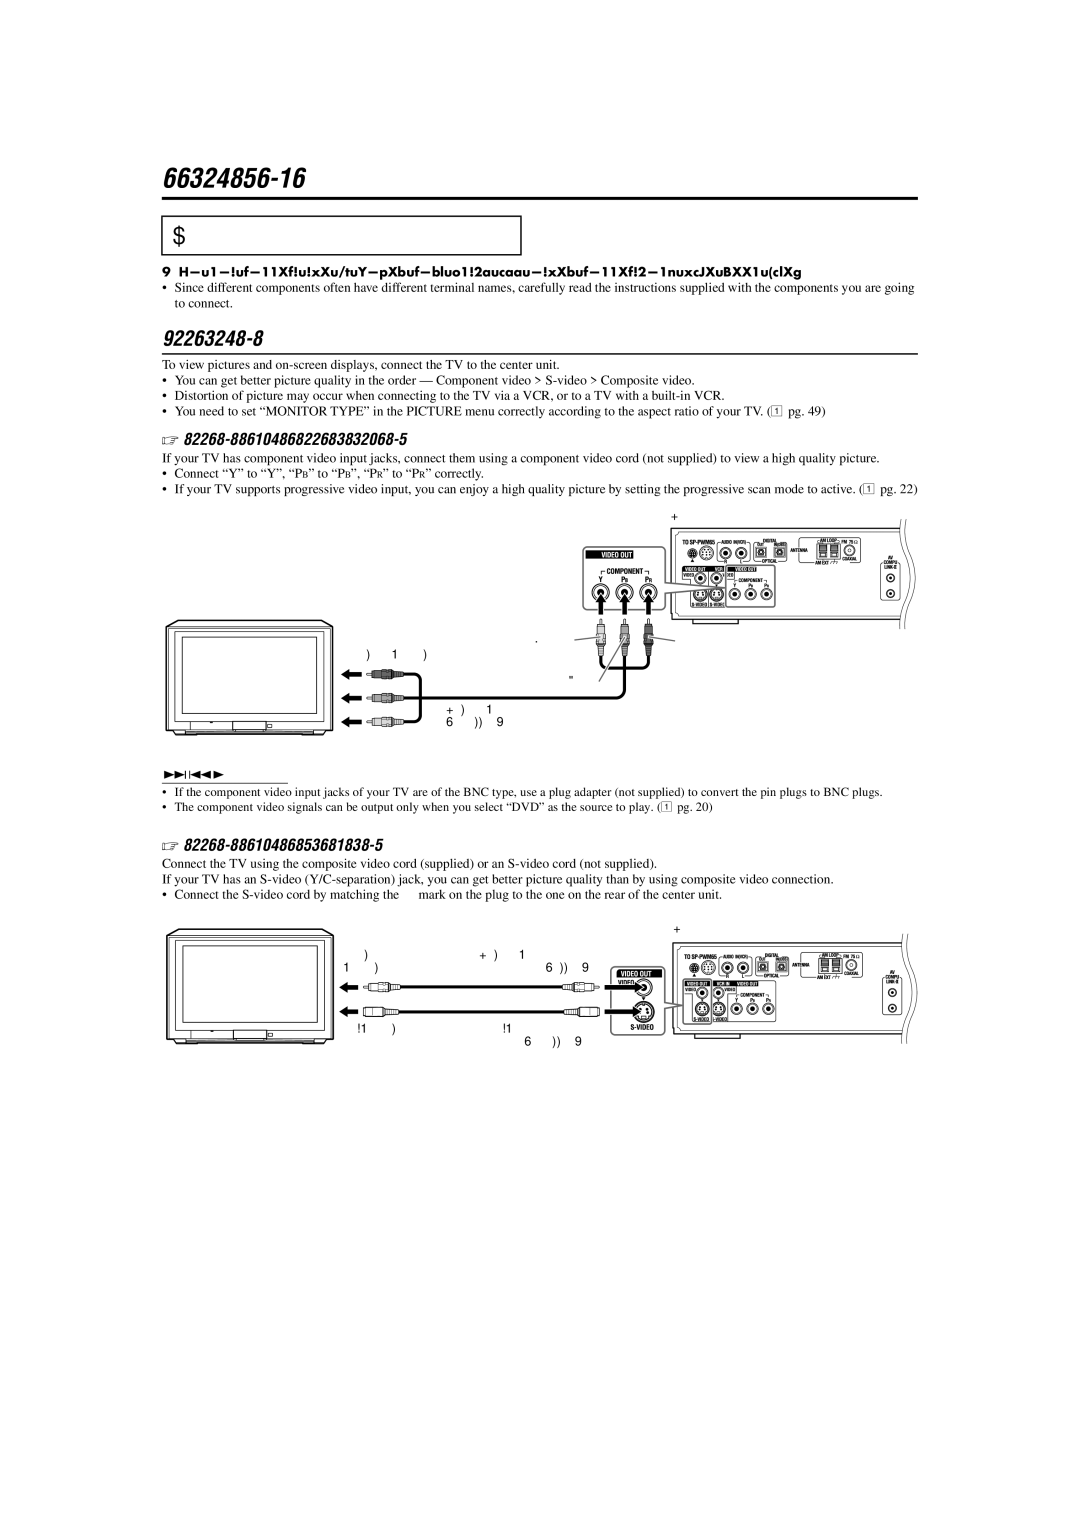
%To connect a TV through the component video input jacks
If your TV has component video input jacks, connect them using a component video cord (not supplied) to view a high quality pic
•Connect “Y” to “Y”, “P B ” to “P B ”, “PR ” to “P R ” correctly.
•If your TV supports progressive video input, you can enjoy a high quality picture by setting the progressive scan mode to acti
Green
To component video input
TV | Blue |
| |
| Component video cord |
| (not supplied) |
NOTE
•If the component video input jacks of your TV are of the BNC type, use a plug adapter (not supplied) to convert the pin plugs
•The component video signals can be output only when you select “DVD” as the source to play. (
%To connect a TV through the composite or S-video jacks
Connect the TV using the composite video cord (supplied) or an
If your TV has an
• Connect the | / mark on the plug to the one on the rear of the center unit. | |
| To composite | Composite video cord |
| video input | (supplied) |
TV |
|
|
|
| or |
| To | |
|
| (not supplied) |
ture.
ve. ( A pg. 22)
Center unit
Red
to BNC plugs.
Apg. 20)
Center unit
8
