Connecting to the DC12 V power supply
Connect this product to the DC12 V power supply when not using the PoE.
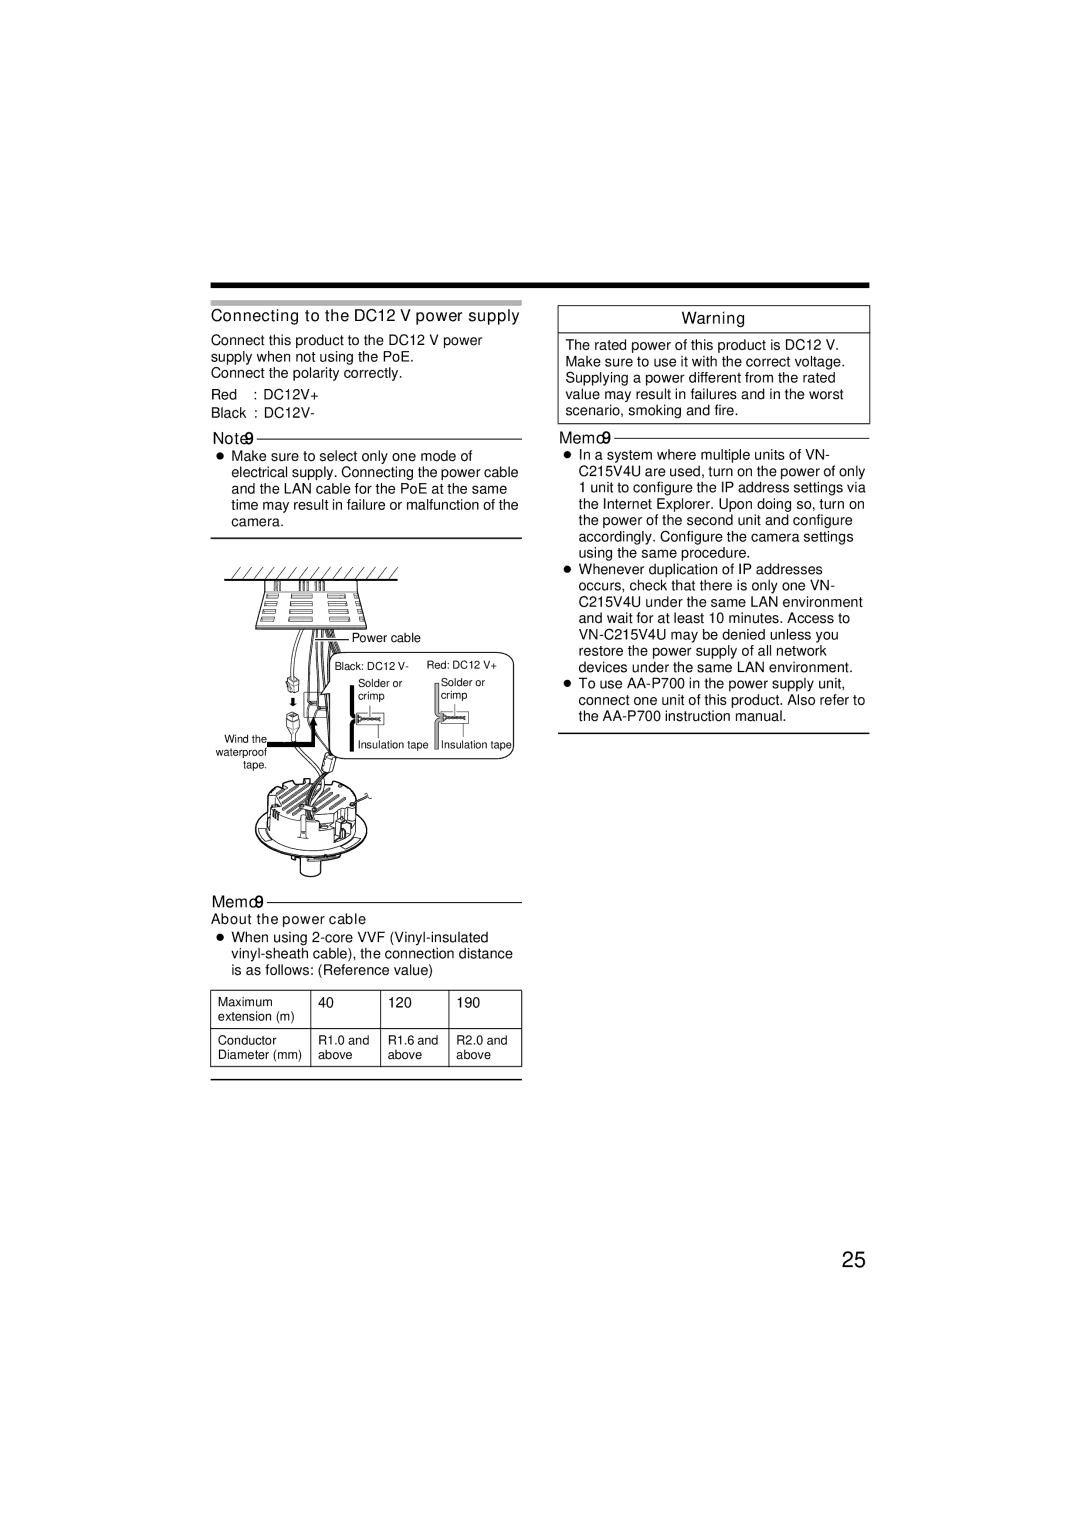
Connect the polarity correctly.
Red : DC12V+
Black : DC12V-
Note:
●Make sure to select only one mode of electrical supply. Connecting the power cable and the LAN cable for the PoE at the same time may result in failure or malfunction of the camera.
 Power cable
Black: DC12 V- | Red: DC12 V+ |
Solder or | Solder or |
crimp | crimp |
Wind the | Insulation tape Insulation tape | |
waterproof | ||
| ||
tape. |
|
Warning
The rated power of this product is DC12 V. Make sure to use it with the correct voltage. Supplying a power different from the rated value may result in failures and in the worst scenario, smoking and fire.
Memo:
●In a system where multiple units of VN- C215V4U are used, turn on the power of only 1 unit to configure the IP address settings via the Internet Explorer. Upon doing so, turn on the power of the second unit and configure accordingly. Configure the camera settings using the same procedure.
●Whenever duplication of IP addresses occurs, check that there is only one VN- C215V4U under the same LAN environment and wait for at least 10 minutes. Access to
●To use
Memo:
About the power cable
●When using
Maximum | 40 | 120 | 190 |
extension (m) |
|
|
|
|
|
|
|
Conductor | R1.0 and | R1.6 and | R2.0 and |
Diameter (mm) | above | above | above |
|
|
|
|
|
|
|
|
25