INSTALLATION AND CONNECTION
•Create the holes necessary to secure the mounting plate (Fig. C).
•In addition to the screwed connection, the mounting plate and roof gland must be bonded to the roof with adhesive and sealed. This is done using the Sikaflex® 291 adhesive sealant supplied, which is ideally suited for this purpose thanks to its broad range of adhesion.
Before starting to use Sikaflex® 291 adhesive sealant, be sure to read the Sikaflex® Products safety data sheet and technical data sheet in this installation manual!
The prerequisite for good adhesive characteristics is a clean, dry and
If the surface is painted, ensure that the paint finish is sufficiently well bonded to the substrate.
If the coat of paint is already loose or peeling, it must be removed down to a stable layer in the area to which the adhesive will bond. If you have any doubts concerning the adhesive characteristics, consult a paint and lacquer specialist, or the manufacturer of your vehicle.
Under certain circumstances, it may be necessary for you to improve the adhesive properties of the roof surface by
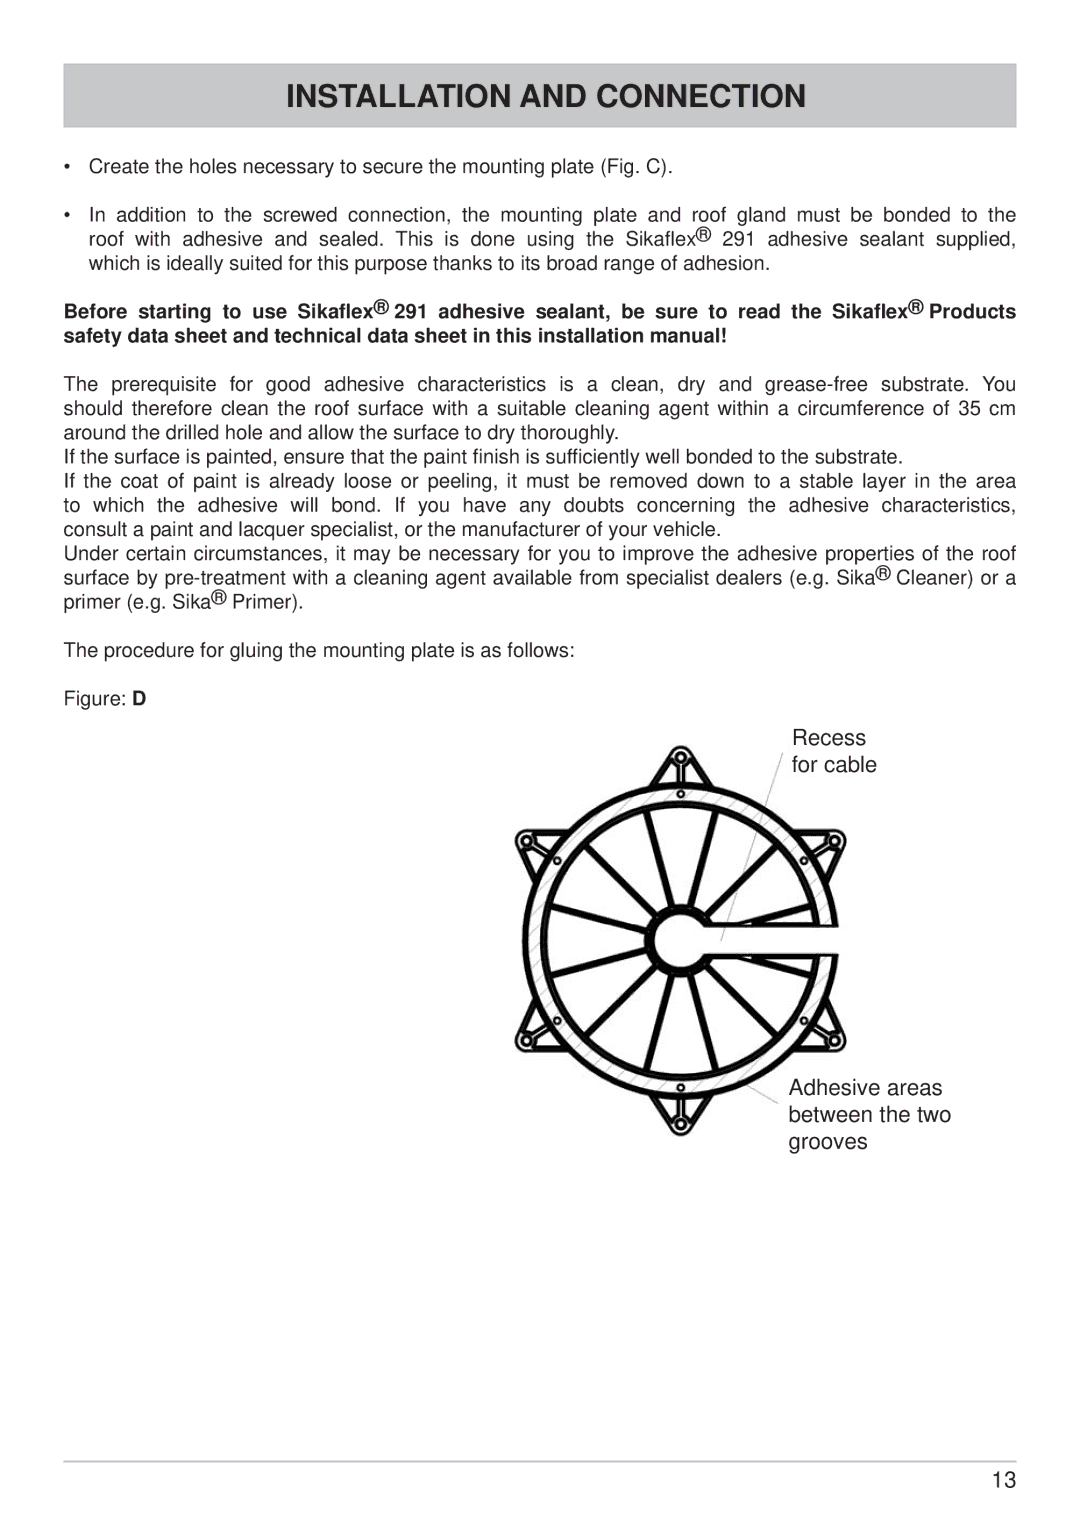
The procedure for gluing the mounting plate is as follows:
Figure: D
Recess for cable
Adhesive areas between the two grooves
13
