INSTALLATION AND CONNECTION
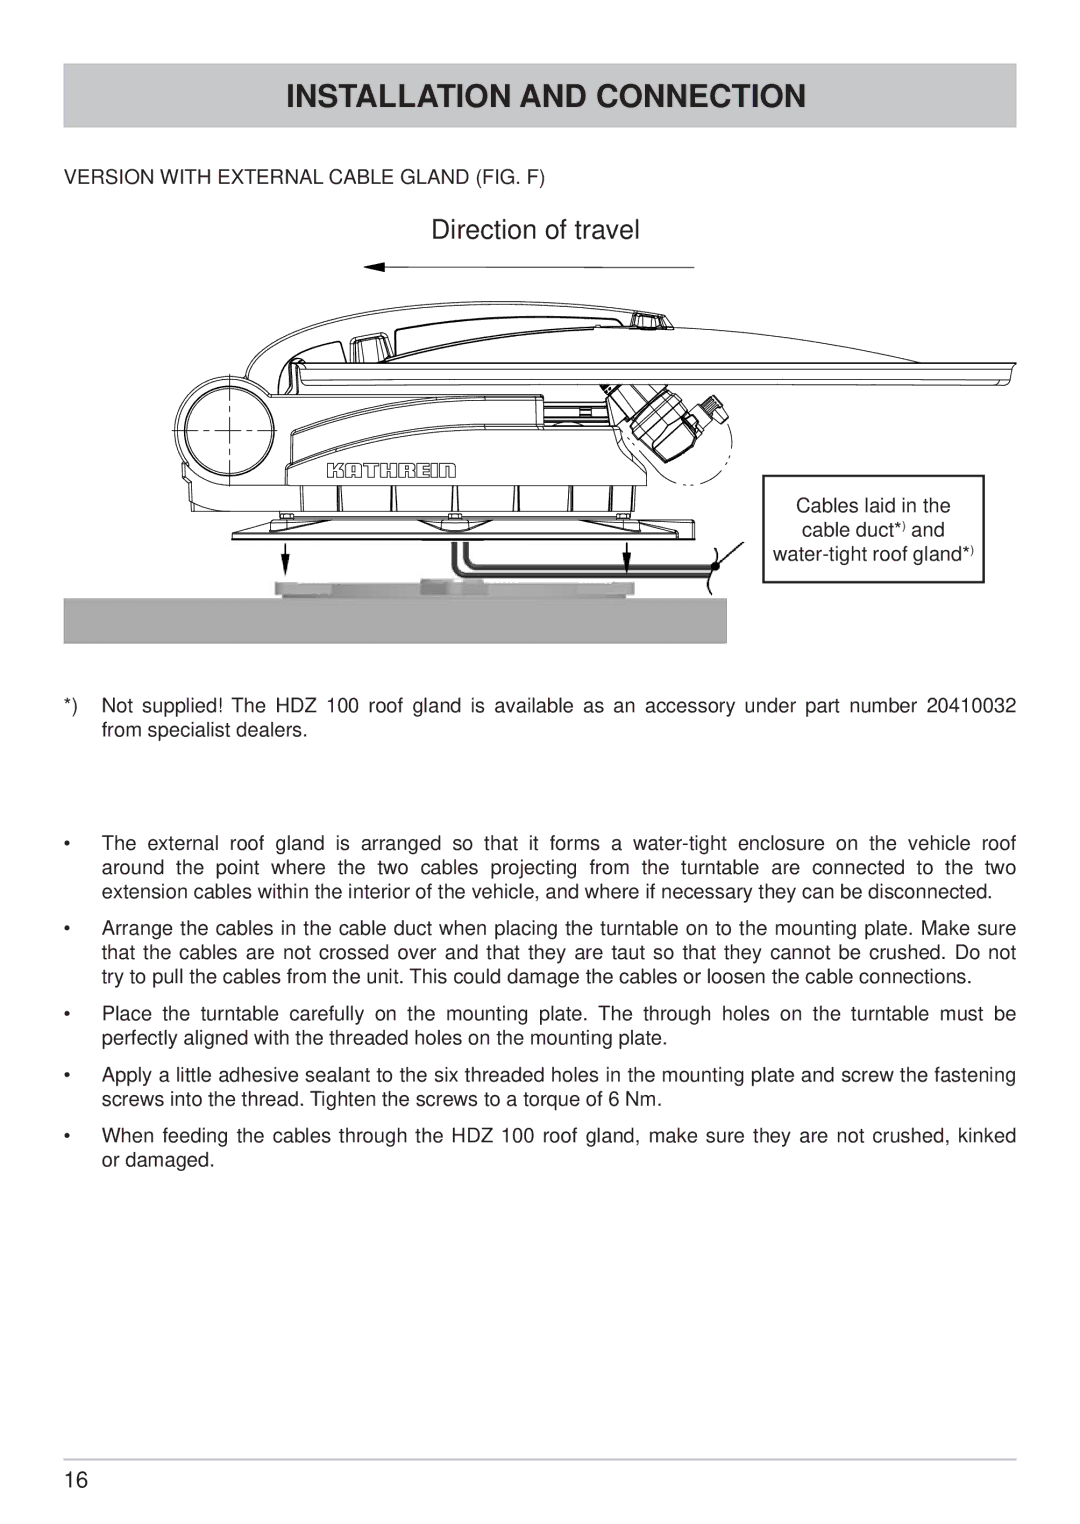
VERSION WITH EXTERNAL CABLE GLAND (FIG. F)
Direction of travel
Cables laid in the cable duct*) and
*) Not supplied! The HDZ 100 roof gland is available as an accessory under part number 20410032 from specialist dealers.
•The external roof gland is arranged so that it forms a
•Arrange the cables in the cable duct when placing the turntable on to the mounting plate. Make sure that the cables are not crossed over and that they are taut so that they cannot be crushed. Do not try to pull the cables from the unit. This could damage the cables or loosen the cable connections.
•Place the turntable carefully on the mounting plate. The through holes on the turntable must be perfectly aligned with the threaded holes on the mounting plate.
•Apply a little adhesive sealant to the six threaded holes in the mounting plate and screw the fastening screws into the thread. Tighten the screws to a torque of 6 Nm.
•When feeding the cables through the HDZ 100 roof gland, make sure they are not crushed, kinked or damaged.
16