APPENDIX 7
After assigning the 7700 a web server port and video server port you must use Port Forwarding for Case B (using a router with a static IP address provided by the ISP).
Please consult your router's user guide on how to correctly configure Port Forwarding. For your convenience, we have provided two example configurations.
For D-Link DI-604 broadband routers:
1.Open a web browser and type http://192.168.0.1 into your address bar (the default IP address to access the router).
2.You will have to supply your User Name and Password to log onto the router. (Default from factory, Username: admin Password: [leave blank])
3.Select the Advanced tab.
4.Click the "Enabled" option button.
5.Give a description to the "Virtual Server".
6.Set the Private IP address the IP address you have assigned the
7700.
7.Select TCP as the Protocol Type.
8.Set both the Private Port and Public Port the same value that you set the Web Server Port on the 7700.
9.Set the schedule for when you will allow access to the 7700.
10.Click Apply.
11.Repeat steps
12.After the settings on the router have saved, you can exit the browser. Port Forwarding is complete.
For Linksys BEFSR41 Cable/DSL routers:
1.Open a web browser and type http://192.168.1.1 into your address bar (the default IP address to access the router).
2.You will have to supply your User Name and Password to log onto the router. (Default from factory, Username:[leave blank] Password: admin)
3.Select Applications & Gaming from the menu bar.
4.Enter a description for your 7700 Web Port in the Application entry.
5.Enter the Web Port number you have assigned the 7700 into the Start and End fields.
6.Select TCP as the Protocol.
7.Enter the IP address of the 7700.
8.Check the "Enabled" checkbox.
9.Repeat steps
7700.
10.Click "Save Settings".
11.After the settings have been saved exit the browser. Port Forwarding is complete.
|
|
|
| 7700 INSTALLATION | 2 | |||||
Top View | Power Indicator |
|
|
|
|
|
|
| ||
| This | red | switch | becomes | illuminated | when | 12V | DC | ||
| power | is | supplied to | the | unit | and | the | switch | is | |
| depressed. | This | indicator | should | always be | lit when | ||||
in use. If it is not lit, verify the adapter is plugged in to a good power source and the switch is depressed.
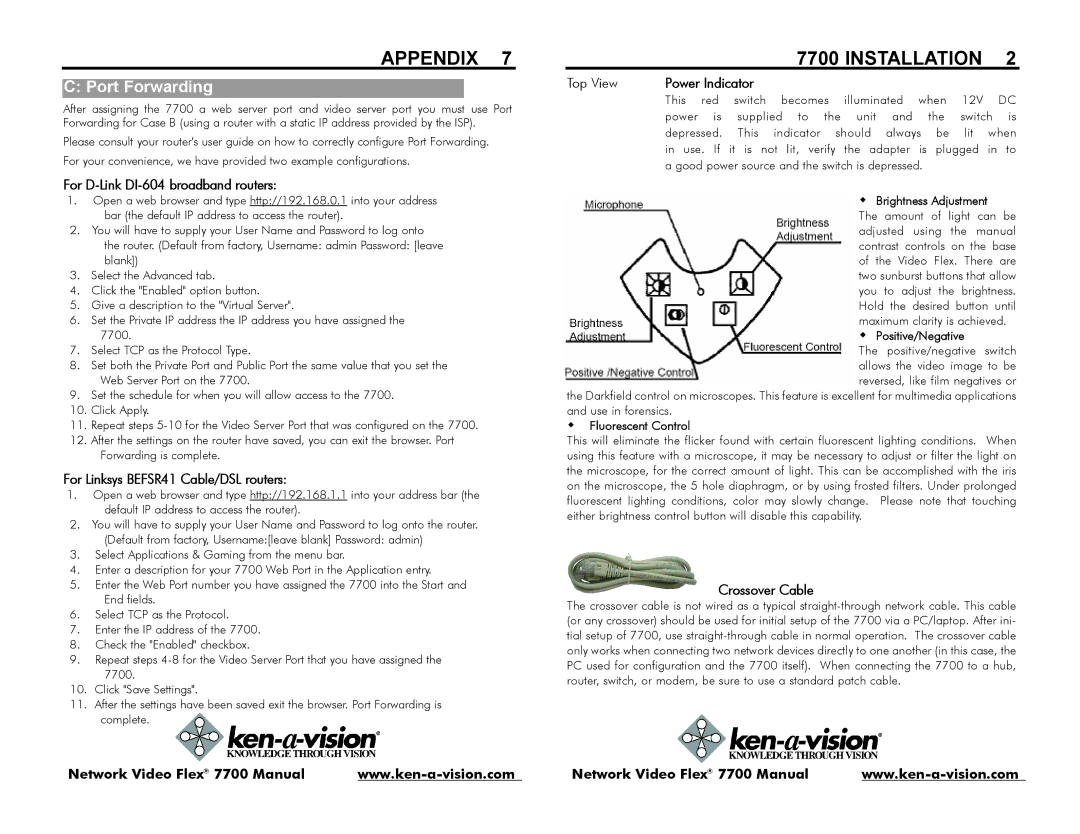
w Brightness Adjustment
The amount of light can be adjusted using the manual contrast controls on the base of the Video Flex. There are two sunburst buttons that allow you to adjust the brightness. Hold the desired button until maximum clarity is achieved.
w Positive/Negative
The positive/negative switch allows the video image to be reversed, like film negatives or
the Darkfield control on microscopes. This feature is excellent for multimedia applications and use in forensics.
wFluorescent Control
This will eliminate the flicker found with certain fluorescent lighting conditions. When using this feature with a microscope, it may be necessary to adjust or filter the light on the microscope, for the correct amount of light. This can be accomplished with the iris on the microscope, the 5 hole diaphragm, or by using frosted filters. Under prolonged fluorescent lighting conditions, color may slowly change. Please note that touching either brightness control button will disable this capability.
Crossover Cable
The crossover cable is not wired as a typical
Network Video Flex® 7700 Manual | Network Video Flex® 7700 Manual |
