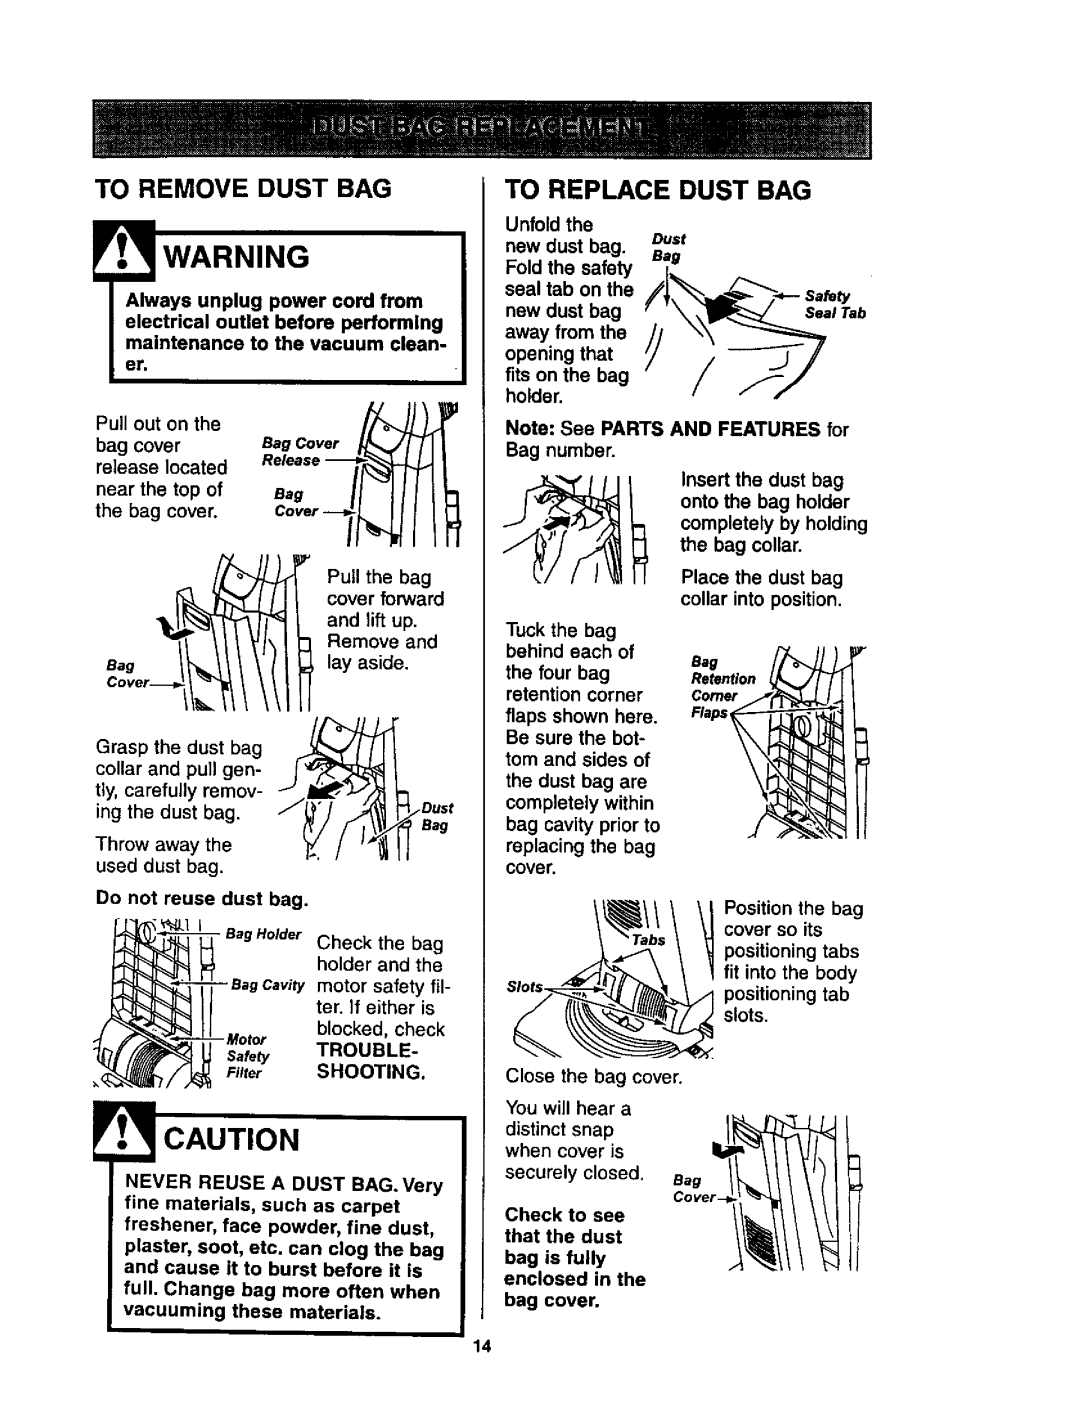
TO REMOVE DUST BAG
!WARNING
Always unplug power cord from electrical outlet before performing maintenance to the vacuum clean-
st.
Pull out on the
Bag Cover
bag cover release located
TO REPLACE DUST BAG
Unfold the
Dust
new dust bag. Bag
Fold the safety seal tab on the new dust bag away from the opening that fits on the bag holder.
Note: See PARTS AND FEATURES for
Bag number.
near the top of
the bag cover.
|
|
| Pull | the | bag |
|
|
| cover forward | ||
|
|
| and | lift up. | |
|
|
| Remove | and | |
Bag |
| lay | aside. | ||
|
|
|
| ||
Grasp | the dust bag |
|
| ||
collar and pull gen- |
|
| |||
tly, | carefully | remov- |
|
| |
ing | the | dust | bag. |
| Bag |
|
|
|
|
| |
Throw away the used dust bag.
Do not reuse dust bag.
_l Bag Holder Checkholder andthe bagthe
ter. if either is
blocked, check
__
Tuck the bag
behind each of
the four bag
retention corner
flaps shown here. Be sure the bot- tom and sides of the dust bag are completely within bag cavity prior to replacing the bag
cover.
onto the bag holder completely by holding
the bag collar. Insert the dust bag
Place the dust bag collar into position.
Bag
Retention
Comer
Flaps
Position the bag cover so its
positioning tabs fit into the body
positioning tab slots.
SHOOTING.
NEVER REUSE A DUST BAG.Very fine materials, such as carpet freshener, face powder, fine dust, plaster, soot, etc. can clog the bag and cause it to burst before it is full. Change bag more often when vacuuming these materials.
Close the bag cover.
You will hear a
distinct snap when cover is
securely closed. Bag
Check to see that the dust
bag is fully enclosed in the
bag cover.
14