Electdcal Shock And Personal Injury Hazard
Unplug power cord from electrical out- let. Do not operate the vacuum cleaner withoutthe pdmary or exhaust filters.
Be sure the filters are properly installed to prevent motor failure and or electri- cal shock.
PRIMARY FILTER
Check primary filter frequently and clean when dirty.
TO REMOVE PRIMARY FILTER
Remove the dust bin assembly as outlined in the DUST BIN CLEANING section.
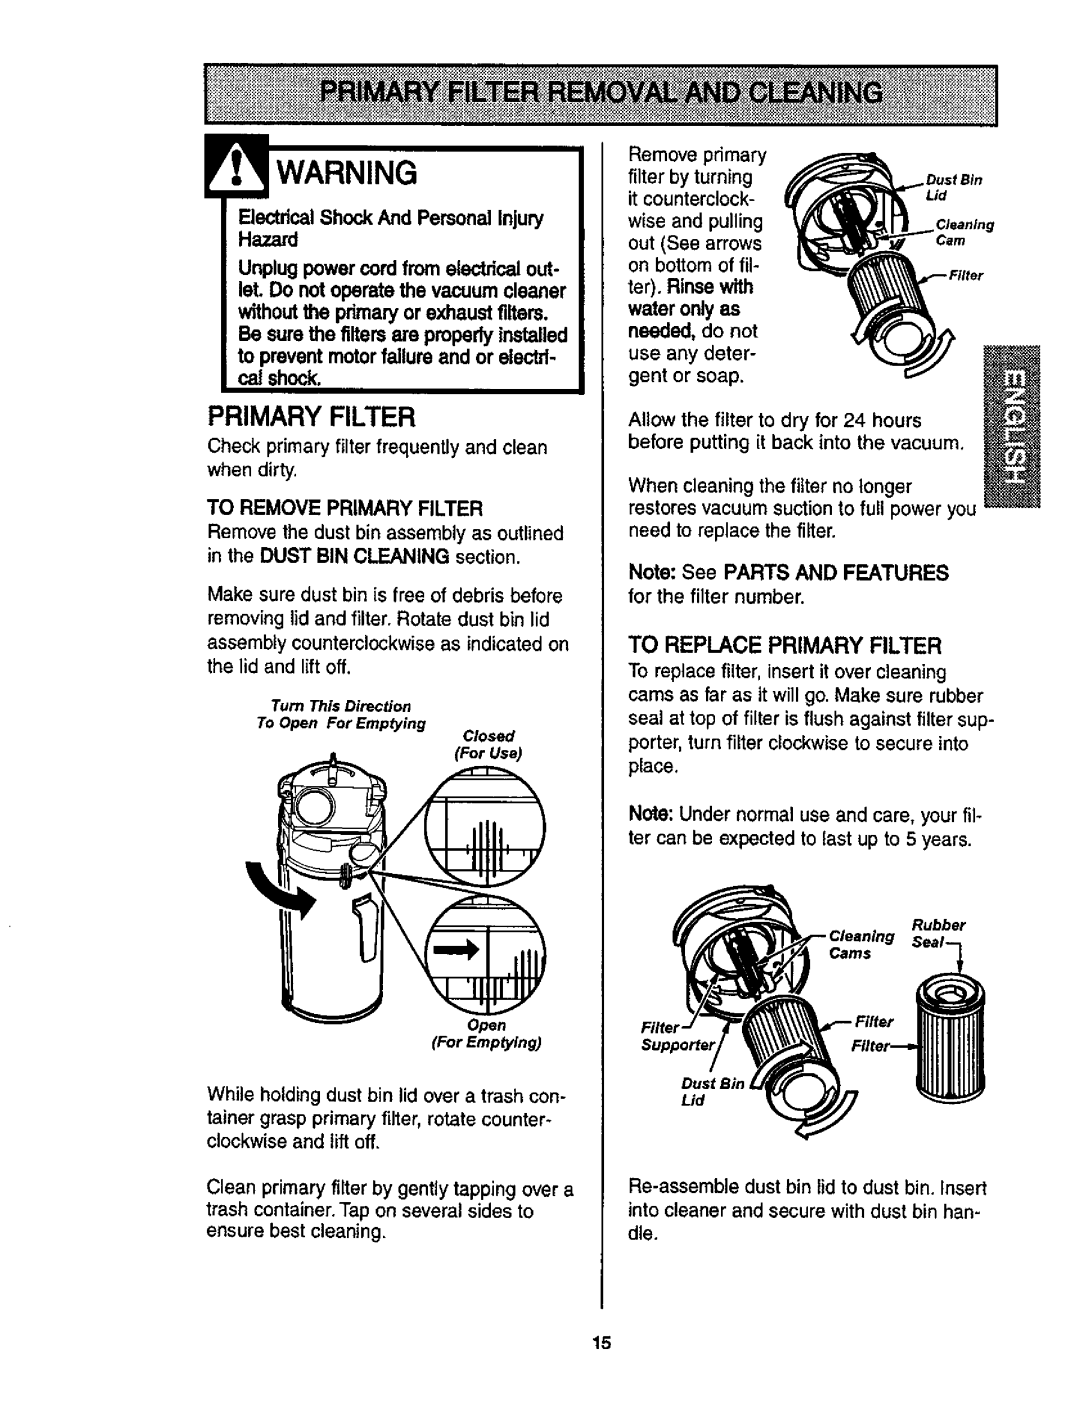
Make sure dust bin is free of debris before removing lid and filter. Rotate dust bin lid assembly counterclockwise as indicated on the lid and lift off.
Turn This Direction
To Open For Emptying
Closed
(For Use)
Open
(For Emptying)
While holding dust bin lid over a trash con-
tainer grasp primary filter, rotate counter- clockwise and lift off.
Clean primary filter by gently tapping over a trash container. Tap on several sides to ensure best cleaning.
Remove primary |
|
filter by turning | Dust Bin |
it counterclock- | Lid |
wise and pulling |
|
out (See arrows |
|
on bottom of fil- |
|
ter), Rinse with water only as needed, do not use any deter- gent or soap.
Allow the filter to dry for 24 hours before putting it back into the vacuum,
When cleaning the filter no longer restores vacuum suctionto full power you need to replace the filter.
Note: See PARTS AND FEATURES for the filter number.
TO REPLACE PRIMARY FILTER
To replace filter, insert it over cleaning cams as far as it will go. Make sure rubber seal at top of filter is flush against filter sup- porter, turn filter clockwise to secure into place.
Note: Under normal use and care, your fil- ter can be expected to last up to 5 years.
Rubber
Cams
Filter.
Dust Bin,
Lid
into cleaner and secure with dust bin han- dle.
15