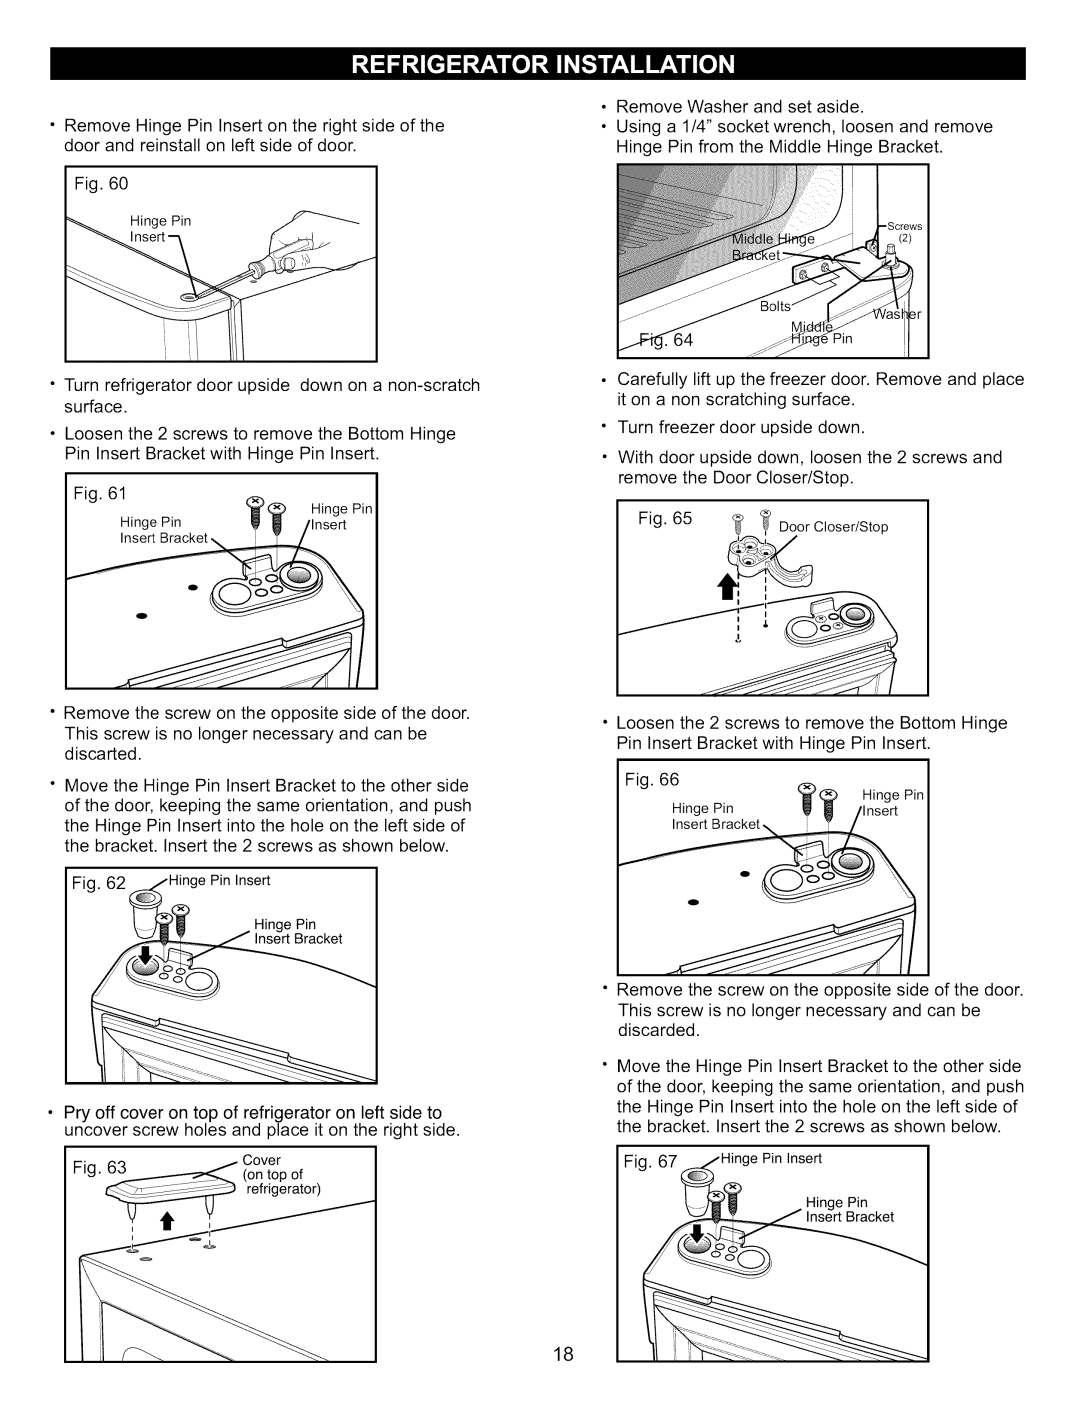
Remove Hinge Pin Insert on the right side of the door and reinstall on left side of door.
Fig. 60
Hinge Pin
•Turn refrigerator door upside down on a
•Loosen the 2 screws to remove the Bottom Hinge Pin Insert Bracket with Hinge Pin Insert.
Fig. 61
Hinge Pin
Hinge Pin | W |
•Remove the screw on the opposite side of the door.
This screw is no longer necessary and can be discarted.
Move the Hinge Pin Insert Bracket to the other side of the door, keeping the same orientation, and push
the Hinge Pin Insert into the hole on the left side of the bracket. Insert the 2 screws as shown below.
Fig. | Pin Insert |
Hinge Pin
•Pry off cover on top of refrigerator on left side to uncover screw holes and place it on the right side.
Fi'_63 _ | Cover |
u.u_ | (on top of |
| refrigerator) |
I | 1 |
•Remove Washer and set aside.
•Using a 1/4" socket wrench, loosen and remove Hinge Pin from the Middle Hinge Bracket.
Pin
Carefully lift up the freezer door. Remove and place it on a non scratching surface.
Turn freezer door upside down.
With door upside down, loosen the 2 screws and remove the Door Closer/Stop.
Fig. 65
Door Closer/Stop
•Loosen the 2 screws to remove the Bottom Hinge Pin Insert Bracket with Hinge Pin Insert.
Fig. 66 | Hinge Pin I |
Hinge | Pin |
Insert |
|
•Remove the screw on the opposite side of the door.
This screw is no longer necessary and can be discarded.
Move the Hinge Pin Insert Bracket to the other side of the door, keeping the same orientation, and push
the Hinge Pin Insert into the hole on the left side of the bracket. Insert the 2 screws as shown below.
Fig. 67 | Pin Insert | I |
Hinge Pin
Insert Bracket
18