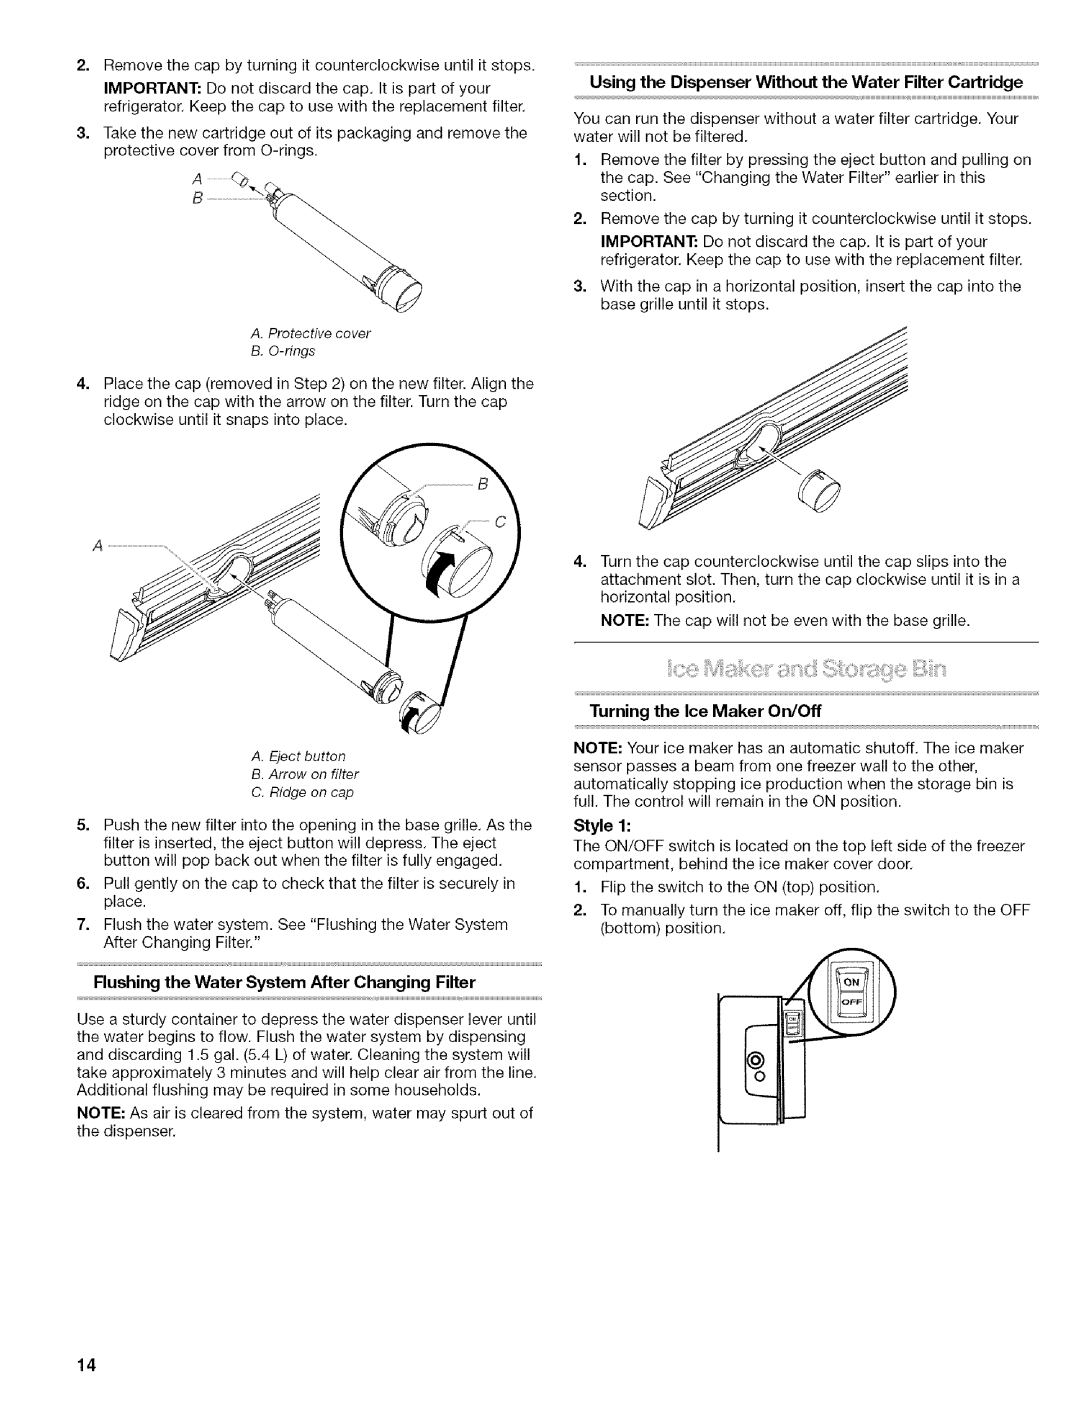
2.Remove the cap by turning it counterclockwise until it stops.
IMPORTANT: Do not discard the cap. It is part of your refrigerator. Keep the cap to use with the replacement filter.
3= Take the new cartridge out of its packaging and remove the protective cover from
A. Protective cover
B.
4= Place the cap (removed in Step 2) on the new filter. Align the
ridge on the cap with the arrow on the filter. Turn the cap clockwise until it snaps into place.
A. Eject button
B. Arrow on filter
C. Ridge on cap
5.Push the new filter into the opening in the base grille. As the filter is inserted, the eject button will depress. The eject button will pop back out when the filter is fully engaged.
6.Pull gently on the cap to check that the filter is securely in place.
7.Flush the water system. See "Flushing the Water System After Changing Filter."
Flushing the Water System After Changing Filter
Use a sturdy container to depress the water dispenser lever until the water begins to flow. Flush the water system by dispensing and discarding 1.5 gal. (5.4 L) of water. Cleaning the system will take approximately 3 minutes and will help clear air from the line. Additional flushing may be required in some households.
NOTE: As air is cleared from the system, water may spurt out of the dispenser.
Using the Dispenser Without the Water Filter Cartridge
You can run the dispenser without a water filter cartridge. Your water will not be filtered.
1.Remove the filter by pressing the eject button and pulling on the cap. See "Changing the Water Filter" earlier in this section.
2.Remove the cap by turning it counterclockwise until it stops.
IMPORTANT: Do not discard the cap. It is part of your refrigerator. Keep the cap to use with the replacement filter.
3.With the cap in a horizontal position, insert the cap into the base grille until it stops.
4.Turn the cap counterclockwise until the cap slips into the attachment slot. Then, turn the cap clockwise until it is in a horizontal position.
NOTE: The cap will not be even with the base grille.
Turning the Ice Maker On/Off
NOTE: Your ice maker has an automatic shutoff. The ice maker sensor passes a beam from one freezer wall to the other, automatically stopping ice production when the storage bin is full. The control will remain in the ON position.
Style 1:
The ON/OFF switch is located on the top left side of the freezer compartment, behind the ice maker cover door.
1.Flip the switch to the ON (top) position.
2.To manually turn the ice maker off, flip the switch to the OFF (bottom) position.
14
