Analog recording
Use the separately sold AID converter
Operation is possible with either the main unit or the remote controller,
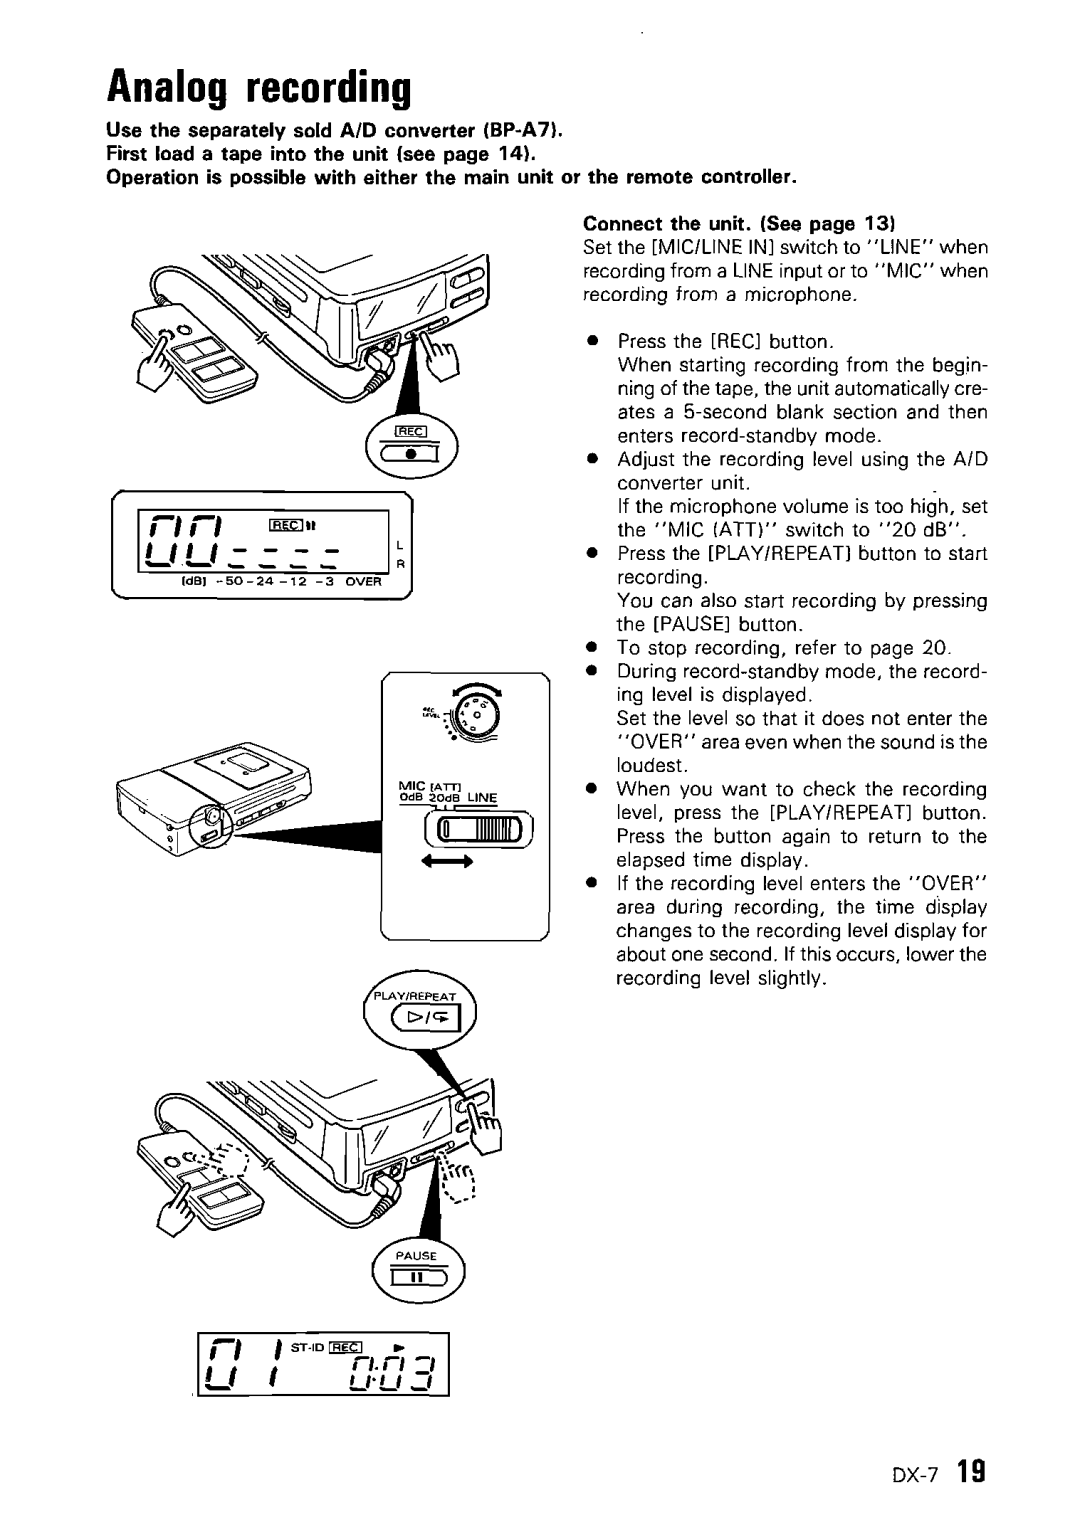
Connect the unit, (See page 13)
Set the [MIG/LINE IN] switch to "LINE" when recording from a LINE input or to "MIG" when recording from a microphone.
1[1[/:: ~II I~
MIC (ATT]
OdB 20dB LINE
l'fino)
+-+
"'ST.ID [jjg] .. =,
'_" nn U'U_'
•Press the [REG] button.
When starting recording from the begin- ning of the tape, the unit automatically cre- ates a
•Adjust the recording level using the AID converter unit.
If the microphone volume is too high, set the "MIG (ATT)', switch to "20 dB".
•Press the [PLAY/REPEAT] button to start recording.
You can also start recording by pressing the [PAUSE] button.
•To stop recording, refer to page 20.
•During
Set the level so that it does not enter the "OVER" area even when the sound is the loudest.
•When you want to check the recording level, press the [PLAY/REPEAT] button. Press the button again to return to the elapsed time display.
•If the recording level enters the "OVER" area during recording, the time d'isplay changes to the recording level display for about one second. If this occurs, lower the recording level slightly.
