MD edit functions 65
4After editing, eject and remove the mini disc.
Image of erasing one track |
|
| Track to be erased | |
|
|
|
| |
(TRACK ERASE) | 1 | 2 | 3 | 4 |
|
|
|
|
|
“DISC WRITING” displayed during the mini disc ejection operation indicates that the data associated with recording or editing is being written on the disc. Do not apply vibration or shock to the unit while this message is displayed.
1 | 2 | 3 |
Preparation section
A B CDA BD
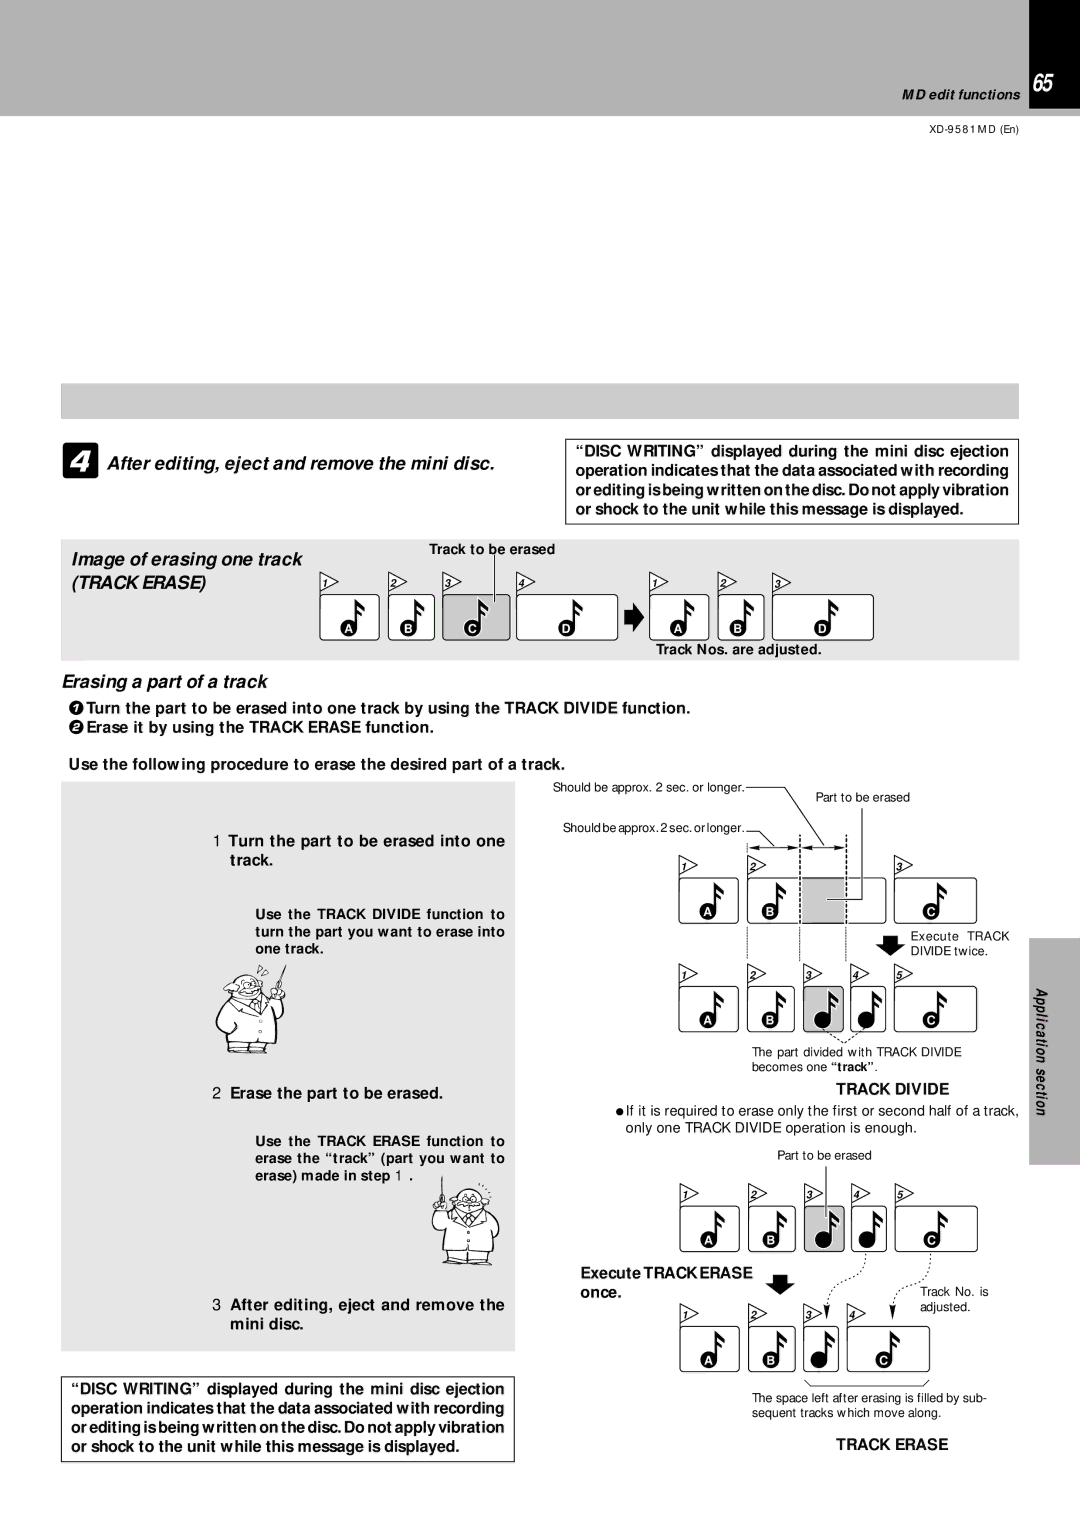
Track Nos. are adjusted.
Erasing a part of a track
1Turn the part to be erased into one track by using the TRACK DIVIDE function.
2Erase it by using the TRACK ERASE function.
Use the following procedure to erase the desired part of a track.
Basic
1Turn the part to be erased into one track.
Use the TRACK DIVIDE function to turn the part you want to erase into one track.
Should be approx. 2 sec. or longer.
Should be approx. 2 sec. or longer.
12
A B
12
A B
Part to be erased
3
C
Execute TRACK
DIVIDE twice.
3 4 5
C
section
Application
2Erase the part to be erased.
Use the TRACK ERASE function to erase the “track” (part you want to erase) made in step 1.
3After editing, eject and remove the mini disc.
The part divided with TRACK DIVIDE becomes one “track”.
TRACK DIVIDE P
ÖIf it is required to erase only the first or second half of a track, only one TRACK DIVIDE operation is enough.
|
| Part to be erased |
| |
1 | 2 | 3 | 4 | 5 |
A | B |
|
| C |
Execute TRACK ERASE |
|
|
| |
once. |
|
|
| Track No. is |
1 | 2 | 3 | 4 | adjusted. |
| ||||
section
Knowledge sections
A BC
“DISC WRITING” displayed during the mini disc ejection | The space left after erasing is filled by sub- | |
operation indicates that the data associated with recording | ||
sequent tracks which move along. | ||
or editing is being written on the disc. Do not apply vibration | TRACK ERASE ä | |
or shock to the unit while this message is displayed. | ||
|
|
