Key Digital KD-CDA12, KD-DA6 user manual SW2 OFF ON ON OFF ON ON OFF ON

Models: KD-CDA12 KD-DA6

1 16
Download 16 pages 51.05 Kb
Page 9
Image 9
_

HD View12 Model KD-CDA12

OPERATING INSTRUCTIONS
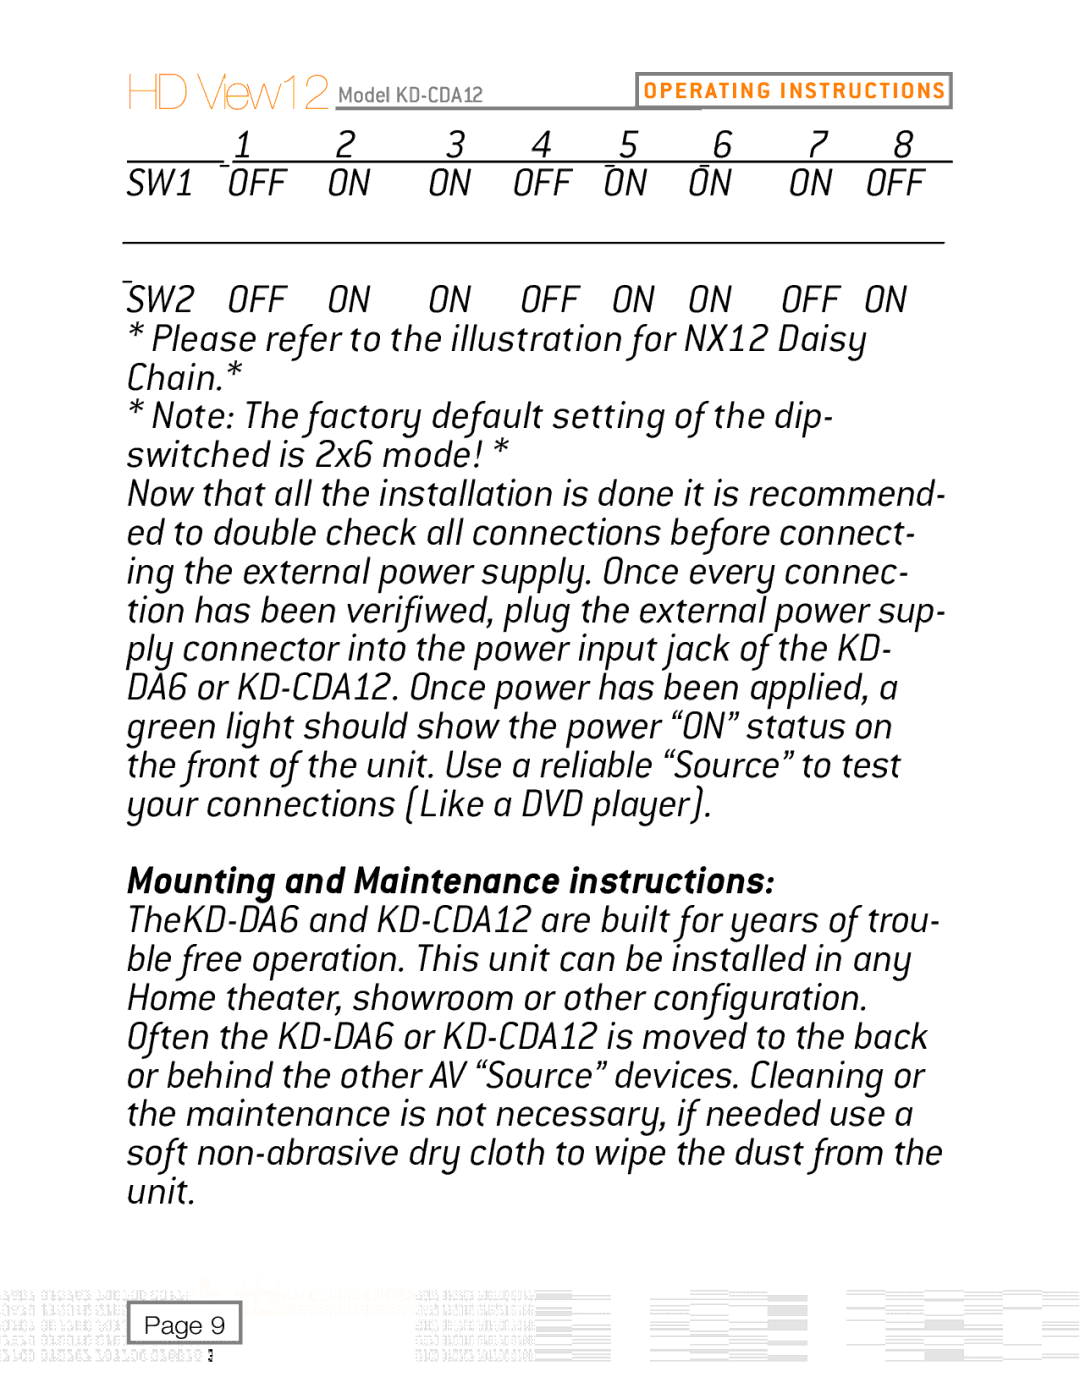
_1

2

3

4

_5

_6

7

8

SW1


OFF

ON

ON

OFF

ON

ON

ON

OFF

_________________________________________________________________________________________________

_

SW2 OFF ON ON OFF ON ON OFF ON

*Please refer to the illustration for NX12 Daisy Chain.*

*Note: The factory default setting of the dip- switched is 2x6 mode! *

Now that all the installation is done it is recommend- ed to double check all connections before connect- ing the external power supply. Once every connec- tion has been verifiwed, plug the external power sup- ply connector into the power input jack of the KD- DA6 or KD-CDA12. Once power has been applied, a green light should show the power “ON” status on the front of the unit. Use a reliable “Source” to test your connections (Like a DVD player).

Mounting and Maintenance instructions: TheKD-DA6 and KD-CDA12 are built for years of trou- ble free operation. This unit can be installed in any Home theater, showroom or other configuration. Often the KD-DA6 or KD-CDA12 is moved to the back or behind the other AV “Source” devices. Cleaning or the maintenance is not necessary, if needed use a soft non-abrasive dry cloth to wipe the dust from the unit.

Page 9

Page 9
Image 9
Key Digital KD-CDA12, KD-DA6 user manual SW2 OFF ON ON OFF ON ON OFF ON