Connections
When you connect the unit to other equipment, be sure to turn off the power and unplug all of the equipment from the wall outlet before making any connections.
Connecting to a TV
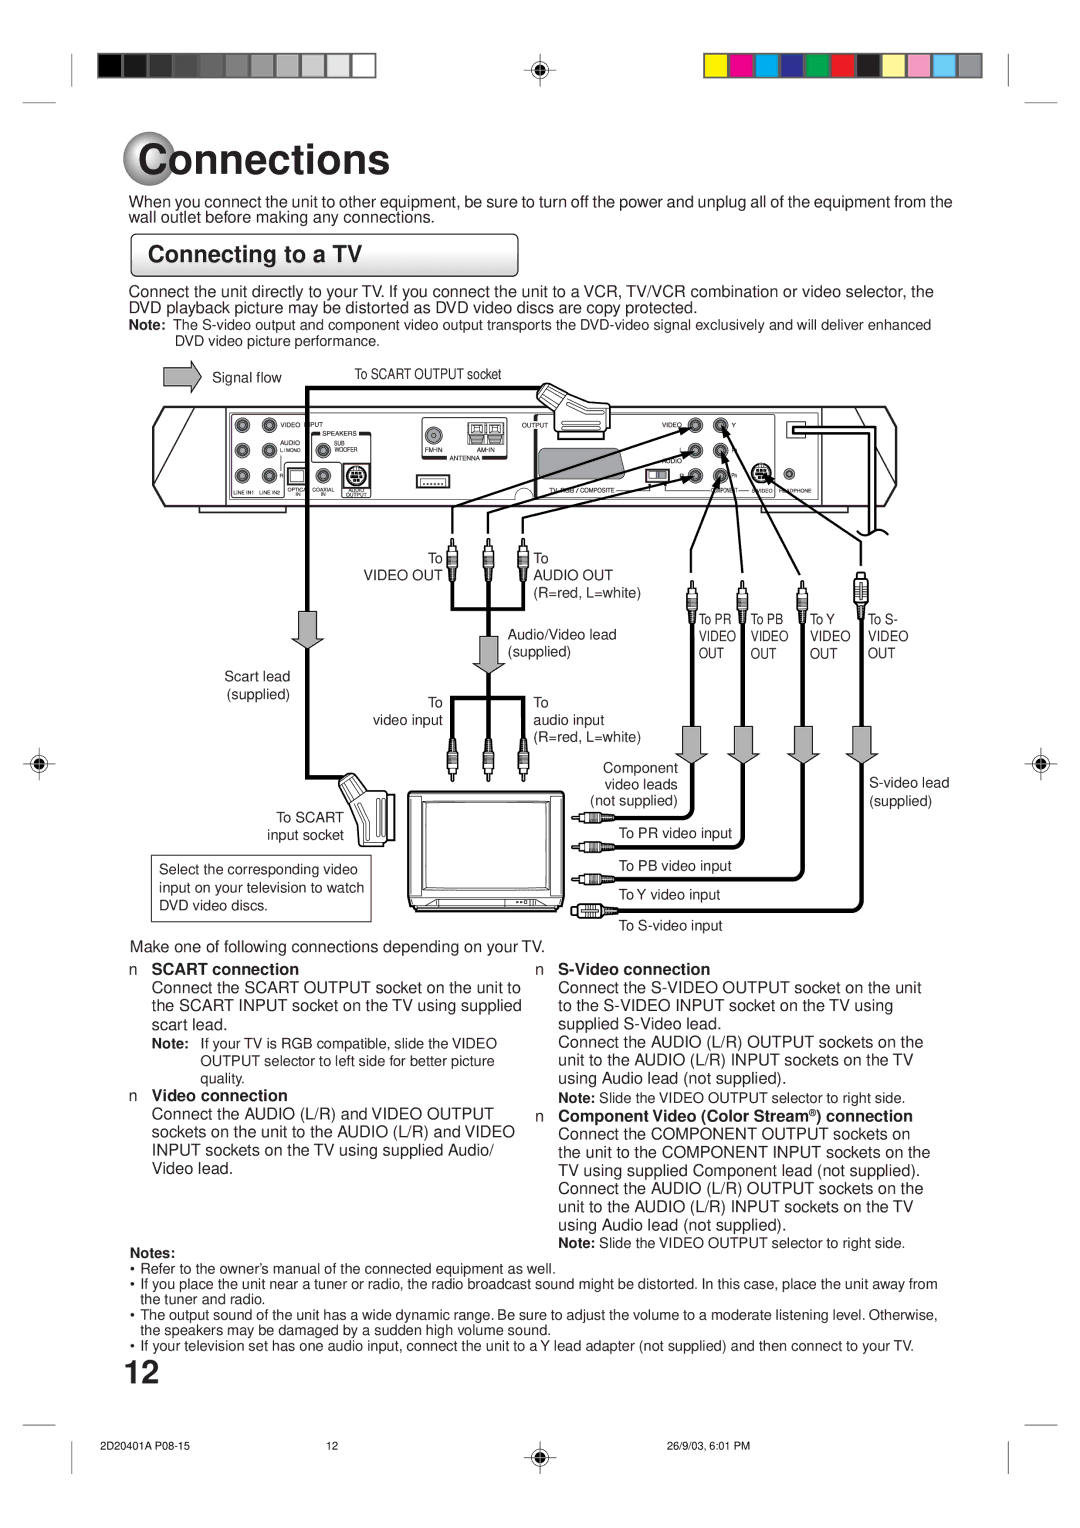
Connect the unit directly to your TV. If you connect the unit to a VCR, TV/VCR combination or video selector, the DVD playback picture may be distorted as DVD video discs are copy protected.
Note: The
Signal flow | To SCART OUTPUT socket |
|
|
|
|
|
| To | To |
|
|
|
|
| VIDEO OUT | AUDIO OUT |
|
|
|
|
|
| (R=red, L=white) |
|
|
|
|
|
| Audio/Video lead | To PR | To PB | To Y | To S- |
|
| VIDEO | VIDEO | VIDEO | VIDEO | |
|
| (supplied) | OUT | OUT | OUT | OUT |
Scart lead |
|
|
|
|
|
|
(supplied) | To | To |
|
|
|
|
|
|
|
|
| ||
| video input | audio input |
|
|
|
|
|
| (R=red, L=white) |
|
|
|
|
|
| Component |
|
|
| |
|
| video leads |
|
|
| |
|
| (not supplied) |
|
|
| (supplied) |
To SCART input socket
Select the corresponding video input on your television to watch DVD video discs.
Make one of following connections depending on your TV.
■ SCART connection
Connect the SCART OUTPUT socket on the unit to the SCART INPUT socket on the TV using supplied scart lead.
Note: If your TV is RGB compatible, slide the VIDEO OUTPUT selector to left side for better picture quality.
■ Video connection
Connect the AUDIO (L/R) and VIDEO OUTPUT sockets on the unit to the AUDIO (L/R) and VIDEO INPUT sockets on the TV using supplied Audio/ Video lead.
Notes:
•Refer to the owner’s manual of the connected equipment as well.
•If you place the unit near a tuner or radio, the radio broadcast sound might be distorted. In this case, place the unit away from the tuner and radio.
•The output sound of the unit has a wide dynamic range. Be sure to adjust the volume to a moderate listening level. Otherwise, the speakers may be damaged by a sudden high volume sound.
•If your television set has one audio input, connect the unit to a Y lead adapter (not supplied) and then connect to your TV.
12
2D20401A | 12 | 26/9/03, 6:01 PM |
