Kramer Electronics PIP-200 user manual Connecting to a PC, Installing the Pip Control software

Models: PIP-200

1 18
Download 18 pages 8.27 Kb
Page 10
Image 10
9.3Connecting to a PC

9.3Connecting to a PC

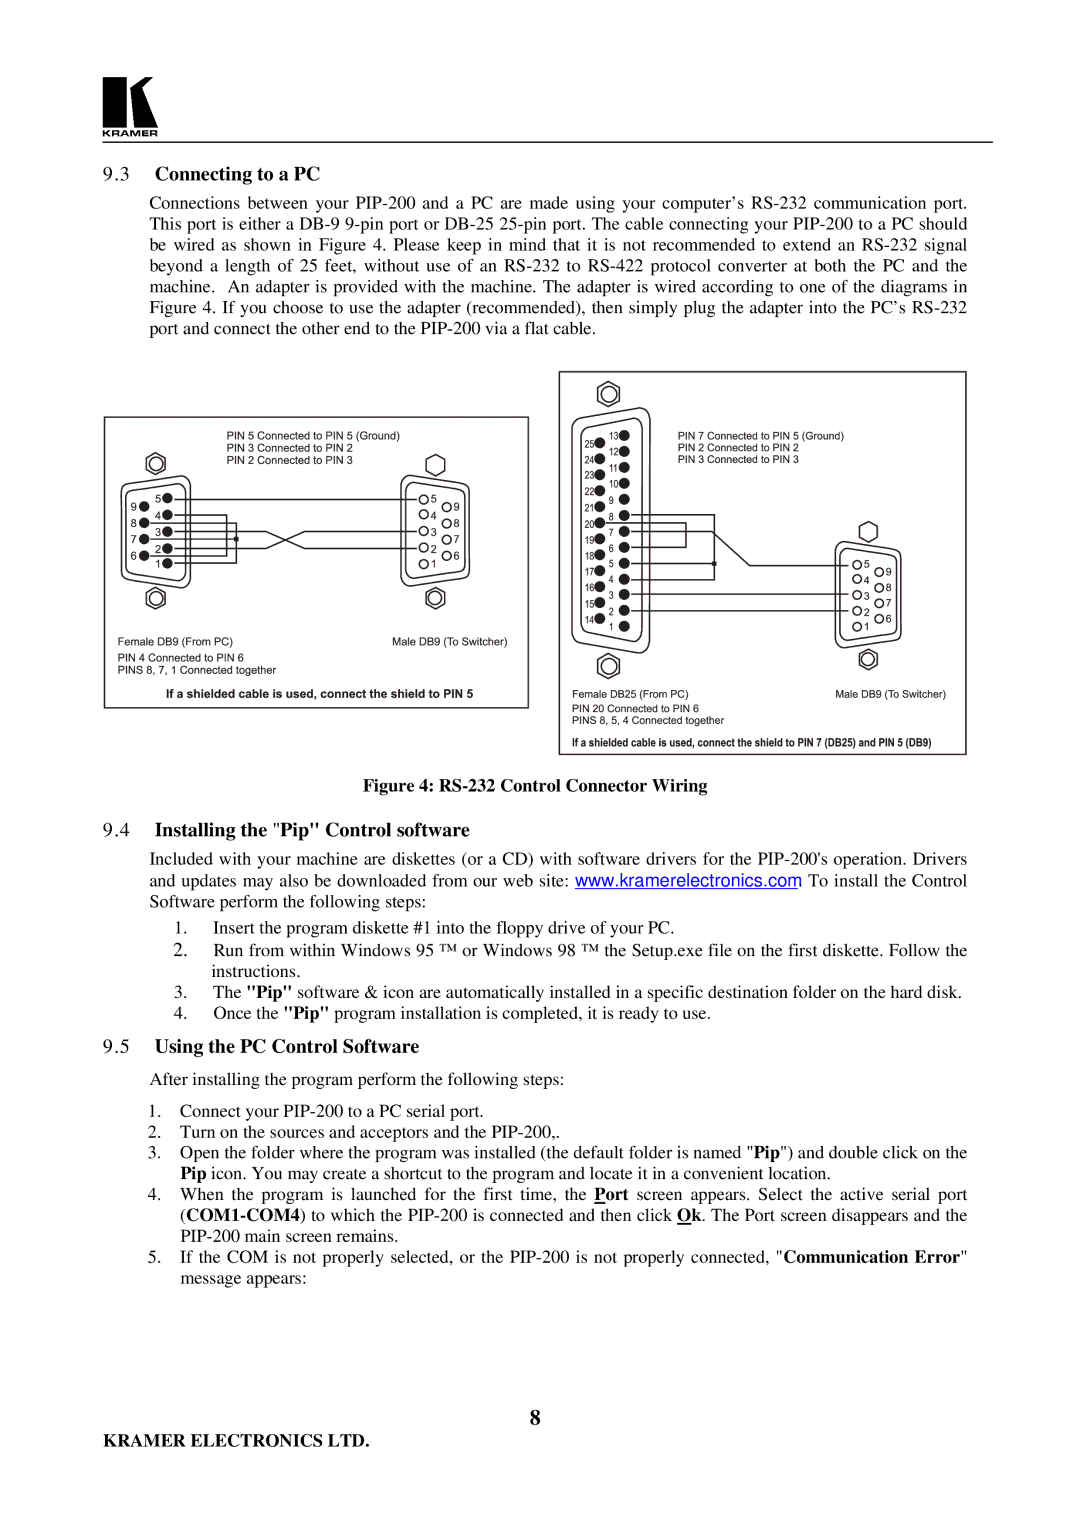
Connections between your PIP-200 and a PC are made using your computer’s RS-232 communication port. This port is either a DB-9 9-pin port or DB-25 25-pin port. The cable connecting your PIP-200 to a PC should be wired as shown in Figure 4. Please keep in mind that it is not recommended to extend an RS-232 signal beyond a length of 25 feet, without use of an RS-232 to RS-422 protocol converter at both the PC and the machine. An adapter is provided with the machine. The adapter is wired according to one of the diagrams in Figure 4. If you choose to use the adapter (recommended), then simply plug the adapter into the PC’s RS-232 port and connect the other end to the PIP-200 via a flat cable.

Figure 4: RS-232 Control Connector Wiring

9.4Installing the "Pip" Control software

Included with your machine are diskettes (or a CD) with software drivers for the PIP-200's operation. Drivers and updates may also be downloaded from our web site: www.kramerelectronics.com. To install the Control Software perform the following steps:

1.Insert the program diskette #1 into the floppy drive of your PC.

2.Run from within Windows 95 ™ or Windows 98 ™ the Setup.exe file on the first diskette. Follow the instructions.

3.The "Pip" software & icon are automatically installed in a specific destination folder on the hard disk.

4.Once the "Pip" program installation is completed, it is ready to use.

9.5Using the PC Control Software

After installing the program perform the following steps:

1.Connect your PIP-200 to a PC serial port.

2.Turn on the sources and acceptors and the PIP-200,.

3.Open the folder where the program was installed (the default folder is named "Pip") and double click on the Pip icon. You may create a shortcut to the program and locate it in a convenient location.

4.When the program is launched for the first time, the Port screen appears. Select the active serial port (COM1-COM4) to which the PIP-200 is connected and then click Ok. The Port screen disappears and the PIP-200 main screen remains.

5.If the COM is not properly selected, or the PIP-200 is not properly connected, "Communication Error" message appears:

8

KRAMER ELECTRONICS LTD.

Page 10
Image 10
Kramer Electronics PIP-200 Connecting to a PC, Installing the Pip Control software, Using the PC Control Software