6.Braze the line set to the service valve. Quench the joints with water or a wet cloth to prevent heat damage to the valve core and opening port. The tube end must stay bottomed in the fitting during final assembly to ensure proper seating, sealing, and rigidity.
7.Install the thermal expansion valve which is sold separately and which is approved for use with R410A refrigerant in the liquid line at the indoor coil (see Refrigerant Metering Device on page 9).
![]()
![]() CAUTION
CAUTION
When flushing existing line set and/or indoor coil, be sure to empty all existing traps. Residual mineral oil can act as an insulator, preventing proper heat transfer. It can also clog the thermal expansion valve, reducing system performance and capacity. Failure to properly flush system as explained in these instructions will void warranty.
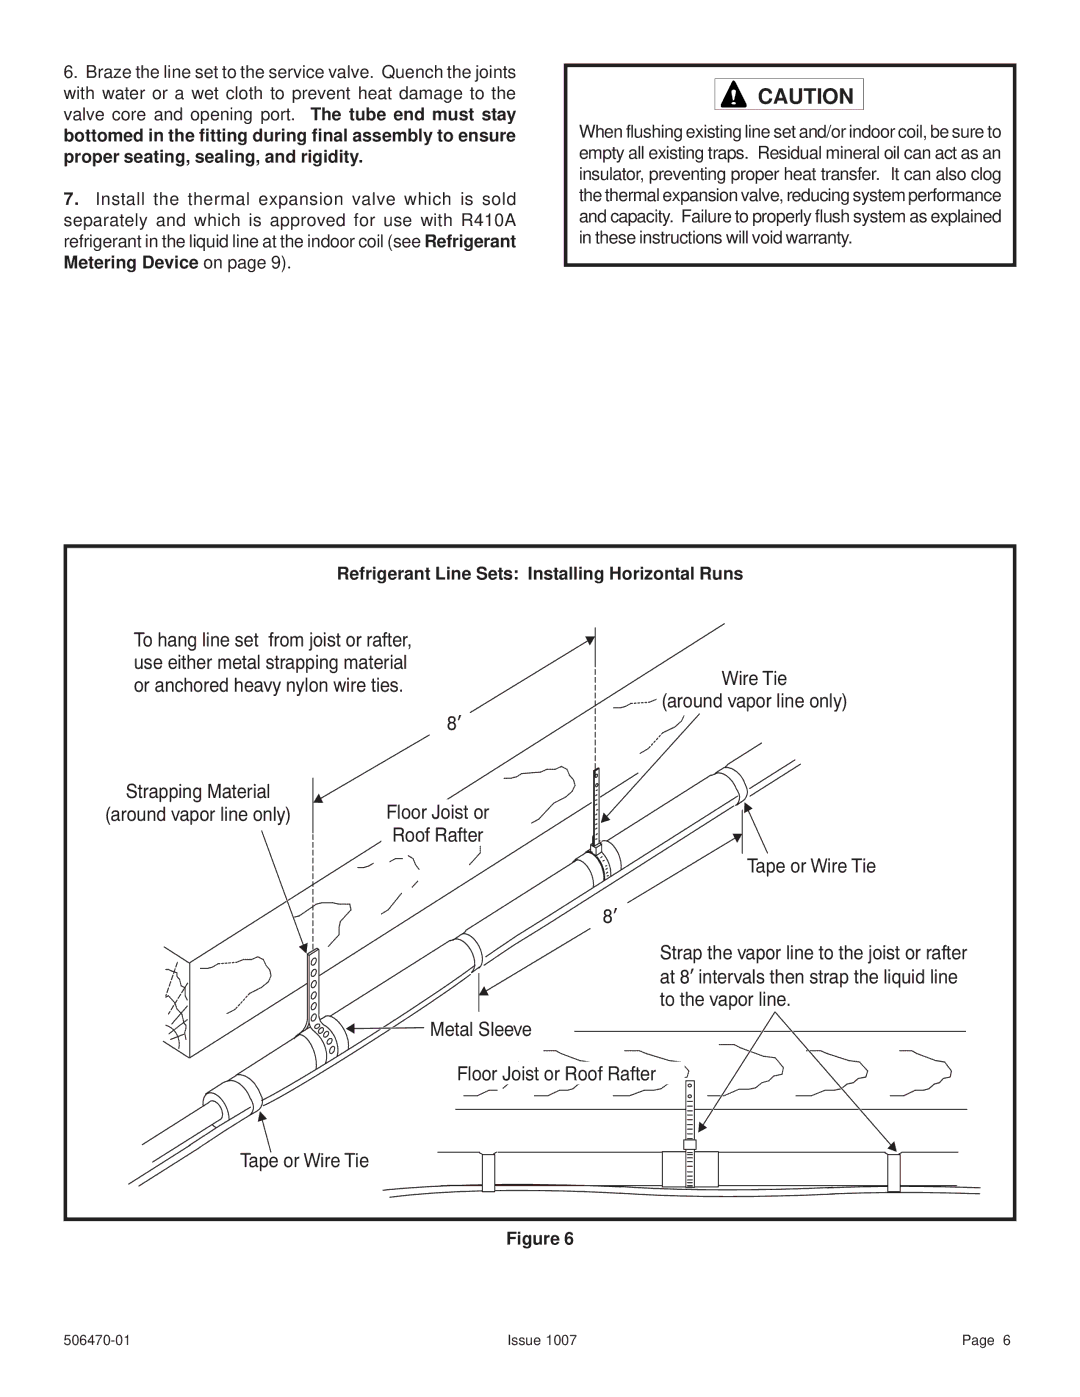
Refrigerant Line Sets: Installing Horizontal Runs
To hang line set from joist or rafter, use either metal strapping material or anchored heavy nylon wire ties.
8’
Wire Tie
(around vapor line only)
Strapping Material
(around vapor line only)
Floor Joist or
Roof Rafter
Tape or Wire Tie
8’
Strap the vapor line to the joist or rafter at 8’ intervals then strap the liquid line to the vapor line.
![]()
![]() Metal Sleeve
Metal Sleeve
Floor Joist or Roof Rafter
Tape or Wire Tie
Figure 6
Issue 1007 | Page 6 |
