Flushing Existing Line Set and Indoor Coil
This procedure should not be performed on systems which contain contaminants, such as compressor burn out.
Required Euipment
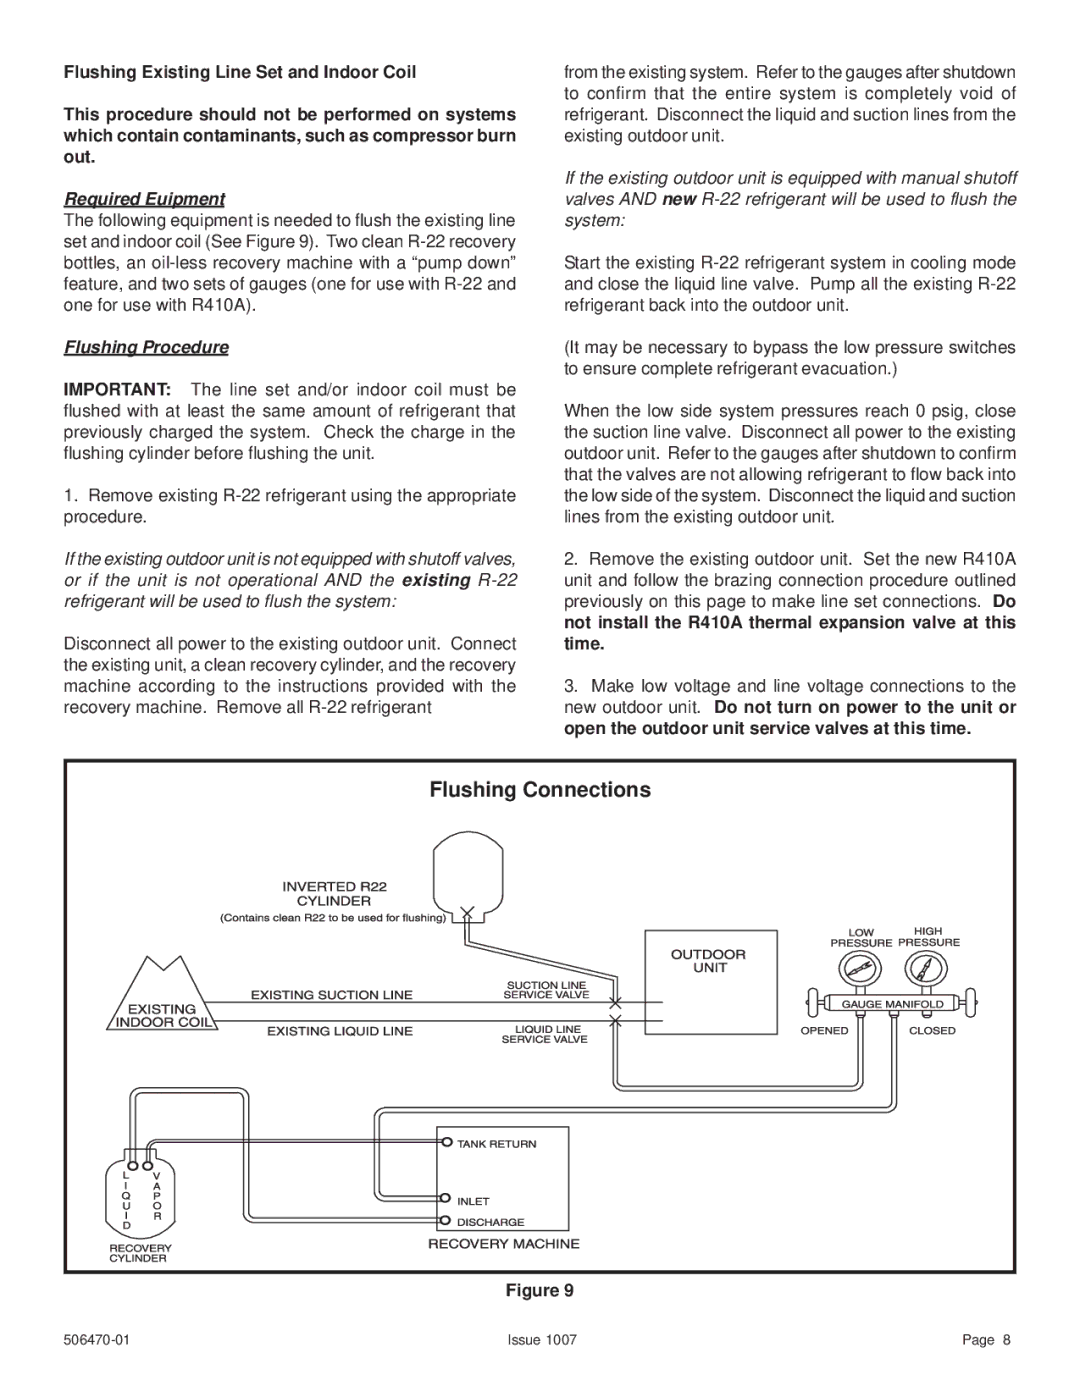
The following equipment is needed to flush the existing line set and indoor coil (See Figure 9). Two clean
Flushing Procedure
IMPORTANT: The line set and/or indoor coil must be flushed with at least the same amount of refrigerant that previously charged the system. Check the charge in the flushing cylinder before flushing the unit.
1.Remove existing
If the existing outdoor unit is not equipped with shutoff valves, or if the unit is not operational AND the existing
Disconnect all power to the existing outdoor unit. Connect the existing unit, a clean recovery cylinder, and the recovery machine according to the instructions provided with the recovery machine. Remove all
from the existing system. Refer to the gauges after shutdown to confirm that the entire system is completely void of refrigerant. Disconnect the liquid and suction lines from the existing outdoor unit.
If the existing outdoor unit is equipped with manual shutoff valves AND new
Start the existing
(It may be necessary to bypass the low pressure switches to ensure complete refrigerant evacuation.)
When the low side system pressures reach 0 psig, close the suction line valve. Disconnect all power to the existing outdoor unit. Refer to the gauges after shutdown to confirm that the valves are not allowing refrigerant to flow back into the low side of the system. Disconnect the liquid and suction lines from the existing outdoor unit.
2.Remove the existing outdoor unit. Set the new R410A unit and follow the brazing connection procedure outlined previously on this page to make line set connections. Do not install the R410A thermal expansion valve at this time.
3.Make low voltage and line voltage connections to the new outdoor unit. Do not turn on power to the unit or open the outdoor unit service valves at this time.
Flushing Connections |
Figure 9
Issue 1007 | Page 8 |