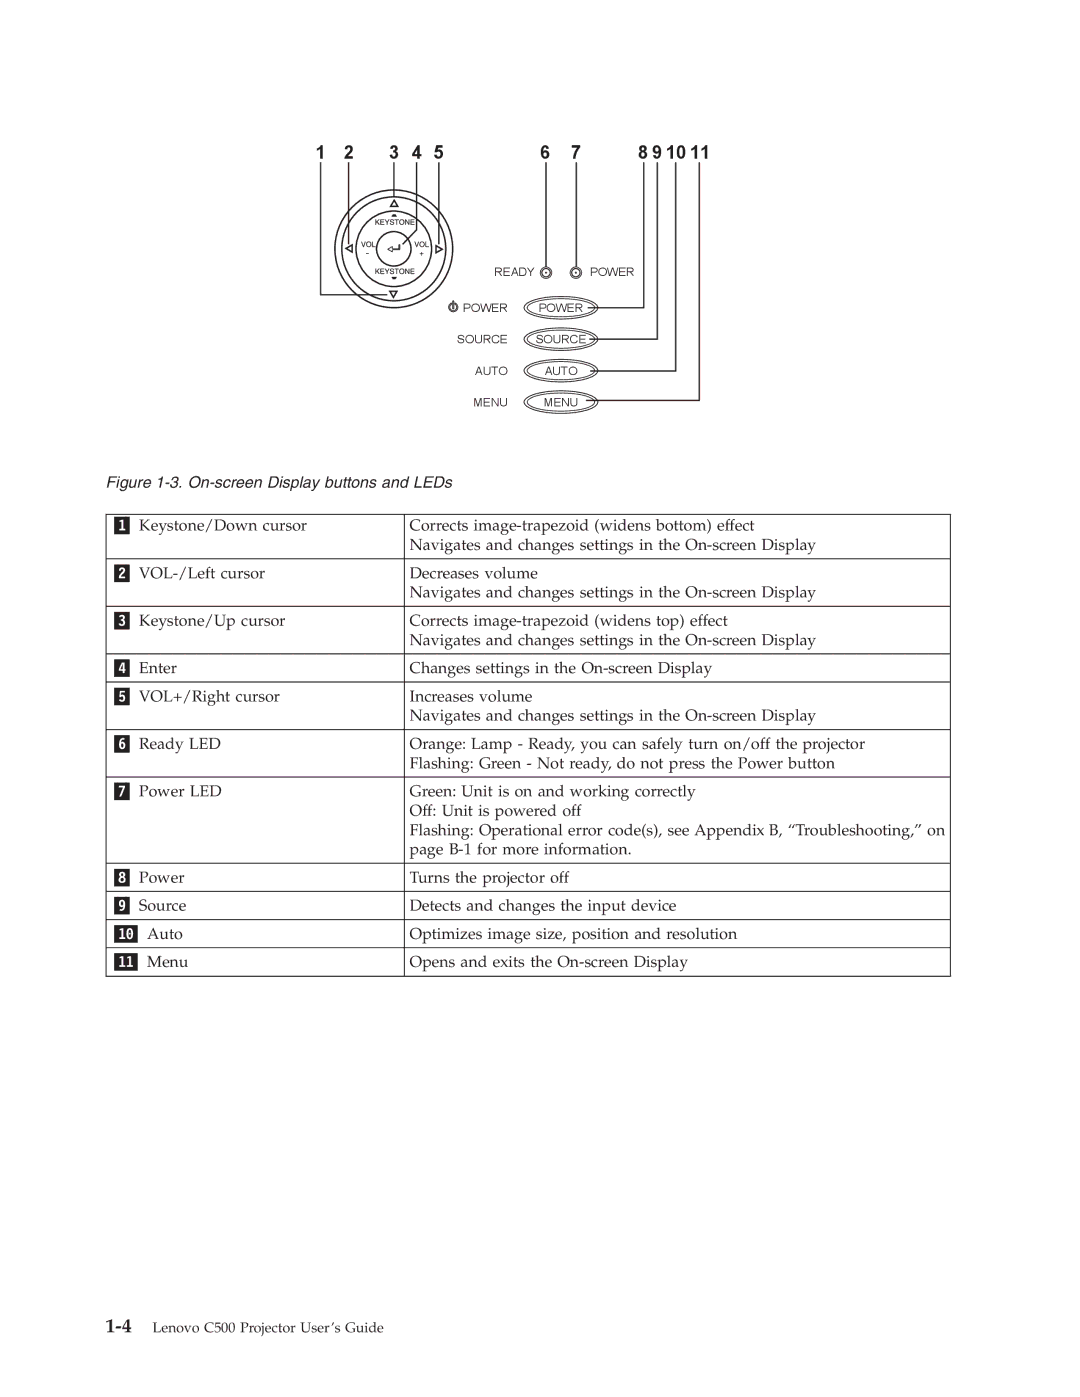
1 | 2 | 3 | 4 | 5 | 6 | 7 | 8 9 10 11 |
READY | POWER |
POWER | POWER |
SOURCE | SOURCE |
AUTO | AUTO |
MENU | MENU |
Figure 1-3. On-screen Display buttons and LEDs
Keystone/Down cursor | Corrects |
| Navigates and changes settings in the |
|
|
Decreases volume | |
| Navigates and changes settings in the |
|
|
Keystone/Up cursor | Corrects |
| Navigates and changes settings in the |
|
|
Enter | Changes settings in the |
|
|
VOL+/Right cursor | Increases volume |
| Navigates and changes settings in the |
|
|
Ready LED | Orange: Lamp - Ready, you can safely turn on/off the projector |
| Flashing: Green - Not ready, do not press the Power button |
|
|
Power LED | Green: Unit is on and working correctly |
| Off: Unit is powered off |
| Flashing: Operational error code(s), see Appendix B, “Troubleshooting,” on |
| page |
|
|
Power | Turns the projector off |
|
|
Source | Detects and changes the input device |
|
|
Auto | Optimizes image size, position and resolution |
|
|
Menu | Opens and exits the |
|
|