Manuals
/
Lenovo
/
Computer Equipment
/
Laptop
Lenovo
G565, G465
manual
Appendix A. CRU instructions
Models:
G465
G565
1
42
70
70
Download
70 pages
2.09 Kb
39
40
41
42
43
44
45
46
Troubleshooting
Specification
Password
System status indicators
Connecting external devices
Warranty
„ Software configuration
Display problems
„ Checking battery status
Resolution
Page 42
Image 42
Appendix A. CRU instructions
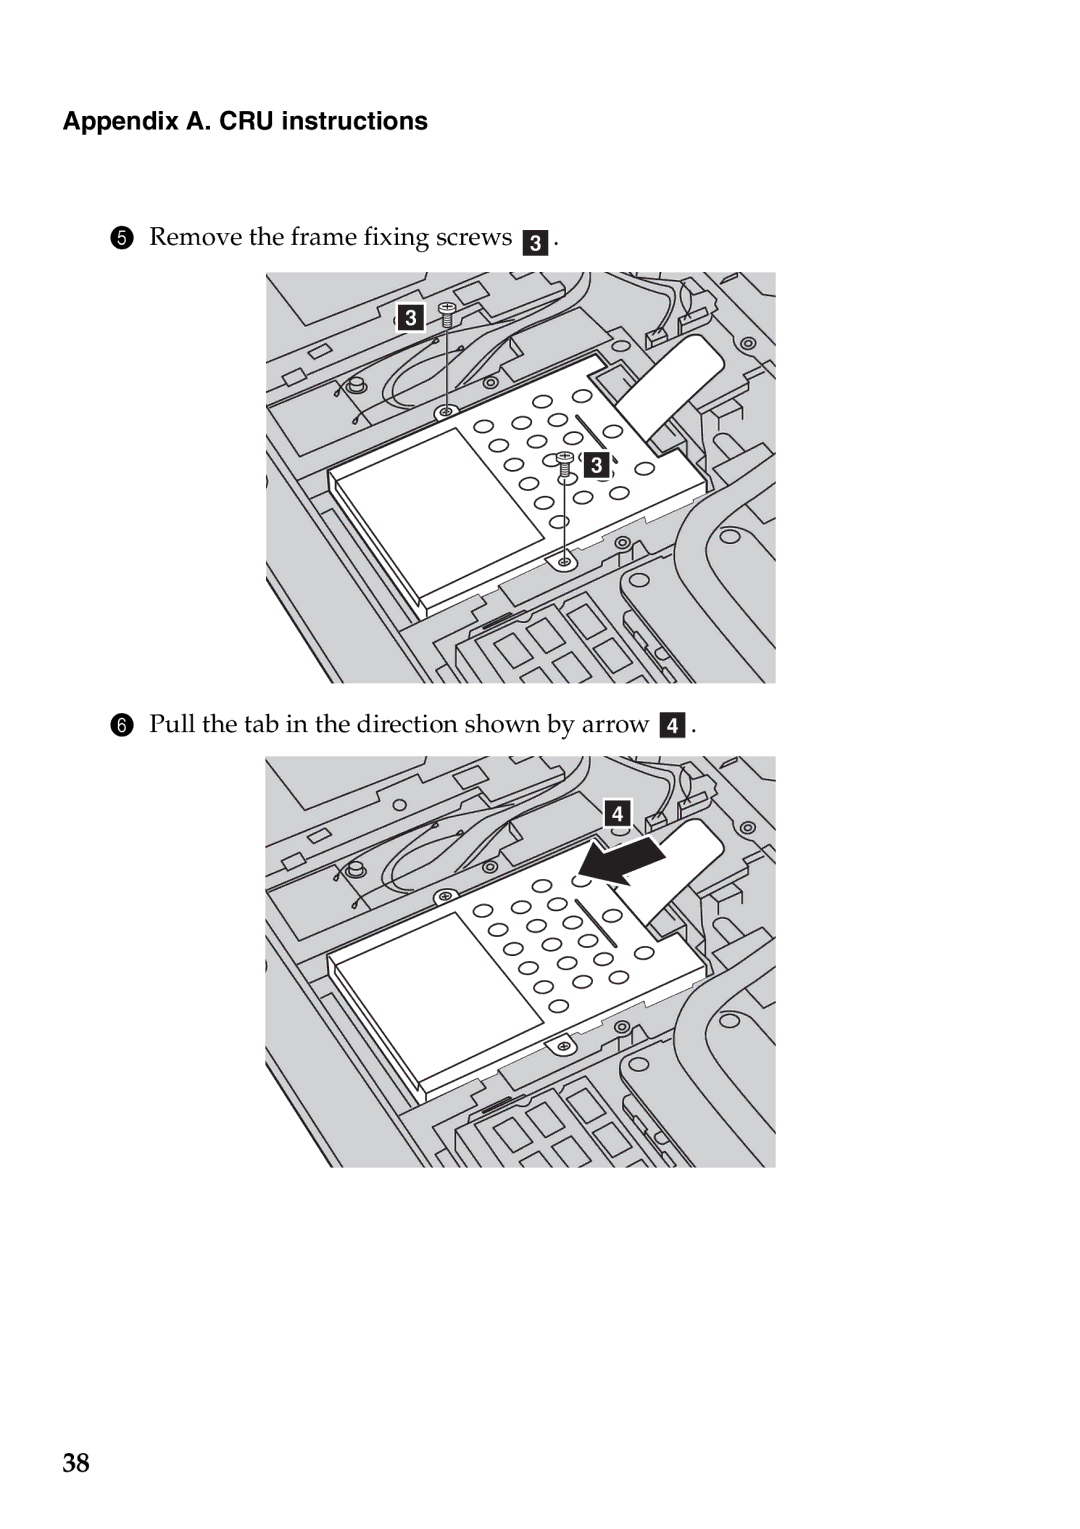
5
Remove the frame fixing screws
c
.
c
c
6
Pull the tab in the direction shown by arrow
d
.
d
38
Page 41
Page 43
Page 42
Image 42
Page 41
Page 43
Contents
Lenovo G465/G565
Regulatory Notice
Contents
Page
Getting to know your computer
„ G465
Top view
„ G565
Getting to know your computer
Energy
Getting to know your computer Integrated
Camera Select Models only
Speakers
RJ-45 port
Left-side view
Fan louvers
VGA port
Right-side view
Optical drive
Front view
Bottom view
Learning the basics
„ Conncting to the power
„ Configuring the operating system
„ Reading the manuals
„ Shutting down your computer
Learning the basics
„ Checking battery status
„ Charging the battery
„ Removing the battery pack
„ Handling the battery
Using the touchpad
Using the keyboard
„ Numeric keypad G465
„ Function key combinations
Learning the basics
Connecting external devices
„ Using memory cards not supplied
„ Connecting a universal serial bus USB device
„ Connecting a Bluetooth device Select models only
„ OneKey Rescue system button a
„ Energy Management button b Select models only
Special keys and buttons
System status indicators
Caps lock indicator G465 G565 Num lock indicator G465
„ Using VeriFace
„ Attaching a security lock not supplied
Securing your computer
„ Using passwords
Connecting to the Internet
Wired connection
„ Software configuration
Connecting to the Internet
„ Hardware connection
Wireless connection
Wi-Fi WiMAX
Hardware connection
OneKey Rescue system
„ Introduction
OneKey Rescue system
OneKey Rescue system
Troubleshooting
Frequently asked questions
How can I install the device drivers?
Troubleshooting
Display problems
Troubleshooting Password problem
Keyboard problems
Sleep or hibernation problems
Computer screen problems
Puter does not work
Hard disk drive problem
Troubleshooting Sound problems
Battery problems
Startup problem
Troubleshooting Other problems
Respond
Replacing the battery
Appendix A. CRU instructions
Appendix A. CRU instructions
Handling a hard disk drive
Appendix A. CRU instructions
Appendix A. CRU instructions
Appendix A. CRU instructions
Replacing memory
Appendix A. CRU instructions
Appendix A. CRU instructions
Removing the optical drive
Appendix A. CRU instructions
Appendix B. Lenovo limited warranty
„ What this warranty covers
„ How to obtain warranty service
„ What your service provider will do to correct problems
Appendix B. Lenovo limited warranty
„ Replacement of a product or part
„ Your additional responsibilities
„ What this warranty does not cover
„ Use of personal information
„ Limitation of liability
„ Dispute resolution
„ Other rights
„ European Economic Area EEA
Warranty information
„ Types of warranty service
Appendix B. Lenovo limited warranty
Appendix C. Product specific Notices
Energy star information
Appendix C. Product specific Notices
Windows
Electronic emissions notices
„ Federal Communications Commission FCC Statement
„ Industry Canada Class B Emission Compliance Statement
„ Avis de conformité à la réglementation d’Industrie Canada
„ German Class B Compliance Statement
Appendix C. Product specific Notices
„ European Union Compliance Statement Class B Compliance
System
Appendix D. Specifications
G465 G565 Form Factor
Ports
Trademarks
Problems
Index
Index
Page
Do not Return IT to the Store
New World. New Thinking.TM
Top
Page
Image
Contents