2060 LED sub card, LED cable and LCD cover assembly
For access, remove these FRUs in order:
v“1010 Battery pack” on page 60
v“1020 Second battery or travel cover (some models)” on page 61
v“1050 PCI Express Mini Card for wireless LAN” on page 66
v“1060 Wireless USB adapter” on page 69
v“1070 Keyboard” on page 72
v“1100 Palm rest or palm rest with fingerprint reader” on page 78
v“1120 Keyboard bezel” on page 82
v“1150 LCD assembly” on page 88
v“2010 LCD bezel assembly” on page 99
v“2020 LCD panel and LCD cable” on page 100
v“2030 Integrated camera” on page 104
v“2040 Antenna assembly” on page 105
v“2050 Hinge L and hinge R” on page 108
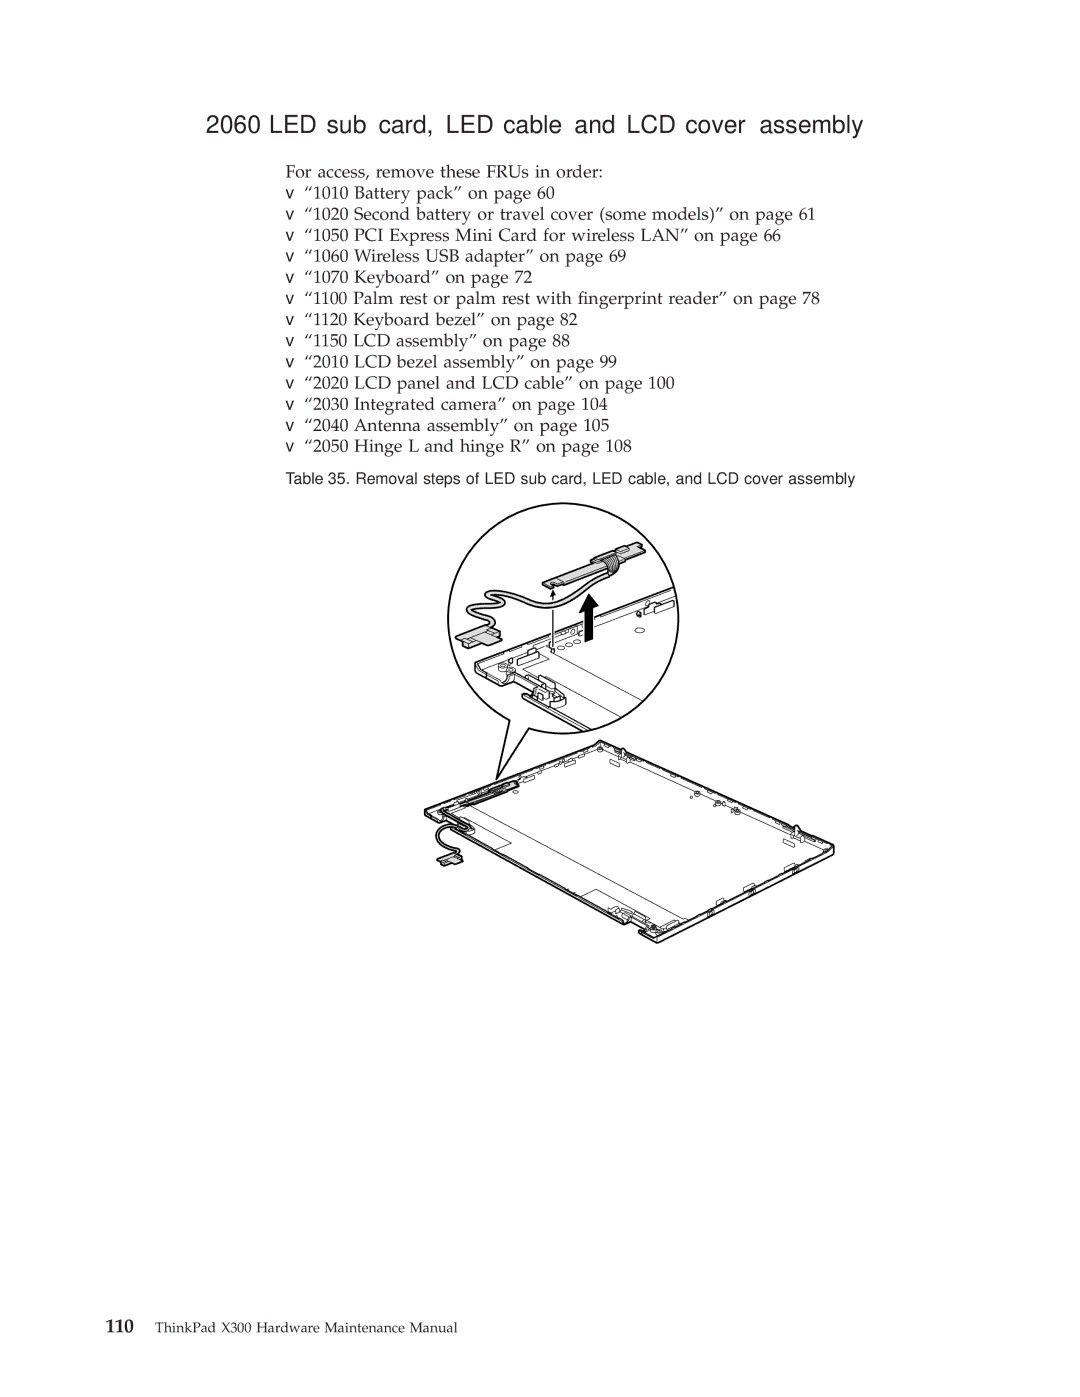
Table 35. Removal steps of LED sub card, LED cable, and LCD cover assembly