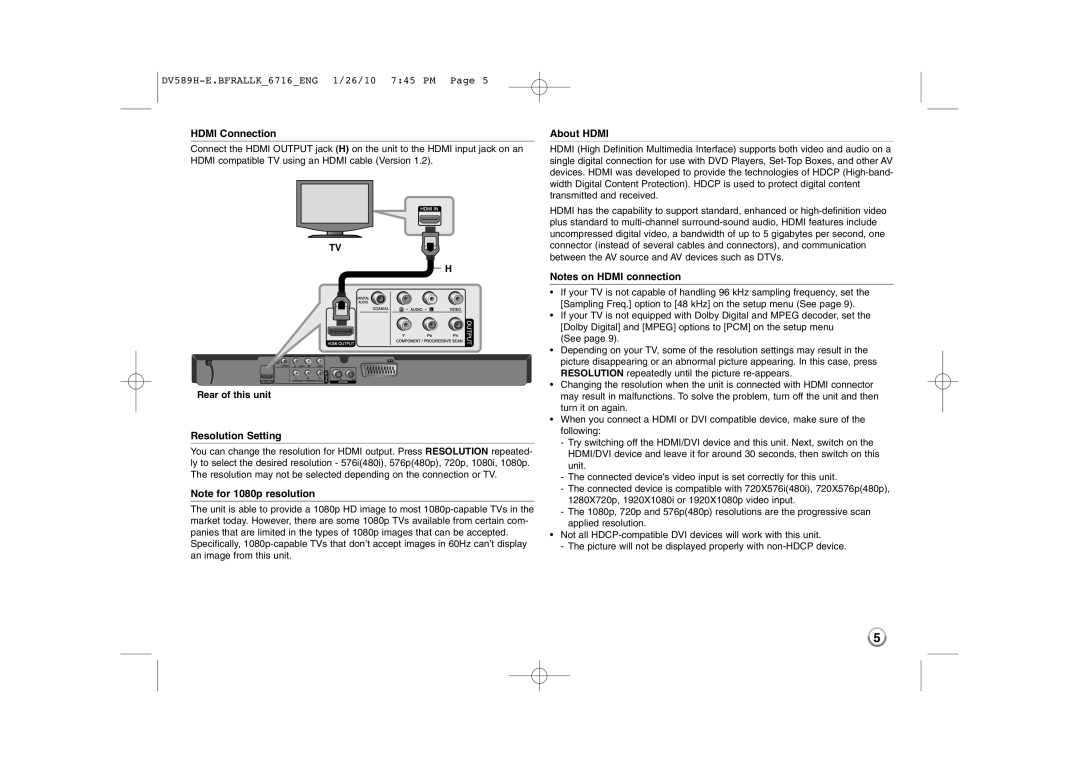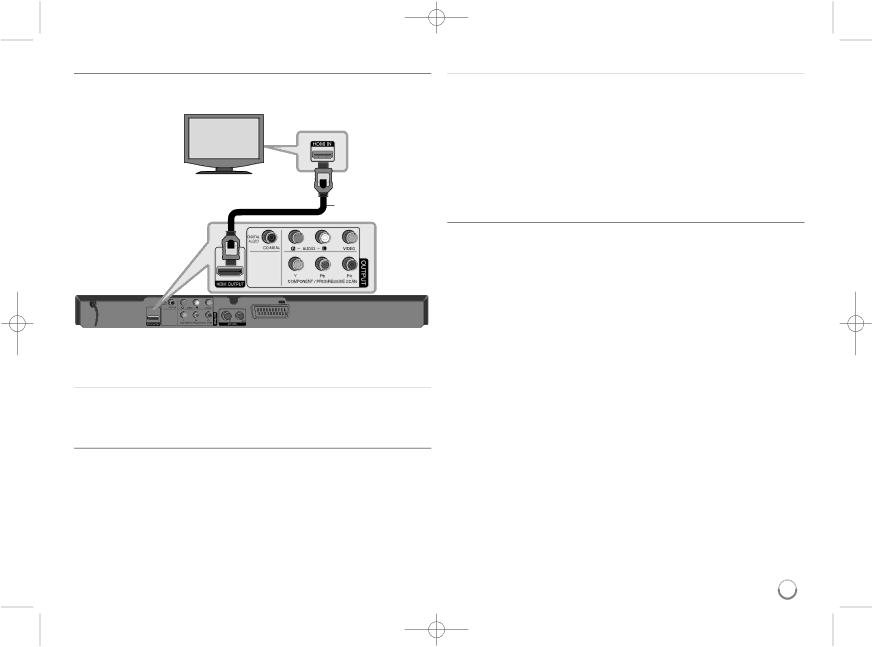
HDMI Connection
Connect the HDMI OUTPUT jack (H) on the unit to the HDMI input jack on an HDMI compatible TV using an HDMI cable (Version 1.2).
TV
H
Rear of this unit
Resolution Setting
You can change the resolution for HDMI output. Press RESOLUTION repeated- ly to select the desired resolution - 576i(480i), 576p(480p), 720p, 1080i, 1080p. The resolution may not be selected depending on the connection or TV.
Note for 1080p resolution
The unit is able to provide a 1080p HD image to most
About HDMI
HDMI (High Definition Multimedia Interface) supports both video and audio on a single digital connection for use with DVD Players,
HDMI has the capability to support standard, enhanced or
Notes on HDMI connection
•If your TV is not capable of handling 96 kHz sampling frequency, set the [Sampling Freq.] option to [48 kHz] on the setup menu (See page 9).
•If your TV is not equipped with Dolby Digital and MPEG decoder, set the [Dolby Digital] and [MPEG] options to [PCM] on the setup menu
(See page 9).
•Depending on your TV, some of the resolution settings may result in the picture disappearing or an abnormal picture appearing. In this case, press RESOLUTION repeatedly until the picture
•Changing the resolution when the unit is connected with HDMI connector may result in malfunctions. To solve the problem, turn off the unit and then turn it on again.
•When you connect a HDMI or DVI compatible device, make sure of the following:
-Try switching off the HDMI/DVI device and this unit. Next, switch on the HDMI/DVI device and leave it for around 30 seconds, then switch on this unit.
-The connected device’s video input is set correctly for this unit.
-The connected device is compatible with 720X576i(480i), 720X576p(480p), 1280X720p, 1920X1080i or 1920X1080p video input.
-The 1080p, 720p and 576p(480p) resolutions are the progressive scan applied resolution.
•Not all
-The picture will not be displayed properly with
5