Setting function of wired remote controller installation

 Remote control
 Master/Slave
 setting


![]() C
C ![]()
![]()
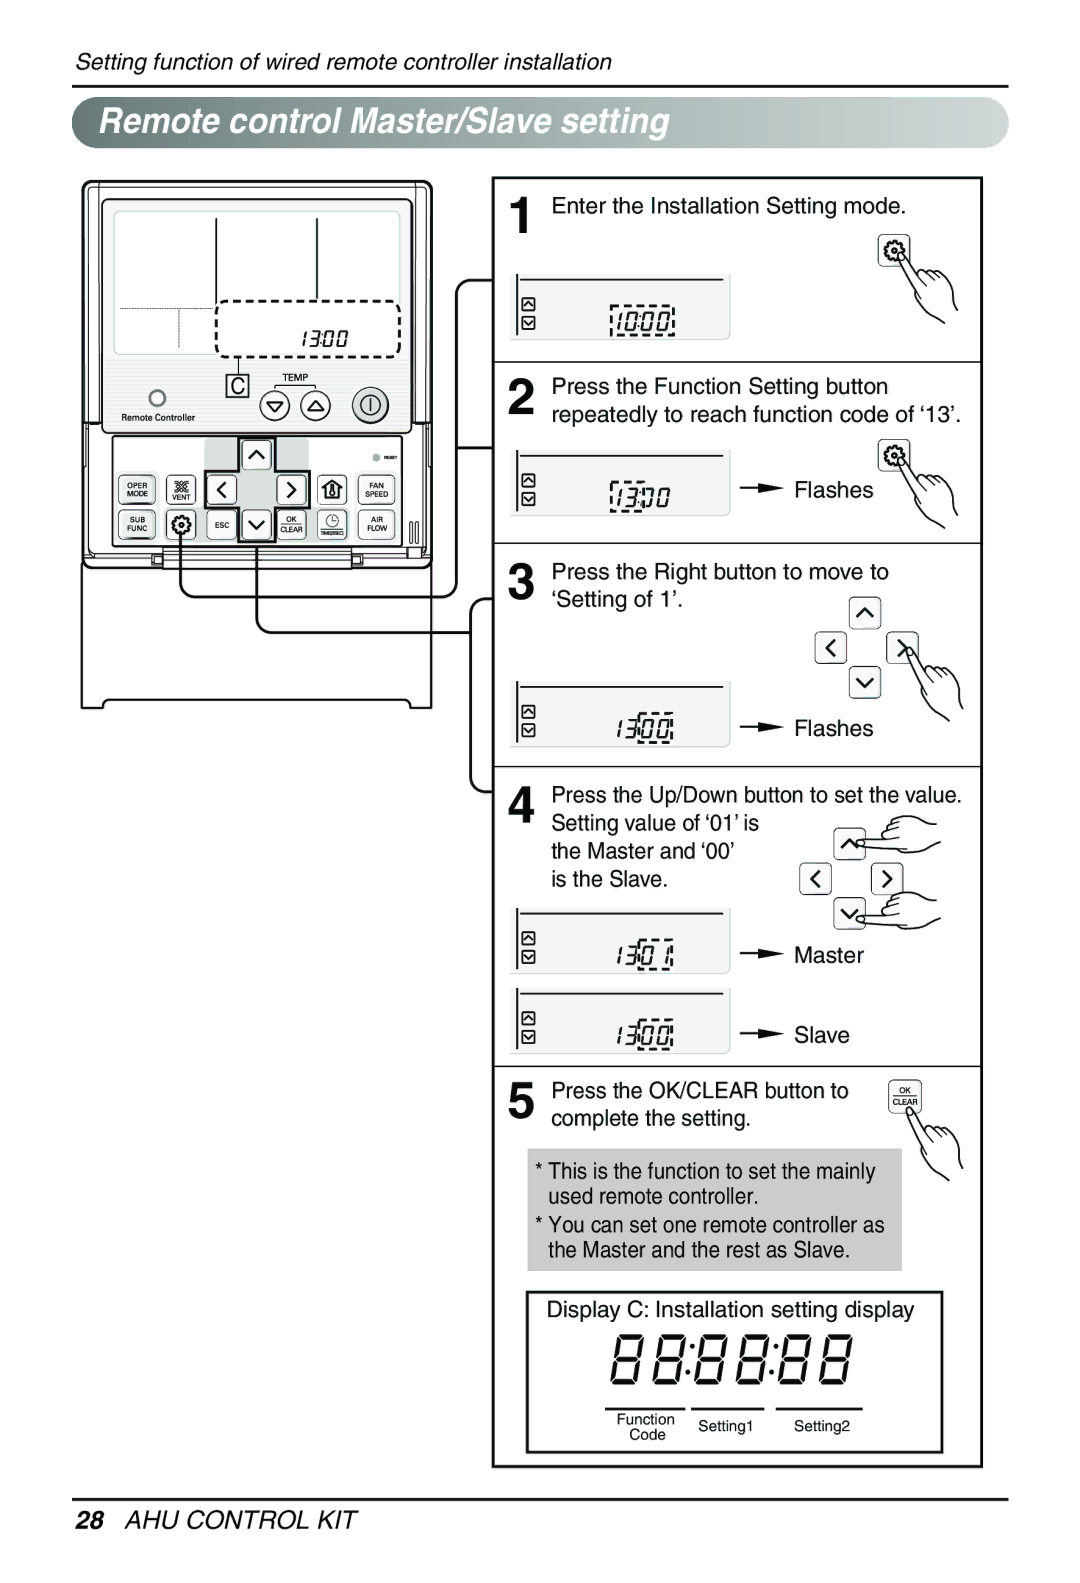
1 Enter the Installation Setting mode.
2 Press the Function Setting button repeatedly to reach function code of ‘13’.
![]() Flashes
Flashes
3 Press the Right button to move to ‘Setting of 1’.![]()
![]()
![]() Flashes
Flashes
4 Press the Up/Down button to set the value. Setting value of ‘01’ is ![]()
the Master and ‘00’ is the Slave.
![]() Master
Master
![]() Slave
Slave
5 Press the OK/CLEAR button to complete the setting.
*This is the function to set the mainly used remote controller.
*You can set one remote controller as the Master and the rest as Slave.
Display C: Installation setting display
Function Setting1 Setting2
Code